Showing posts with label custard. Show all posts

Wednesday, June 8, 2016

To Die For Snickers Bar Cake


It's almost been a year since I made this crazy decadent Snicker's bar cake for my hubby's birthday. I lost it's photos among the craziness that  followed two weeks later-the birth of my youngest son. Sometimes I feel like that newborn phase creates a mayhem that no one who hasn't been through it understands. For me that usually lasts the first year after baby is born. I'm coming out of the fog, people! Paddy is almost one, and while I still don't get any more than two hours sleep in a row max, I'm seeing the light at the end of the tunnel (through droopy eyes.)
Baby experience or not, you may have a "food baby" after eating this cake, which is just a giant replication of your good old Snicker's Bar. It is seriously one of the richest most decadent things I have ever eaten, and I can't believe that my husband and I tackled this thing on our own. This is really the type of cake you could have at a party, it goes a long way because you cant eat too much at one sitting.
If you're not throwing a party, you could consider cutting this in half and freezing a portion. I had to feed half of this to the birds in the end because it took us that long to work our way through it that the custard began to go bad-it was such a shame I had not thought to freeze part of it!
It's insanely impressive in appearance and in taste, with decadent layers of Snickers, chocolate ganache, caramel, peanut butter custard, chocolate custard and biscuit. To die for!


SNICKERS BAR CAKE (Heavily adapted from Baker's Royale)

2 packets of rectangle Arnott's Milk Coffee Biscuits
12-14 mini sized snickers bars, chopped

Pudding:
2/3 cup corn flour (corn starch)
1 cup granulated sugar
pinch salt
6 cups cold whole milk
1 tbsp vanilla extract
3/4 cup dark chocolate, chopped
3/4 cup smooth peanut butter

Ganache Pouring Sauce:
2/3 cups dark chocolate
1 tbsp heavy cream
4 tbsp icing sugar (powdered sugar)
4-5 tbsp warm water

Caramel Sauce:
2 tbsp honey
2 tbsp butter
1/2 cup brown sugar

To make the pudding and assemble the main:
In a large heat proof bowl, place the corn flour, sugar, salt and milk. Beat with electric beaters until well combined. Transfer to a heavy based saucepan. Over a very low heat, stir continuously until thick enough to coat the back of the spoon and leave ribbons when drizzled on itself.
Add vanilla and stir through to combine. Divide the mixture in half. Add the chocolate to one half, and the peanut butter to the other half. Stir both separately to combine thoroughly. Line a 8x8 pan or two 4x8 loaf tins with grease-proof paper, with the sides of the paper hanging over the edges for easy removal. Line the bottom with a layer of the biscuits laid side by side, breaking any biscuits that don't fit to make a good base. Spread a thin layer of the chocolate pudding over this biscuit base. Make the second layer of biscuit over this. Spread with a layer of the peanut butter pudding. Continue until the pudding is used up, and finish the top with the final biscuit layer. Cover in plastic wrap and place in the freezer for 3-4 hours. Half an hour before removal make the ganache pouring layer.

To make Ganache Pouring Sauce:
Place heavy cream and chocolate in a bowl over another bowl of hot water. Let sit for 5 minutes before stirring through until smooth. Add the powdered sugar and mix until until smooth. Add the water a tablespoon at a time until pouring consistency is reached.
Remove the cake from the freezer. Pull the paper sides to release the cake from the tin. Place on a serving platter. Pour the ganache over the top biscuit layer to cover. Sprinkle with the chopped snickers bars. Then make the caramel sauce to finish the cake off.

To make the caramel sauce:
Place honey, butter and sugar in a small saucepan over a low flame. Stir as the butter melts, continuing until the mixture boils. Cool for a minute or two before quickly drizzling over the top of the cake (this dries quickly in the pot, so make haste)
You can return the cake to the freezer to firm up before cutting, or serve straight away. Semi freezing is advised for nice neat cuts.


Wednesday, July 31, 2013

Thick, Creamy Chocolate Custard Yogo

Where do you keep your chocolate stash? Come on, I know you all have one, even if it is just an unintentional stash. Sometimes I find myself in the pantry with my hand in the cooking chocolate bag.
Last night I sneaked the block of chocolate out of my hospital bag. It was meant to be a midnight treat for after the baby is born, but now baby is overdue and  necessity calls--the chocolate is out, paired with girlie movies and other feel good things when the night comes and the babies are tucked up in bed. Why is the waiting game so hard?
I don't know...but chocolate sure makes everything feel a little better.
And I have just found the ultimate chocolate feel good recipe that pleases little people and big people alike. It reminds me of the chocolate custard recipe my mum used to make--or those yummy chocolate yogo tubs you get at the supermarket (although they're never big enough.) This super thick, creamy chocolatey goodness is easy and simple to make and cost effective--considering you buy a tub of the stuff for about 5 or 6 dollars. This probably costs a dollar. And I could seriously eat a litre of this stuff in a sitting. Although I can't, because my stomach isn't big enough anymore to do something as reckless as that. Just as well!
You can use cocoa powder instead of Milo powder for this recipe, but I used Milo/chocolate drinking malt for it's added nutritional benefits, and lowered the sugar from the original recipe. My kids can't get enough of this stuff and it makes a nice and not too naughty treat for them that they can scoop on their own from individual little plastic tubs. It's a winner all around.


THICK, CREAMY CHOCOLATE CUSTARD YOGO (Adapted from Best Recipes)

3 cups milk
1/2 cup Milo powder
1/3 cup sugar
4 tbsp. corn flour
1/2 cup boiling water

Place two cups of milk in a medium saucepan over a medium heat. Heat until it boils. Meanwhile, in a medium bowl, place the chocolate powder, sugar, corn flour and boiling water. Stir to combine and dissolve. Add the final cup of milk to this mixture and stir.
When the milk on the stove-top is coming to a boil, pour the chocolate milk mixture into the saucepan through a sieve or strainer. Lower the heat and whisk continuously until the mixture begins to thicken, approximately 5 minutes. Remove from heat and pour into a container or individual tibs. Place a layer of plastic wrap directly over the top of the custard to avoid a skin forming. Refrigerate until cool before serving. Custard will thicken on refrigeration.

NOTES: Makes about 700mL. You can use cocoa powder instead of Milo for this recipe. Some brands of cocoa are stronger than others, so adjust accordingly. You may also like to add a little more sugar if you use cocoa, as Milo is sweetened.


Wednesday, March 20, 2013

Chocolate Custard Strawberry Cream Tart

Here's a really quick and easy dessert if you're in a hurry. I've been testing out all these instant pudding/mousse/jelly products from the stores, because I see so many recipes in America depend on them. While I find the flavour generally lacking in intensity, these sorts of instant mixes can be just perfect and you're time poor and need to whip something up in a flash. And it's always very popular with the kids. I for one would prefer to make my own mousse or custard from scratch, as I find it tastes better and you can up the flavour to your taste-bud's desire. So feel free to replace the store bought filling with your own chocolate custard or chocolate mousse, and then I believe this would really be one delicious dessert. Someone recently commented that every second recipe on here incorporates strawberries...can't you tell I'm addicted?


CHOCOLATE CUSTARD STRAWBERRY CREAM TART (A Lick the Spoon Original)

300g plain chocolate biscuits, crushed
5-6 tbsp butter, melted
1 packet Airoplane Brand Chocolate Wobble (or chocolate pudding or setting custard. Homemade recipe for chocolate custard here)
400g fresh strawberries
1 cup thickened cream, whipped

Combine the crushed biscuits with enough melted butter to get a damp mouldable base mixture. (you may not need all of the melted butter depending how absorbent your biscuits are.) Firmly press this mixture into a paper lined 20cm round spring form tin and up the sides a few inches. Refrigerate.
In a medium bowl, prepare the Airoplane Chocolate jelly mixture according to the directions on the back of the packet. When this mixture is unset at room temperature, remove the tart base from the refrigerator.
Cut the leaves off the strawberries along with a slither of the top of the berries, so that each berry stands flat with the pointed end upwards. Arrange the strawberries on the tart base so that they cover the surface with the ends pointing upwards. Pour the room temperate jelly mixture on top of the berries. Cover with cling-wrap and refrigerate until the chocolate mixture is set, approximately 2-4 hours.
Whip the cream and pipe on the top of the chocolate to decorate. Sprinkle with a little cocoa powder if desired. Serve chilled.

Saturday, March 2, 2013

Mini Boston Cream Pies

It's Lent and I'm not eating sweet things.
Promise.
Sundays are an exception though, we indulge a little and eat a little thing or two that's fancy. Something like these gorgeous little mini Boston Cream Pies. I've never had a Boston Cream Pie but I'm guessing it's sublime, because these were too. They reminded me of profiteroles--obviously the cake part was a different texture, but it's all the same mouthwatering flavours and explosions in one bite. Flavours I cannot resist!
There's the lovely, giving cake-iness of the cupcake, then that divine vanilla cream custard filling that oozes and slides down in perfect harmony with the bitter sweet fudgy chocolate ganache. They're rich, they're decadent and they're just glorious. Got to have another one.


MINI BOSTON CREAM PIES (adapted from Martha Stewart)

GANACHE:
1 cup chocolate chips
2/3 cup thickened cream

In a medium microwave proof bowl, combine the chocolate and cream. Microwave for one minute on high, then remove and stir until well incorporated. Refrigerate for an hour or two to thicken.

CUPCAKES:
6 tbsp butter
1/2 cup milk
1 cup sugar
1 1/2 cup plain flour
1 1/2 tsp baking powder
1 tsp salt
3 large eggs
1 tsp vanilla essence

Preheat the oven to 180C. Grease a 24 hole mini muffin tray.
In a medium, microwave proof  bowl, place the butter and milk. Microwave on high for a minute or two, until the butter has melted. Remove from microwave and add the sugar, flour, baking powder and salt to the bowl. Whisk until well combined, then beat in the eggs and vanilla essence. Spoon this batter into the cupcake tins so that each is about 3/4 full. Bake for 15 minutes. Set aside on a cooling rack to cool.

CUSTARD:
1 cup milk
2 large egg yolks
3 tbsp. sugar
1 1/2 tbsp. cornflour
20g butter, at room temperature
1 tsp vanilla essence

Place milk in a small saucepan and bring to the boil.
Meanwhile, in a separate saucepan, combine yolks, sugar and cornflour and whisk over a low heat. When the milk has boiled, add a few tablespoons into the yolk mixture and whisk. Gradually add the remaining milk and whisk vigorously on a medium heat. Custard will thicken. Continue to whisk until boils, and remove from heat. Scrape into a small bowl and sit in a few inches of cold water or ice, to cease the cooking process. When cooler, add the butter in two installments, stirring until combined. Add essence, mix and refrigerate until cool

ASSEMBLY:
When the cupcakes are cool, take a knife and hollow out part of the centre of each (don't remove the cake too closely to the bottom of the cake, as this makes them more difficult to handle when completed.) Spoon custard into each hollow, then pair with another cupcake so that the custard sides merge. Spoon the thickened ganache over the top of each doubled up cupcake. Serve immediately, or refrigerate until ready to serve.

Makes 12

NOTES: You could also make these in a regular 12 hole muffin tray. Instead of placing one cupcake on top of another, simply cut the top off with a serrated knife, hollow out a little of the bottom and fill with custard, then replace the "lid".
Custard stores for 2-3 days when refrigerated.

Tuesday, November 6, 2012

Strawberry Custard

That's right--I'm still making my way through the killos and killos of strawberries I have stashed away in my freezer. And loving it! There's nothing quite like excessive ingredients to get the creative juices flowing. It doesn't matter if it flops. There are always more berries to use. But what I had in mind didn't flop, and made a delicious dessert and afternoon snack for the babies too.
My love for strawberries and custard were combined to make one delicious pink and fruity version of the original vanilla custard, which disappeared from the fridge very quickly. We even had trails of it leading to secret hiding places where small children hid licking spoons covered in sticky goodness. Oh the things kids get up to when your back is turned!
I myself felt like hiding in a wardrobe and rocking backwards and forwards with a bowl of strawberry custard, as the nerves for my big cook off on the weekend have well and truly hit. Breathe. I just have to keep reminding myself. Breathe! (And eat custard).


STRAWBERRY CUSTARD (A Lick The Spoon Original)

2 cups milk
4 large egg yolks
6 tbsp. sugar
3 tbsp. cornflour

2 cups fresh or frozen strawberries, room temperature
1/4 cup icing sugar

Place milk in a small saucepan and bring to the boil.
Meanwhile, in a separate saucepan, combine yolks, sugar and cornflour and whisk over a low heat. When the milk has boiled, add a few tablespoons into the yolk mixture and whisk. Gradually add the remaining milk and whisk vigorously on a medium heat. Custard will thicken. Continue to whisk until boils, and remove from heat. Scrape into a small bowl and sit this bowl in a few inches of cold water or ice, to cease the cooking process. While cooling, hull the strawberries and process into a puree in the blender. Add the icing sugar and stir to combine well. Add to the warm custard and mix through well. Custard thickens upon refrigeration. Stores for 2-3 days.

Wednesday, October 10, 2012

Apple Custard Tart of Roses

Here's a wonderful recipe translated from Bulgarian with some alterations on my part. I love finding these interesting and exquisite recipes that are not found in English, because there's a certain feeling of specialty that comes with it. If I ever travel overseas, it will be to Europe to try all the delightful foods that are not commonly found in English speaking countries. There's something so good about European food, the way they cook, and the unprocessed ingredients used. You have no idea how tired I am of hearing the words "cool whip", "canned scone dough" and so forth when I look for recipes on the web. What is this stuff? What's in it? (did you know you can even get canned crispy bacon, and canned cheeseburgers? Yummy?)
It's refreshing to be able to make everything from scratch that doesn't involve any over-processed consumables.
This apple custard tart is delightfully European. It's laced with sweet white wine, and has wonderful zesty orange hints throughout, and boasts a shortbread crust, and an arrangement of pinkened apple rosettes on the top. Brushed with jam and cooked to golden perfection, this lovely tart is best served warm with a drizzling of thickened cream.


APPLE CUSTARD TART OF ROSES (Adapted From Delicious With Jolien)

Pastry:
125g butter, softened
3/4 cup icing sugar
1 tsp vanilla
1 tsp orange rind, grated
1 egg
100g ground almond (almond meal)
1 1/2 cups plain flour

Custard:
4 tbsp corn flour (corn starch)
6 tbsp. sugar
1 tsp vanilla
1 tsp orange rind, grated
3 egg yolks
400mls milk
100ml white wine (I used Moscato)

5-6 apples (I used Pink Lady apples)
1 tsp fruit jam (I used strawberry jam)

To make the pastry dough, place butter and sugar, vanilla and orange rind in a large bowl and incorporate briefly with the beaters. Add egg and almond meal and lightly beat again until the egg has broken down and is mixed through the butter. Add the flour and knead into a soft dough.
Spread into a greased and floured 24cm round flan dish. Using your fingers, press evenly into the base and up the sides of the flan dish. Refrigerate.
Meanwhile to make the custard filling, place the corn flour, sugar, vanilla and orange rind together in a medium saucepan. Add the yolks and a little milk and bring to a smooth, paste-like consistency. Place on a medium-high heat, and add the remaining milk and the wine. Whisking continuously, bring the custard to the boil and then for a further few minutes to thicken. (Custard will also thicken further in the oven).
Set the custard aside in a medium bowl to cool.
Heat the oven at 180C.
Take the apples and wash them. Using a potato peeler, make strips of apple form the peel and the flesh. The larger and wider the strips, the better.
When the custard has cooled, pour it into the base. Begin arranging the apple strips into rose shapes on the custard. (I found it helpful to start building the centre few layers of the rose in my hand before placing it in the custard, then building around it with larger strips. See photos below for a visual)
When the whole surface of the custard is covered in rose shapes, brush the top gently with a little warmed jam. Bake for 40-45 minutes, until the crust is golden and the apples have browned.

Serves 8-10

Building an apple peel rose:


Monday, July 23, 2012

Strawberry Cream Tart

You know when you make the same thing so many times that the recipe gradually and unconsciously changes over time? I once discovered a great custard recipe and have been making it ever since. I made it so many times that I knew the recipe off the top of my head and discarded the hard copy. Eventually the custard turned out slightly odd, with a real corn flour taste and still not quite as thick as I swear it used to be. Time to go back and find the recipe, or time to try something new? When I saw this strawberry cream tart recipe from Cathy's blog Wives With Knives, I thought "try something new", just to shake things up in my world of custard. Custard has long been a favourite of mine. Occasionally I'll be seen buying a litre of it just to have on it's own. I preferred home made custard of course, until my cornflour dilemma.
And strawberries, please don't get me started! They're my favourite berry and come with so many childhood memories. I think I previously mentioned how my brother and I used to thieve them with our grotty little hands from the old lady's garden next door when we were kids. Seeing as I don't have any blind grannies living next door anymore, with loads of fat strawberries glaring at me through the crack in the fence, hubby comes home from the Brisbane markets with them instead. Legally obtained ones, of course.
Usually my two year old son gets to them first though, and has been known to scoff down a punnet in a sitting. Good thing they're high in vitamin C. When I think of that fact, I don't mind how many he eats.
So. Strawberries and custard, in a tart. How much better can it get? Oh wait! It's topped with strawberry jam as well. Delicious. And it's such a fancy looking yet simple dessert, and contains less sugar than my usual sweet morsels.
I added some lychee liqueur to the custard in my version of this tart, just to give it a more fruity, tropical twist. The smell is divine and the texture and taste just fabulous. The custard holds together beautifully, so if you go for the whole large tart instead of the smaller version, have no fear that it's going to squish everywhere out the sides when you cut it, as it chills nice and firm. The pastry case is particularly impressive too, resembling a (less crumbly) uncooked shortbread in the dough stage, and a nice, sturdy, crisp and sweet shell in the end. I will be keeping this recipe for other invented recipes, as you could fill these great pastry cases with anything from fruit to mousse, jelly or cheesecake! Don't forget to check out more delicious recipes from this months Secret Recipe Club reveal, and head over to Wives With Knives for the original recipe, which is a whole tart instead of my little individual ones. Bon appetit!


STRAWBERRY CREAM TART (Adapted from Wives With Knives)


Patisserie Creme:

2 cups milk
6 large egg yolks, room temperature
3/4 cup white sugar
3 tbsp. corn flour
1 heaped tsp. butter
1 tsp vanilla essence
3 tbsp lychee liqueur 


Pastry:

3/4 cup butter, room temperature
1/2 cup sugar
1/2 tsp. vanilla essence
1 3/4 cup plain flour
pinch salt

Garnish:

12 strawberries, fanned (see directions below)
 3 tbsp strawberry jam to glaze


To make the patisserie creme, place the milk in a saucepan over high heat until boiling. Meanwhile, beat the yolks and sugar in a bowl on medium high until it is light yellow and falls into the bowl as a ribbon, after about 3 minutes. Add the vanilla essence. On a low speed, beat in the corn flour until well combined. Once the milk has boiled, remove from heat and, with the beaters running on low, pour the milk into the egg mixture. Combine. Pour the mixture back into the saucepan and return to the heat. Lower the heat to medium and stir continuously with a whisk until the mixture is thick and the corn flour is cooked, after about 8 minutes. Bring this custard to the boil and cook, whisking for another 3 minutes. Remove from the heat and transfer to a bowl. Stir in butter, vanilla and liqueur. Cover with plastic wrap and refrigerate until chilled.
To make the pastry, preheat the oven to 180C.
Place the butter and sugar in a medium bowl and beat until just combined. Add the vanilla.Sift the flour and salt over the top of the butter mixture. Beat until a dough begins to form.
With a light hand, gently combine the mixture and form into 12 rough ball shapes, all of equal size. Place each ball inside the holes of a regular sized, 12 hole muffins tray. If you are using a regular muffin tray, ensure it is well greased.
Press the dough into the holes and up the sides to make pastry cases. Make sure the dough is pressed evenly around the sides and bottom. Place the tray in the refrigerator to chill for about 15 minutes. Meanwhile cut out 12 squares of non stick baking paper to fit inside the muffin tray holes. Place these papers inside each hole on top of the chilled pastry. Use pastry weights or rice over each paper to ensure the pastry does not rise in the first faze of cooking. Place the tray into the oven and cook for 20 minutes. Remove from heat and gently remove the papers and their weights. Poke a few holes in the pastry bases using a fork. Return the pastry cases to the oven and cook for a further 15-20 minutes, or until golden and crisp looking. Cool in the tray, then remove and place on a cooling rack.
Fill each case with the patisserie creme. You can simply spoon it in or pipe it in for a prettier effect, as the creme is quite thick. Top with a fanned strawberry, and brush with jam to glaze. Serve with cream, if desired.

Making a fanned strawberry garnish:


 Lay the strawberry on a flat surface. Working from about a cm from the green stalk, cut a series of thin slices through the strawberry in a vertical motion from one side to the next. Take the strawberry and gently urge the slices apart in a fan motion. Voila!

NOTES: You can substitute the lychee liqueur for any desired flavouring, however, the intensity of flavourings differ, so add only a little at a time until you reach the desired strength. 1 tsp of cognac or brandy is a good substitute. If you are not using a silicone muffin tray, ensure the tray is well greased before placing the pastry inside the holes. You can also make this as one whole tart, by pressing the dough into a 10 inch round or 9 inch square false bottom tart pan. If you are using rice as a pastry weight, you can keep this and reuse this, as it will be unaffected by the heat.


Tuesday, April 3, 2012

Custard Toffee Cream Desserts


You know those times that you plan to have people over, after a big feast day like Easter, and you're not sure if you should make as much food as usual? You know no one's going to have a very large appetite if they've done the traditional chocolate egg eating. So, to make dessert, or not to?
I hate having too many leftovers, especially when it's just hubby and I who have to polish them off (trust me I don't need that temptation!) 
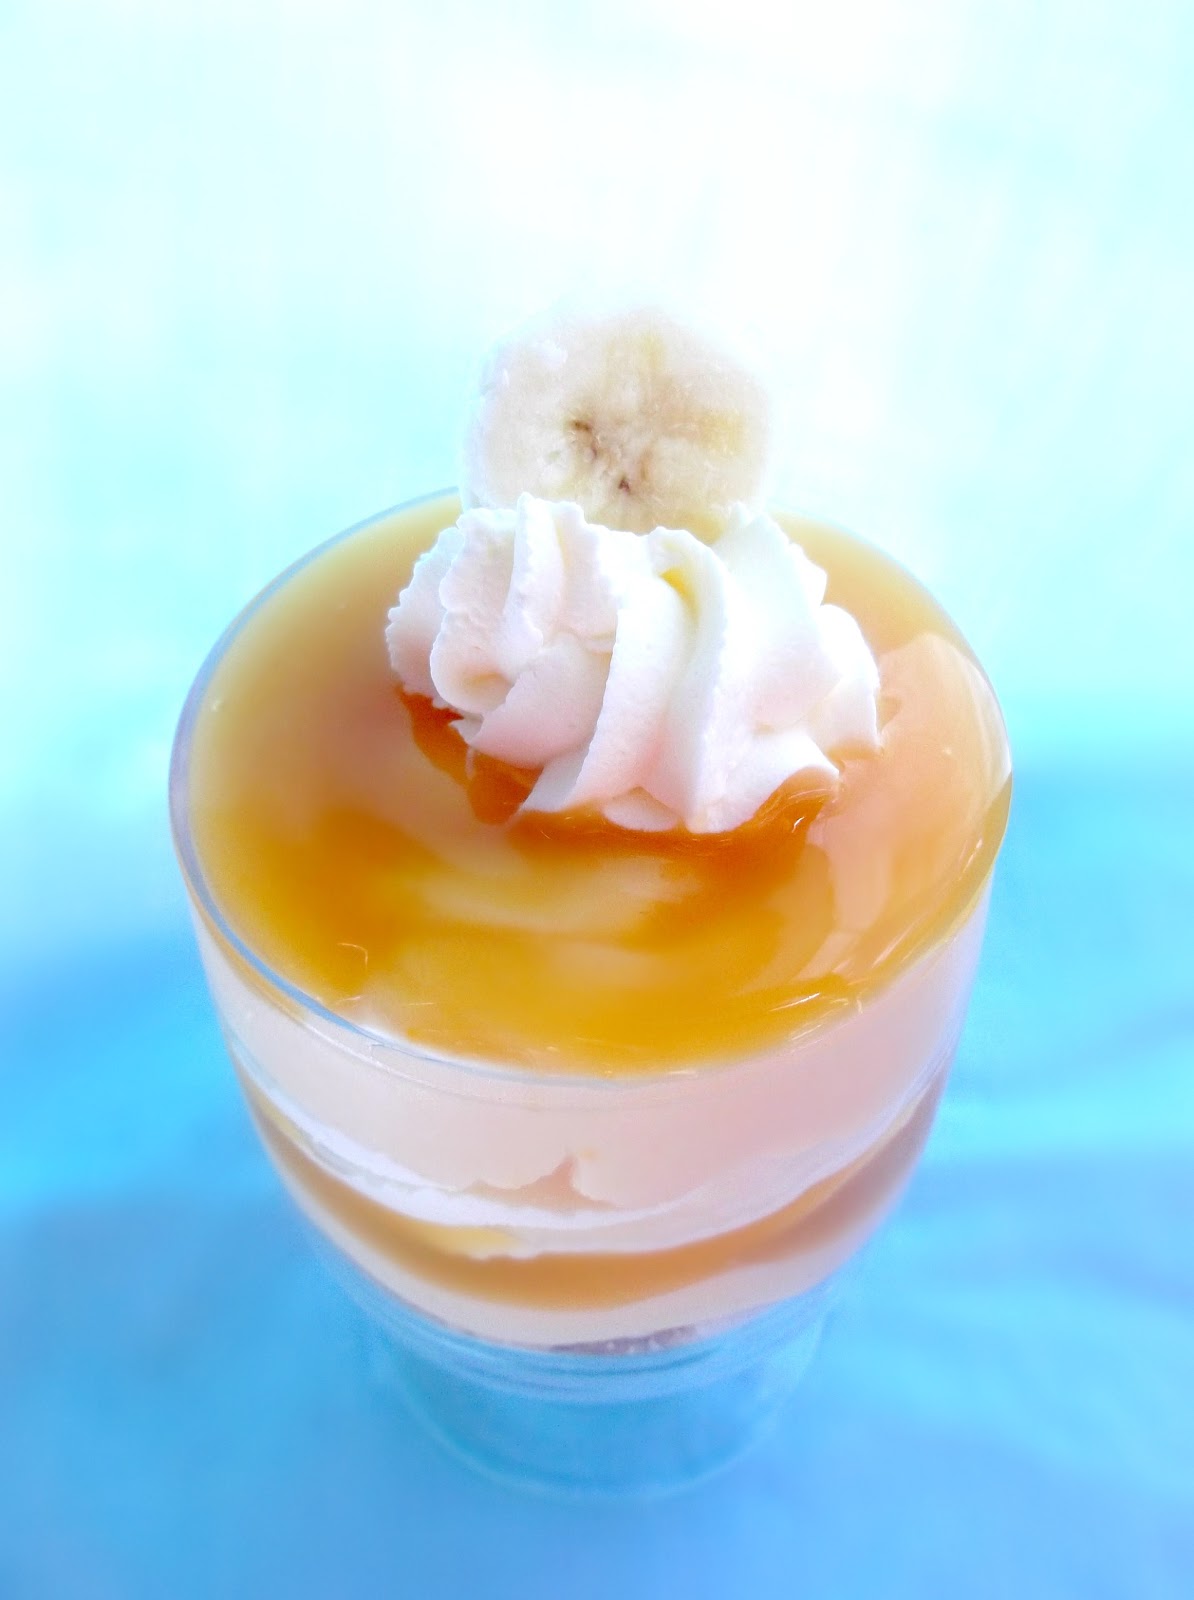
So I fell in love with this recipe for Custard Toffee Cream Desserts, because you can assemble them on the spot quickly, so as to only cater for as many people as feels like dessert to top off the meal. It's very simple, and very rich--like a disassembled banoffee pie with added vanilla custard. I cheated with this recipe and used store bought toffee sauce (like the goo that you usually pour over ice cream) but here's a fabulous recipe for home made caramel sauce that's to die for. I also made my own vanilla custard because I like it really thick and creamy, but for ease, I have just listed it in the ingredients as store bought.


INDIVIDUAL CUSTARD TOFFEE CREAM DESSERT (Adapted from Glorious Treats)

1 small banana, sliced (reserve one slice for garnish)
1/4 cup whipped cream
1/4 cup thick custard
1 crushed biscuit (we used shortbread fingers)
drizzling of toffee or caramel sauce

Crush biscuit and place in the bottom of the glass. Layer banana, then custard, toffee, cream, banana, custard and then toffee again. Pipe a swirl of cream on the top and garnish with a slice of banana. Serve immediately.

Serves 1


Saturday, August 27, 2011

How To Make Perfect Vanilla Egg Custard

There is little I love more than a good custard. I'm a fan of the powdered custard you can buy, but more so the authentic, slave-away-at-the-stove with a whisk, egg custard. There is something so irresistible about the real deal, especially when vanilla beans are used.  Okay, they're not in everyone's baking budget so lets just say that Queen Vanilla Essence Flavouring is just as good unless you're a chef in a restaurant...because those genuine babies suck away at the dollars!
The only problem with the real-deal egg custard is that often people are discouraged by scrambling egg particles in their not so smooth end result. Ewww! Another batch in the bin.
After attempting egg custard a few times, I feel I now have it down-pat, and have an amazing patisserie recipe to boot.
Now I haven't taken any "in-the-process" photos like I would have liked...no, I was too busy whisking away frantically. And people wonder why my biceps are so impressive.
Just kidding. But you will need a bit of power in those arms.


Step 1: Custard should only be attempted when you are child, pet and distraction free. All you need is a good 15 minutes. I never even go near the custard making process when my son is awake. You're doomed if you do! You're bound to have a disaster occur at the custard's crucial moment of "becoming"...a kiddy packing a number 3 into that nappy or the cat getting half swallowed by the toilet. So pop the bub to bed, put the cat outside and turn off the TV.

Step 2: Prepare ahead. Measure out the ingredients, separate the eggs, and have them at arms reach along with these instructions. Fill the sink with a few inches of cold water for when the saucepan comes off the stove (this reduces further cooking of the custard in the pot once you've finally ceased whisking at the end). Put the milk on to boil and arm your self with the whisk. You may want to stretch those biceps a few times before getting into the vigorous whisking process.

Step 3: Don't stop whisking, from the very beginning to the very end! It's always well worth the elbow-grease.

Other Tips: Inconsistencies are often a result of the custard sitting on the bottom of the saucepan too long, so don't even stop whisking for a moment. That's really the most important thing. Egg white in the custard also causes problems, so when you're separating the eggs, make sure you get as much egg white off the yolk as possible. This includes those horrid, thick, white clumps that are often attached to the yolk. Get rid of them!

Now for the awesome recipe, seeing as you're all prepared for the delicious smoothness that is now promised.

BEST VANILLA EGG CUSTARD

2 cups milk
4 large egg yolks
6 tbsp. sugar
3 tbsp. cornflour
40g butter, at room temperature
1 tsp vanilla essence

Place milk in a small saucepan and bring to the boil.
Meanwhile, in a separate saucepan, combine yolks, sugar and cornflour and whisk over a low heat. When the milk has boiled, add a few tablespoons into the yolk mixture and whisk. Gradually add the remaining milk and whisk vigorously on a medium heat. Custard will thicken. Continue to whisk until boils, and remove from heat. Scrape into a small bowl and sit in a few inches of cold water or ice, to cease the cooking process. When cooler, add the butter in 3-4 installments, stirring until combined. Add essence, mix and refrigerate. Stores for 2-3 days.


Monday, July 18, 2011

Custard Yo Yo Biscuits

They say one of the signs of insanity is talking to yourself. I wonder if that includes writing to ones self? Anyway, a big welcome to all our new subscribers! Blogging can feel lonely. But I don't feel so crazy now! I hope you enjoy the visual feast that is before you.
A lot of people ask me why I cook and put the effort I do into things that will soon be devoured and forgotten. It's like any passion I suppose. You do it because you love it, and I know it makes others happy and I love sharing something with them. Its a wonderful thing to be able to share something good with someone and enjoy a piece of time and a piece of cake together. There's a sense of achievement and satisfaction in creating something visually beautiful and delicious for the tastebuds. Who needs reasons for doing something they love anyway?
The funny thing is, I used to have such a hatred for food. Some people live to eat...I only ate to live, and only because it was absolutely necessary. In fact, the first 18 years of my life consisted of hiding food and burying school lunches, and the next three I virtually survived uni living off ten cups of coffee a day, a perhaps a little sushi. Okay, I exaggerate, but when you find the joy in food life changes somewhat. I began to see it as art...textures, designs, colours, fillings, contrast. It caught my decorative eye and finally my senses. Bon appetit!


YO YO BISCUITS

1 cup self raising flour
3 tbsp. icing sugar
1/4 cup custard powder
4oz butter

Sift flour, icing sugar and custard powder together in a medium bowl. Add butter and work into a stiff dough. Roll into walnut sized balls and place on a lined baking tray.
Press each down with a fork. Bake at 180C for 15-20 minutes until a light fawn colour. Cool and join pairs with jam or icing.

Makes 12

Tuesday, June 21, 2011

The Decadence Of Mille-feuille

I have a fear of flying to new heights. Well, its a subconscious fear I suppose. I know there's nothing grand about making a vanilla custard slice but in the back of my mind I'm scared of that amazingly delicious gooey goo, and creating it and failing at it. Blow it, I'm going to make it anyway.
But I'm not going to cut it and if it fails...I'm going to devour all the evidence before my husband comes home. He'll look at me strangely from head to toe and say "Gee, that baby sure grew quickly in one day!"
"Water retention." I will reply. "By the way, I didn't get the time to make anything to take to your parents house for dessert tonight".
Okay, that didn't seem such a good idea. I didn't fancy going for a jog to work off some of that custard and pastry, or explaining why I said I would make something and didn't..
So I made it--eyes closed just in case I saw it flop into a failure of liquid custard and soggy pastry. I wasn't going to cut it, because I predicted that would be the disaster moment. So I made individual round ones and made one extra for a taste test.
HEAVEN IN MY MOUTH!
Why didn't I make more of these babies?


MILLE-FEUILLE

2 sheets puff pastry, thawed
2 cups milk
4 large egg yolks
6 tbsp. sugar
3 tbsp. cornflour
40g butter, at room temperature
50g dark chocolate, melted
1 cup icing sugar
Vanilla essence, extra

Cut the pastry into 20 equal sized rounds. Place on lined baking trays and cook for 12-15 minutes at 210C until the bottoms are golden. Remove from heat and turn the puff pastry circles over and press gently to flatten. Leave to cool.
Place milk in a small saucepan and bring to the boil.
Meanwhile, in a separate saucepan, combine yolks, sugar and cornflour and whisk over a low heat. When the milk has boiled, add a few tablespoons into the yolk mixture and whisk. Gradually add the remaining milk and whisk vigorously on a medium heat. Custard will thicken. Continue to whisk until boils, and remove from heat. Scrape into a small bowl and sit in a tray of ice, to cease the cooking process. When cooler, add the butter in 3-4 installments, stirring until combined. Add essence, mix and refrigerate.


Meanwhile, combine icing sugar with some water and vanilla essence to make a thin paste. Lather half the pastry circles with icing and place them on a rack. Melt the chocolate gently and place in a piping bag with a thin pencil nozzle. Pipe several horizontal lines on each over the icing. Run a toothpick through the lines to create a leaf effect. Leave to dry.
When the custard has settled, add to piping bag with a large star nozzle on the end. Pipe a swirl of custard onto each of the remaining pastries. Top with the iced pastries and serve.

Makes 10