Showing posts with label fruit. Show all posts

Thursday, October 23, 2014

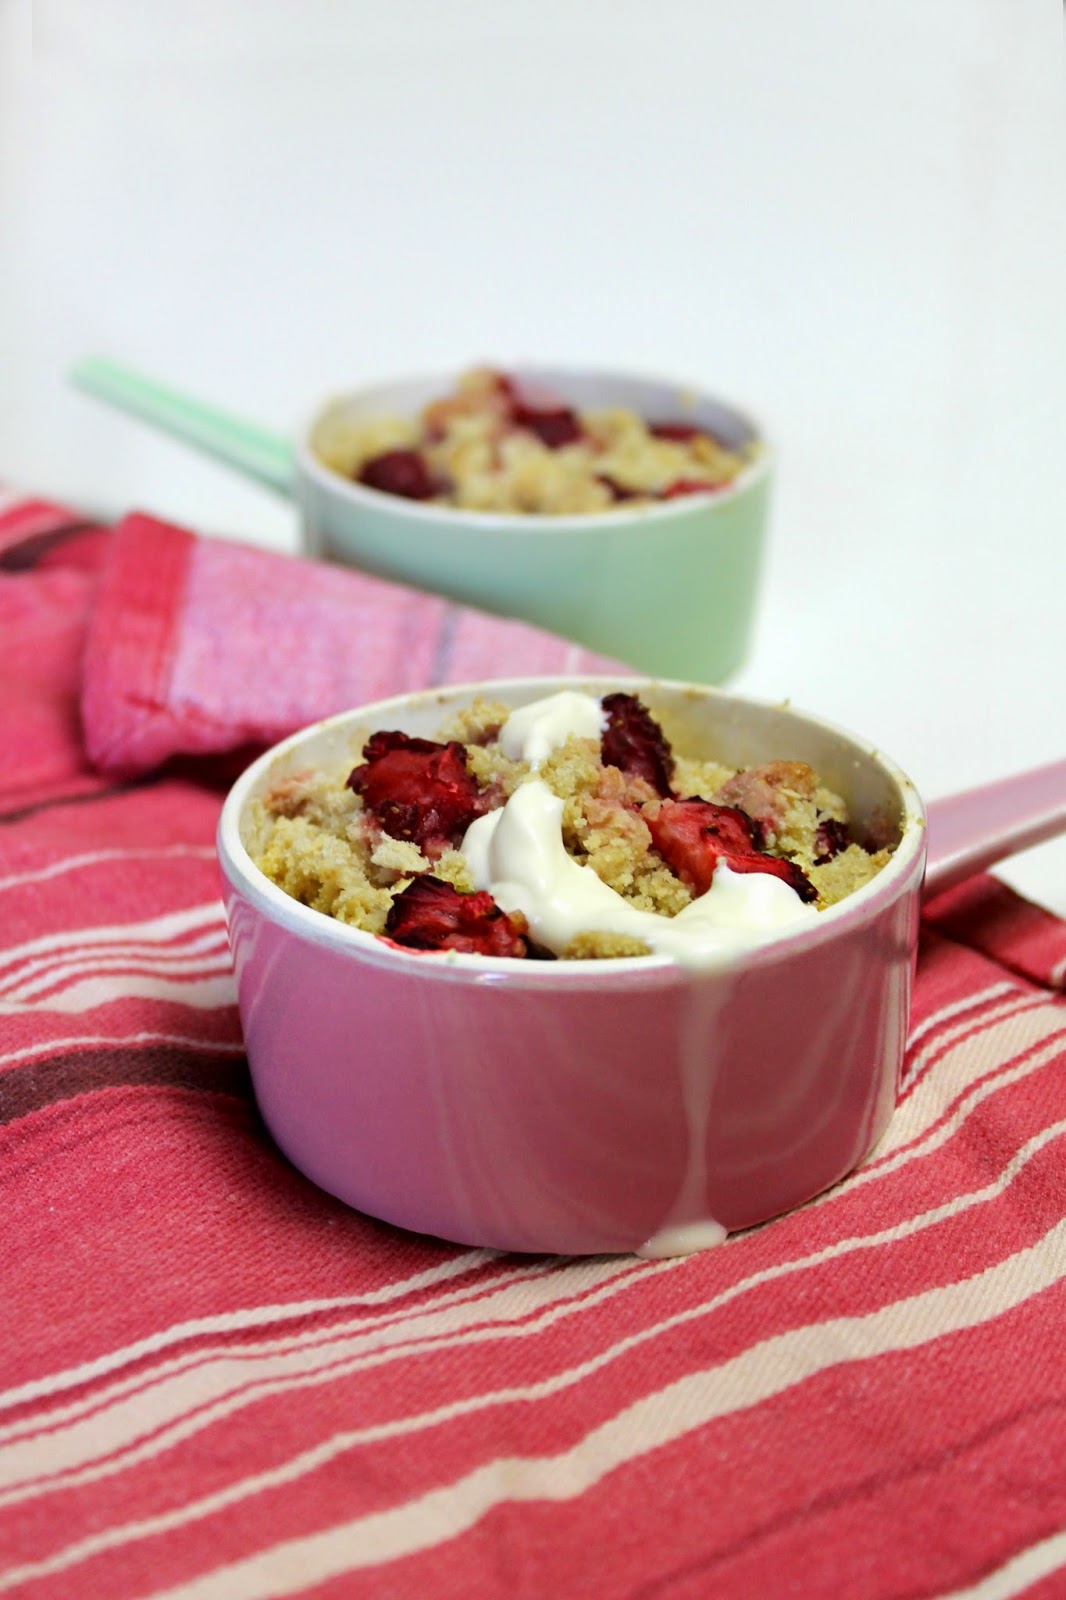
Strawberry and Pear Crumbles

 It was a brown slimy substance defrosting in a ziplock bag on the counter. Brown liquid was accumulating in the bottom. My husband came home and pulled a face of disgust as he gingerly inspected it , and asked me what on earth that ungodly looking goop on the bench was. You know, when you buy too many bananas, and they start going brown on the outside and a little soft under the skin? I peel them and pop them in a ziplock bag in the freezer, ready for banana bread when I have the chance. When I told my husband that I intended to make a cake with this squelchy mess, I think he almost passed out.
He was so disturbed by it that I promised to throw it out. The next time I served banana bread, he had no idea that I used the same method for saving my bananas, and he loved that bread! I secretly chuckle and continue with the practice. What do they say-what you don't know can't kill you? I doubt that saying rings true for many cooking substances, but hey, I've worked in kitchens and seen chefs use the ten second rule and worse multiple times. Shhh...don't tell anyone I told you!
But back to over ripe fruit, it seriously carries an intensified flavour. I'm sure it doesn't apply to all old fruit and there's a fine line between old and OLD. Browning bananas always make the best banana bread, soft tomatoes make the sweetest chutney, you get the picture.
Well, I had a bruised pear and some strawberries that were looking pretty tired. I decided to slice them up and pop them into an apple crumble style dessert, without the apple. Also, being a sucker for vintage kitchen wares, I couldn't resist the opportunity to get out those pastel ramekins!
This is a really easy, go to recipe for a quick, delicious and nutritious dessert. It took as little as five minutes to assemble.
I was so surprised by how these two fruits came together in perfect harmony, topped with a delightful oat laden buttery crumble on the top with a dollop of cream. The juices of the strawberries had coloured the pear a soft pink, and it was a very pretty and scrumptious end to a meal.


STRAWBERRY AND PEAR CRUMBLES (A Lick the Spoon original)

1 large pear
1/2 cup strawberries
1 tbsp butter, melted
3 tbsp. plain flour
1 tbsp brown sugar
1 tbsp rolled oats
Cream to serve (optional)

Preheat the oven at 180C.
Peel, core and slice the pear. Slice the strawberries. Layer these two cut fruits between two oven proof ramekins. In a small bowl, pour the melted butter. Add the flour, brown sugar and oats. Combine until a crumbly dough forms. Sprinkle this mixture over the tops of the fruit in the ramekins. Cook for 15 minutes. Cool for a few minutes before serving with cream or ice cream if desired.

Serves 2


Wednesday, January 15, 2014

Cloudy Pink Old Fashioned Lemonade

 This little beauty of a recipe was copied down into a little note pad in grey lead pencil when I was about 8 years old. It comes out of a 1950's kid's cookbook, and was by far my favourite thing to make in the kitchen at that age. It's so simple and so tasty, and a great way to keep the kids both occupied and cool in the summer holidays. It's the best home made lemonade recipe I have come across--it pleases kids and adults alike. It's old fashioned goodness--cloudy, sweet and lemony, without gassy bubbles. These days lemonade is rarely without fizziness, and I have had a few people recommend, after a glass of this refreshing drink, that I should add bubbles to it. I personally like it the way it is--it reminds me of how it would have been way back when that cookbook was written--chilling in Granny's fridge in a tea-towel covered jug. You could add sparking water to the concentrated lemonade in place of the cold water if desired however, to modernise it if preferred. Prepare yourself for a refreshing crowd pleaser! This is a frequently requested recipe.


CLOUDY PINK OLD FASHIONED LEMONADE

1 cup sugar
3 lemons, juiced (1/2 cup)
4 cups cold water
drop or two of red or pink food colouring

Put the sugar and 1 cup of water into a large saucepan and place over medium heat. Boil for five minutes. Then add remaining water and remove from heat. Add the lemon juice and stir through the water. Leave to cool and serve with ice.

Serves 4


Tuesday, January 14, 2014

Strawberry Topiary

As a table centre peice for a shabby chic style high tea, I thought a strawberry topiary would work a treat. It stood 40cm tall and stood atop a french provincial style candle stand I purchased from Dusk. It brought out "wows" from the guests and they all enjoyed pulling a couple off each during the afternoon tea I threw. I recommend placing this in the centre of a round table within arms reach of all your guests. I made the mistake of placing this in a place where only one side of a table could reach, and topiary was picked at from one side and the ball ended off overbalancing in the end because one side was all strawberries and the other was bare. If you cant place this in the centre of a small round table, I recommend rotating the topiary every so often, so that the strawberries are taken from all sides.
This would be great on a table at Christmas, for a baby shower, wedding or any sort of girlie or feminine party. It looks decadent and fancy as a table centrepeice while offering your guests a fresh, healthy, gluten free fruit option.


Step by Step Strawberry Topiary How To

You will need:

6x 250g punnets of strawberries
1x 15 cm Styrofoam ball
1x candle holder or similar stand (this must have a metal prong in the centre to secure the ball)
cocktail toothpicks
a small knife


Secure the styrofoam ball in the centre of the candle holder. The stand you choose should have a metal spike in the centre to hold the ball on securely. Glue may be another option if your stand doesn't have a spike in the centre.


Cut the leaves from the strawberries. Cut as closely to the leaves as possible, taking off as little fruit as you can. Keeping a little bit of the "woody" part of the top of the strawberry helps in holding it to the toothpick, so it doesnt just slide off. Reserve the leaves for the final touches of the topiary. These will be used to fill any gaps in the completed topiary.


You will see above that the toothpick is inserted into some of the harder part on the top of the strawberry. This is the goal in the following steps--it doesn't have to be completely centred as long as its well secured in the strawberry. Unlike the picture above, the toothpick goes into the foam ball partway before the strawberry is inserted.


Insert one toothpick partway into the top of the foam ball. Positioning is not very important yet, but it helps if you put the strawberries on the ball evenly so that the ball does not overbalance as you are creating the topiary.


 Push the strawberry onto the toothpick, ensuring that the wood is driven through the thick/woodier part of the strawberry top.


 Carefully push the strawberry downwards to the foam ball. If the toothpick end pops through the top point, ensure you push subsequent toothpicks a little further into the foam ball before topping with the strawberry.


Continue this method over the top of the styrofoam ball.Do not worry to much if there are gaps, as these will be later filled with the strawberry leaves.Try however to limit the size of any gaps, choosing strawberries that are the best size for particular areas.


Continue securing the strawberries until the entire surface is covered in strawberries.


Take the strawberry leaves to fill any gaps (I should have used more but I was in a hurry to snap this photo before guests arrived. Alternatively use clusters of mint leaves for larger gaps--this is also very aromatic and offers a breath freshener to your guests too)

Tuesday, October 29, 2013

Best Ever Banana Bread

When I was a kid and heard the phrase "no flies on him", I just presumed the person spoken about had good personal hygiene and didn't smell like a garbage can. It's interesting that people frequently associate bad smells with flies, and I suppose flies generally are attracted to the grosser things in life. That's why I was a bit surprised that when my house filled with the heavenly aroma of this banana bread baking in all its golden glory, flies flocked to the fly wire over the windows, trying to find a way inside. The whole house was filled with the most delicous banana and cinnamon smells as that banana loaf cooked away.
Its by far the best banana bread recipe I've ever tried. It's golden on the outside, the crust sweet and slightly crunchy on the outer. The bread itself and moist and giving, the perfect texture and is well balanced in flavours--the banana-ey goodness, the spice of the cinnamon, the sweeter outer crust. Its glorious served warm with a slathering of butter--or even made decadent with the addition of cream cheese icing. I myself decorated the top with fresh banana slices before it went into the oven, and it came out looking like cafe style banana bread. It got thumbs up from all family members...I wonder if it would have got such high reviews if my husband had known that I used his shirt as a backdrop in the photos? Ha!


BEST EVER BANANA BREAD (Adapted from All Recipes)

1/2 cup butter
1/2 cup brown sugar, packed
1/2 cup white sugar
2 eggs
4 over ripe bananas, mashed
1 tsp vanilla essence
2 tbsp milk
1/2 tsp bicarb soda
1 1/2 cups Self raising flour
1 tsp cinnamon
1 extra banana for decorating, optional

Preheat your oven to 190C. Greae and line a loaf tin.
In a large bowl, place the butter and the sugars and beat with an electric mixer until light in colour. Add the eggs one at a time, beating well between additions. Add the mashed banana and vanilla and mix until combined. In a cup, mix the milk with the bicarb soda, and add the flour and this mixture alternately to the main bowl, mixing until just combined. Add the cinnamon are stir through the batter.
Pour into the lined and greased loaf tin. Place slices of the extra banana on the top of the batter, and place in the oven. Bake for 45 minutes, or until the cake springs back when touched in the centre. Cool before removing from the tin.

NOTES: I doubled this recipe and got a hightop loaf and 12 good sized muffins.


Friday, October 25, 2013

Mango Butter Cream Sponge Cake

 I've been noting the trending goings-on in the food world of late. One of the great things about food blogging, is that even people who approach me and don't know me always have something interesting to share about their food experiences. Food is such an awesome universal binder, is it not?
Anyway there have been a few trendy things going on of late. Forget bacon on sweets and salted caramel,  that's so 2012. Things have gone to another level, with bars serving fried locusts on the side of cocktails (to be eaten) and some sort of sand worms have also made an appearance in fancy restaurants up here in Queensland. I know St. John lived off locusts and honey--but would you choose it when you have a menu of delicacies before you? (Having said that, apparently they are low fat and high protein, might make a good snack for weight watchers!) Call me a wimp, but I don't go in for these things. That includes sheep's brains, offal, haggis and the likes. Really, some things should not be eaten.
Speaking of unsavoury things in Queensland, what's with the fried feet? You'd think no one owned shoes around here. (Seriously this is a great embarrassment to me, seeing grown people walking about the streets and in shops with no shoes. We don't live in a seaside town either. I have the feeling we're going back to primitive times.)
On a loftier note, mango is back in season, and I couldn't help myself with this gorgeous sunny, fruit laden sponge cake. You will love the airy texture of this quick and easy sponge, layered with decadent mango butter cream and girdled with toasted coconut. It's a wee piece of heaven, and makes an effortlessly impressive addition to any table.


MANGO BUTTER CREAM SPONGE CAKE (partially adapted from Better Homes and Gardens, April 2010)

1 cup self raising flour
1 tsp cornflour
1 cup caster sugar
3 tbsp milk
2 tbsp melted butter
3x 60g eggs
finely grated zest of 1/2 lemon
1 tsp. baking powder

Preheat the oven to 190C.
Grease and line two 20cm cake pans with butter and baking paper. Sift the flour and cornflour into a large bowl, then add sugar, milk, butter, eggs and zest and beat with the electric mixer on high. Beat until light and fluffy, approximately 3 minutes. Fold the baking powder into this mixture.
Divide the mixture evenly between the two cake pans. Bake for 18-20 minutes until golden in colour and cooked through when tested with a skewer.
Leave to cool in pan for 5 minutes before removing to complete the cooling process on a wire rack.

To make the Mango Butter Cream:

*please note, quantities stated below are just rough measurements, I tend to add a little more icing sugar or liquid until I reach the desired consistency, so feel free to do the same*

1 mango, peeled, seeded, pureed
3 cups icing sugar
1/3 cup butter, room temperature
1/4 cup cream
1/2 cup toasted coconut, to decorate
1 extra mango, sliced, to decorate

Place pureed mango, icing sugar and butter in a large bowl, and beat with an electric beater. Gradually add the cream until the desired texture is achieved. Whip until light and airy before smoothing between the two sponge cakes, on the sides and the top. Press toasted coconut to the sides of the cake, and decorate with extra mango slices if desired.


NOTES: This sponge cake is best eaten on the day it is made, for maximum softness.


Thursday, October 17, 2013

Moist Apple Crumble Cupcakes with Cinnamon Icing

 Since my last post in which I mentioned stalkers, a few have come out of the woodwork. While I can't do much about keeping them away, we can all do something about keeping another person at bay.
An apple a day keeps the doctor away. Even better if it's an apple inside a cake, topped with cinnamon butter icing and delicious crumble mixture--even better if that cake happens to be moist and delicious and speckled with more cinnamon. Oh my. This is such a delicious treat for those random afternoon teas with friends, and it really is easy to put together.
My beautiful older sister used to make this as a tea cake without the icing and the crumble. I think it's traditionally an English tea cake called the Dorset Tea Cake. I have very fond childhood memories of this cake--I would literally crave it. And it's delicious which ever way you choose to make it.
I have not referenced the source of this recipe for one reason--It comes from the scrappy, torn and browned archives of the recipe drawer in the kitchen at home, handwritten by my mother. There's no knowing where it came from.


MOIST APPLE CRUMBLE CUPCAKES WITH CINNAMON ICING

1/2 cup butter
1/2 cup sugar
1 egg
1/2 cup milk
2 cups self raising flour
pinch salt
1 tsp cinnamon
5 small apples, peeled, cored and sliced

Preheat the oven to 180C.
Cream butter and sugar in a medium bowl. Beat in the egg and the milk. Add the dry ingredients and beat until a thick smooth mixture forms. Add the apple slices and incorporate. Spoon into greased cupcake liners and smooth the tops. Bake for approximately 3/4 of an hour or until golden and cooked through when skewered.

To make the icing:

1 tbsp butter, softened
1 tbsp brown sugar, heaped
1/2 tsp cinnamon
2 cups icing sugar
2 tbsp cream
water as needed

Add butter, brown sugar, cinnamon and icing sugar in a medium bowl with the cream. Whip with the electric beaters until thick and smooth, adding water if necessary to achieve the desired thickness. If your frosting turns out too runny, you can add more icing sugar to thicken it.

To make the crumble topping:

1 tbsp butter, softened
1 tbsp brown sugar
2 tbsp plain flour
pinch of cinnamon

Add all ingredients to a small bowl. Using your fingertips, rub the butter into the dry ingredients until it forms a sort of crumbly mixture. You may add more butter to reach the desired consistency if need be.  Dry this mixture out under the grill on medium for 1-2 minutes. Top the cupcakes with the icing and then scatter this crumble mixture over the tops.


Tuesday, July 2, 2013

Banana Cinnamon Puddings with Butterscotch Sauce

My kids are what I call faze-eaters or gorge-feeders. My daughter has a bird-like, grazing appetite, and my son is a heavy snacker and eats small main meals. But when they discover something new, they gorge themselves on it like they cannot get enough. I don't mind this when it's a healthy thing, and it always is, or I wouldn't let them do it. For the duration of a week it was strawberries. Now they wont look at them. For two weeks it was bananas. Now they wont touch them. It's been beans, chickpeas, pasta, mandarins and yogurt. The banana faze left me with tonnes of bananas I had to cut up and freeze, hence this recipe perked my curiosity and made me feel I could get a little condensing done from the freezer.
And who doesn't love that banana cinnamon and butterscotch combination? Its like a match made it heaven, and its also made with greek yogurt which makes it light and airy with a bit of a tang. Scrumptious!


BANANA CINNAMON PUDDINGS WITH BUTTERSCOTCH SAUCE (From Taste)

100g butter, softened
1/2 cup brown sugar, firmly packed
2 eggs
1 1/4 cup self raising flour
1 tsp ground cinnamon
3/4 cup mashed banana
2/3 cup greek yogurt

Sauce:
1/3 cup brown sugar, firmly packed
1/2 cup cream
25g butter, chopped

Preheat the oven to 180C. Beat the butter and sugar until light and fluffy, then add one egg at a time and beat thoroughly between each addition. Add the flour and cinnamon and mix until combined. Fold in the mashed banana and yogurt. Divide between 6 greased ramekins or 6 greased Texas muffin tins.
Cook for 30-35 minutes or until the tops are golden and a skewer comes out clean.
To make the sauce, place the brown sugar, cream and butter in a small saucepan. Heat on low, stirring for 3 minutes or until the butter melts. Increase the heat and bring to the boil. Lower the heat again and continue cooking for a few more minutes until the mixture thickens. Pour over warm puddings to serve.

SERVES 6.


Banana Cinnamon Puddings with Butterscotch Sauce

Friday, March 22, 2013

Glazed Raspberry Swirl Scrolls

Oh dear...there is no turning back now.  For one, you've stumbled across this page. For another, if you're anything like me, this is enough to make you baking crazy. I can't stop making bread!
This is a really fun recipe and a total crowd pleaser. Well, I would have been a bit happier if I had taken these easy raspberry scrolls from the oven a little earlier, they would have been less dry, but that was my fault and not the recipe. My house smelled like a bakery and I swooned around in it for several hours and wished it to always smell that good. Where was my husband to see these new found baking skills and smell his house when he should have? At work. And that's where these beauties got shipped off in the morning, after a wee taste test. Okay, I stashed a few away in the freezer, because this recipe's great like that. Got to love things that freeze well! But of course there's nothing quite like a fresh raspberry swirl roll, warm from the oven, drizzled in a little bit of delicious glaze...


GLAZED RASPBERRY SWIRL SCROLLS (Adapted from Sally's Baking Addiction)

Dough:
1 cup milk
2/3 cup granulated sugar
1 1/2 tbsp active dry yeast
1/2 cup butter, room tempeature
2 large eggs
pinch salt
4 1/2 cups plain flour, plus extra for dusting

Filling:
2 cups frozen raspberries (not thawed)
1/4 cup heaped granulated sugar
1 tsp corn flour

Glaze:
1 cup icing sugar
3 tbsp cream

To make the dough, warm the milk in a bowl in the microwave until lukewarm (about 35C to be precise).
Add the sugar and the yeast and stir to combine. Cover with a clean tea towel and set aside for 5-10 minutes or until the mixture has become puffy or foamy.
When the yeast mixture reaches foaminess, add the softened butter, eggs and salt to this mixture. Using a flat bladed knife gradually stir the flour into this mixture until well combined, and it forms a soft dough. Use your hands to combined the dough more thoroughly until it forms a ball.
Turn onto a well floured surface and knead for 10-12 minutes. Lightly grease a glass bowl, and place the dough in a ball shape inside. Cover with a clean tea towel and set aside in a warm place for 1-2 hours or until doubled in size.

With baking paper, line a 9x13 inch baking tray, with longer edges on the sides.
With a measuring tape, mark out a 10x 24 inch rectangle on the work bench, and cover this area in flour.
Turn the risen dough onto the floured surface. Evenly roll the dough in this area until it fills the floured space. Trim any uneven edges, so you have straight, even rectangular rolled dough.

In a medium bowl, combine frozen raspberries, sugar and corn flour.
Evenly sprinkle this mixture over the entire surface of the dough until covered. Take the long side of the dough and tightly roll the dough to form a 24 inch log. Cut this log into 16 even portions, about 1.5 inches wide each. Neatly arrange these rolls in the prepared tray, cut side up. Cover the tray with a clean tea towel and place in a warm area for 2 hours until puffy and well risen. (You can also cover the scrolls at this stage and leave them at room temperature overnight, and bake in the morning.)

Half an hour before the end of the rising time, preheat the oven to 200C.
When the two hours has passed since covering the cut rolls, bake in the preheated oven for 25 minutes or until the berries are bubbling and the dough begins to turn golden.
Remove from the heat and cool for 15 minutes before serving with a drizzling of glaze.

To make the glaze, combine the icing sugar and cream in a small bowl and combine thoroughly, until it forms a smooth paste. You can add more icing sugar to thicken it, or more cream to thin it, depending upon your preferences. Drizzle over your cooked scrolls, and enjoy!

NOTES: Baked and unglazed rolls can be frozen for up to 1 month, and warmed to enjoy later stage.
Makes 16

Foamy Yeast, Mixing dough with knife, and kneaded dough in oiled bowl
Dough risen after two hours and placed on floured surface. Dough being rolled flat. Raspberry mixture being made and spread evenly over dough surface. Dough being rolled with filling inside.
Rolled and filled dough being cut. Portions being arranged on tray. Scrolls during rising, and then when risen enough. Scrolls just out of oven.


Wednesday, March 20, 2013

Chocolate Custard Strawberry Cream Tart

Here's a really quick and easy dessert if you're in a hurry. I've been testing out all these instant pudding/mousse/jelly products from the stores, because I see so many recipes in America depend on them. While I find the flavour generally lacking in intensity, these sorts of instant mixes can be just perfect and you're time poor and need to whip something up in a flash. And it's always very popular with the kids. I for one would prefer to make my own mousse or custard from scratch, as I find it tastes better and you can up the flavour to your taste-bud's desire. So feel free to replace the store bought filling with your own chocolate custard or chocolate mousse, and then I believe this would really be one delicious dessert. Someone recently commented that every second recipe on here incorporates strawberries...can't you tell I'm addicted?


CHOCOLATE CUSTARD STRAWBERRY CREAM TART (A Lick the Spoon Original)

300g plain chocolate biscuits, crushed
5-6 tbsp butter, melted
1 packet Airoplane Brand Chocolate Wobble (or chocolate pudding or setting custard. Homemade recipe for chocolate custard here)
400g fresh strawberries
1 cup thickened cream, whipped

Combine the crushed biscuits with enough melted butter to get a damp mouldable base mixture. (you may not need all of the melted butter depending how absorbent your biscuits are.) Firmly press this mixture into a paper lined 20cm round spring form tin and up the sides a few inches. Refrigerate.
In a medium bowl, prepare the Airoplane Chocolate jelly mixture according to the directions on the back of the packet. When this mixture is unset at room temperature, remove the tart base from the refrigerator.
Cut the leaves off the strawberries along with a slither of the top of the berries, so that each berry stands flat with the pointed end upwards. Arrange the strawberries on the tart base so that they cover the surface with the ends pointing upwards. Pour the room temperate jelly mixture on top of the berries. Cover with cling-wrap and refrigerate until the chocolate mixture is set, approximately 2-4 hours.
Whip the cream and pipe on the top of the chocolate to decorate. Sprinkle with a little cocoa powder if desired. Serve chilled.

Wednesday, March 13, 2013

Spiced Mango Lassi

Life's been a little lumpy in the last month and a bit. I'm talking surgery, bloody messes, hospitals, screaming babies. On the up side, I got to see the 20 week ultrasound of my latest little angel, and it's a beauty. Fat and rounded and big for it's estimated age, with a straight little nose and sweetly sucking his or her tiny thumb.
So that wasn't so lumpy. Neither was the Spiced Mango Lassi I made, that went down a treat. Smooth, creamy, cold and refreshing, you could serve this tropical Lassi as a dessert, a afternoon snack or a meal. It's super easy to make as well, and only requires a few minutes of your time, some delicious ingredients and a food blender.


SPICED MANGO LASSI (A Lick The Spoon Original)

1 large mango, peeled and seeded
1 1/2 cups plain Greek yogurt
1 tsp honey
1 flat tsp ground cinnamon
pinch salt

Combine all ingredients in a food blender. Process until smooth.
Pour into glasses and serve with a sprinkling of cinnamon on top and a mint leaf garnish if desired.
Serves 2 (as a snack or meal) or 4 (as a dessert.)


Thursday, January 24, 2013

Raspberry Mango Yogurt Slide

Some have claimed to have put on pounds looking at this blog.
It's hazardous.
It's wicked.
It's to be had in moderation. For sure.
There's no harm in looking, in dreaming and drooling.
I say don't touch what you can't afford, but it's hard sometimes, especially when somethings dripping with chocolatey goodness and it's been one of those days!
Trust me. I know what it's like. I get to that stage several times during the day, where a quick sugar fix is super tempting, just to pick my energy up, even if only momentarily.
But considering I'm about to gain about 15-20kg in the next five months, I don't really need any help with extra delights adding to the grand total. (Just so you know, I'm expecting a wee one, and my last two pregnancies have resulted in whopping, healthy babies).
So where do I now turn? In the discovery of this chilled yogurt and fruit blend, that both satisfies my sweet tooth, while remaining nutritious and delicious. It's also a super refreshing snack to have on these hot summer days...I personally don't know anything quite as refreshing.
I make my own yogurt with an easi-yo flask. Just so you know, it's totally amazing with no added sugar, unless you want it--so you know what's going into it. Yogurt is really healthy for you and contains lots of live bacteria cultures, calcium, aids in nutrient absorption, aids in weight loss, helps prevent infections, and is said to reduce the severity of PMS. Worth a try, right?
Combined with my one of my favourite berries, the raspberry, and my favourite tropical fruit, the mango, this is a to-die for blend that you laze back and scoop from the glass. It's not quite a smoothie, it's not quite frozen yogurt, but it's a gorgeous in between.

For the mango version (which is equally as divine) visit here.


RASPBERRY MANGO YOGURT SLIDE (A Lick the Spoon Original)

1/2 cup frozen raspberries
1/2 cup frozen mango
3/4 cup plain or vanilla yogurt

Combine the fruit and yogurt in a food blender. Blend until all the fruit has been pureed and well incorporated into the yogurt. Pour into a glass and enjoy.

Serves 1