Showing posts with label rolled fondant. Show all posts

Friday, September 25, 2015

Rose Petal Princess Doll Cake

After the arrival of my new son, I found myself doing what I might have considered unthinkable years ago. My daughter turned 2 just weeks after his birth, and I found myself cakeless the day before and thinking her birthday was a few days away. What a cloudy fog that is the first weeks after a baby is born! I found myself buying Woolworth's sponge cakes, whipping cream for the middle and decorating it with strawberry jam,vanilla icing, strawberries and marshmallows. Her eyes were wide and excited as she gazed at it, and I was delighted to realise that the little people don't mind if you can't give them the Minnie Mouse or Toy Story cake you thought you were going to attempt creating.
However, she had asked for a Dolly cake, and I found myself making one for the weekend of her party. It was a fairy themed party, and although I didn't have time to affix wings to the Barbie decked out in a pink ombre rose petal cake dress, Cece didn't notice. She kept saying "Princess! It's a princess cake! It's so beautiful."


I used a packet cake mix for convenience and speed. The dress was made by cooking the cake in two separate oven-proof bowls. One was a bit smaller than the other, and stacked to create the A-line skirt of the doll. Once stacked, I cut a hole in the centre of the cake stack for Barbie's legs to slide into, and wrapped those legs in plastic wrap to avoid toy and cake from meeting.
A thin crumb coat was applied to the cake. Then I divided the fondant (or gumpaste) and used liquid rose coloured food dye to shade them from light to dark pink.


Starting with the darkest pink and the smallest petal cutter, I rolled the fondant thinly and cut out a multitude of petals. I shaped the edges slightly for variation and applied them layer-style with Wilton Dab and Hold Edible adhesive. (You don't have to use expensive edible glues if you don't have them. You can dampen the parts of the petal you apply with a touch of water to make it adhere, or use a tiny dab of icing as a glue).


Once I had completed the doll's bodice, I used the next darkest pink and continued on in a larger  petal cutter size. I continued in this fashion, working downwards and sliding the next row of petals slightly underneath the previous row. Allow to dry, and voila! Cake done.


Thursday, August 15, 2013

Christening Cake and a New Lick the Spooner

I don't usually like to spill too many household beans here on the blog. But we have some exciting news! And I have been rambling on for a long time about expecting a new little bubba, so here we go, the beans are being spilled.
It's a girl! And all that test tasting in the kitchen went towards creating a beautiful pudding, weighing in at 4.4kg! Don't ask.
Needless to say I can see my toes again and am enjoying not having heart burn....and loving fat, warm baby cuddles!

Cecelia at 5 days old--not looking so newborn!

We had our Cecelia Marie baptised one week after she was born, and I somehow still made a Christening cake.


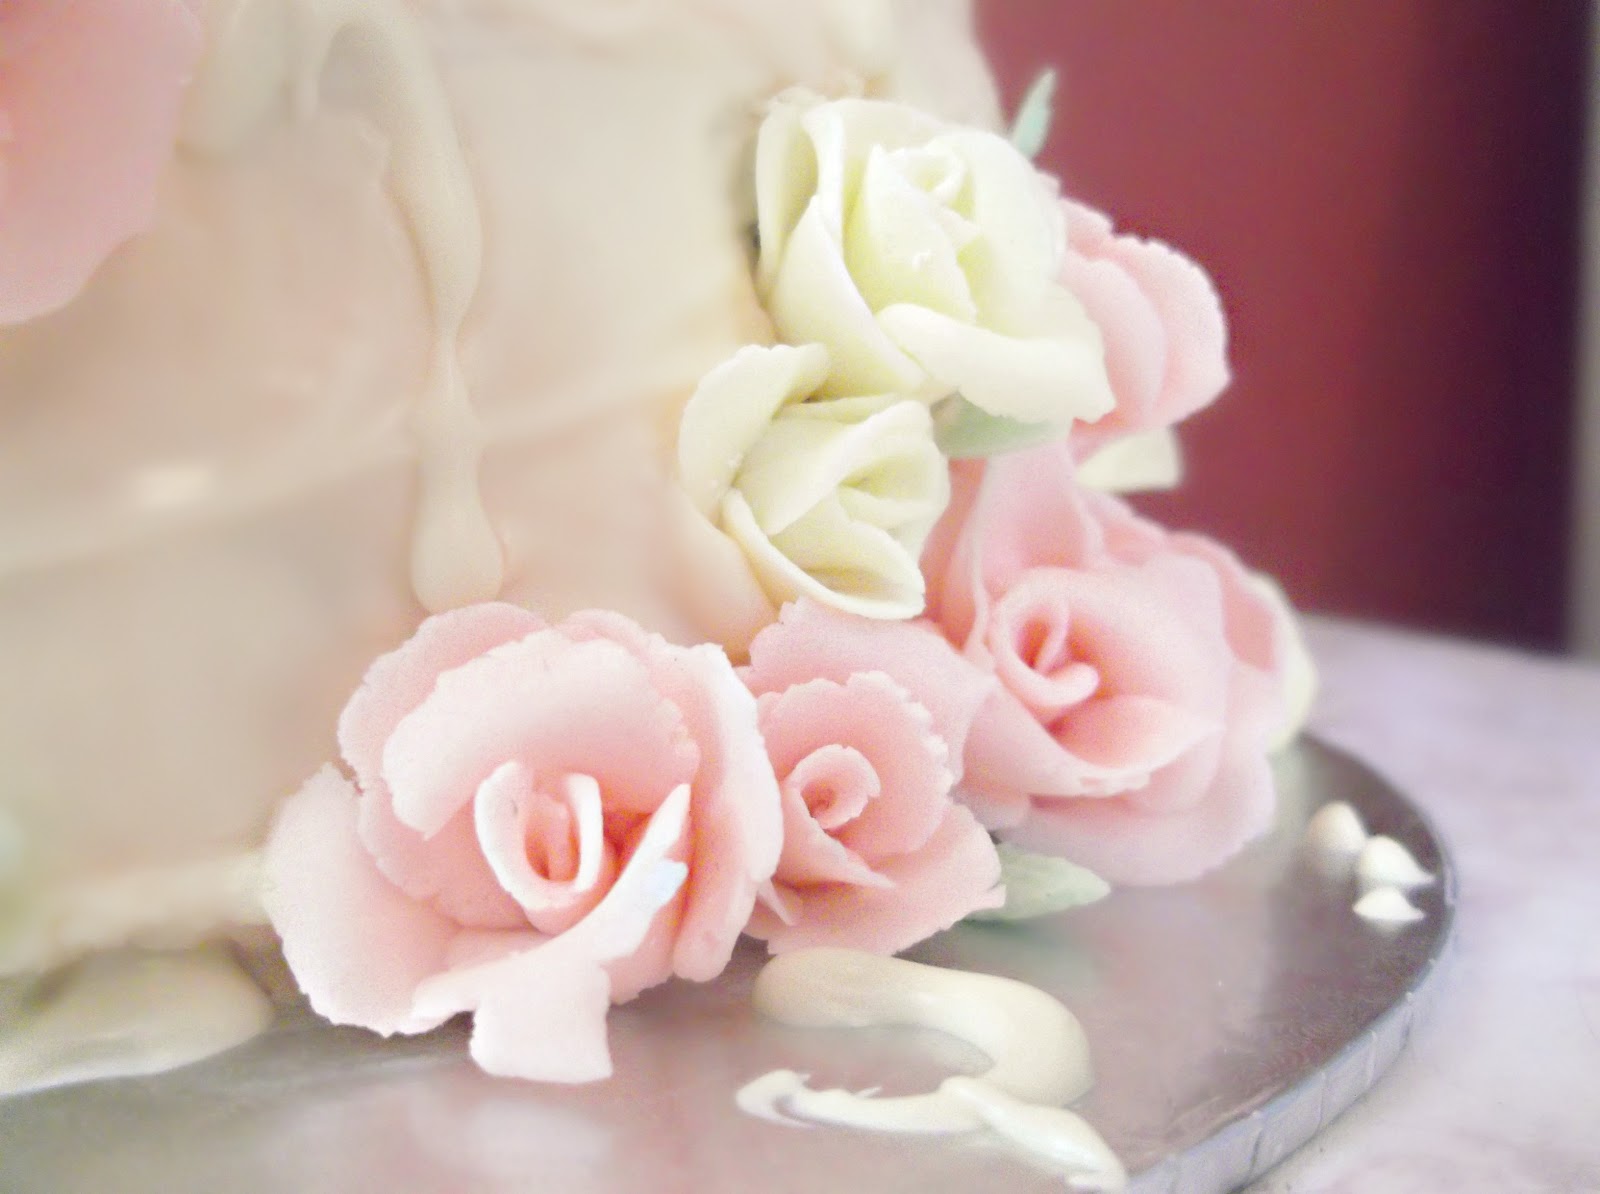
I made most of the decorations in advance--well, the fiddly time consuming bits like the roses. All the icing work was done with store bought rolled fondant (Orchard brand White Icing) and I dabbled in a little draped icing work which I can see being highly addictive in the future. This draped icing was coloured with a little pink liquid food colouring (no need to buy the powdered stuff, and the liquid is less expensive).
I didn't have the confidence or patience at the time to mold the baby myself (remembering melting figures in the past turning into fat blobs), so I used one of my daughters little dolls to top the cake. Of course she wanted it off immediately. Even now as she stands by me looking at the picture, she wants it off.
Overall, it was a very easy christening cake to make and I feel most people would be able to put something like this together even without experience. Give it a go! You may surprise yourself. It's amazing what a little icing and some rolling can do.

One week old. One more person to Lick The Spoon!

Sunday, June 30, 2013

How to Cover a Heart Shaped Cake in Fondant

 Recently I've noticed heart shaped cake tins on the market--springform ones. You know, the ones with the clip at the side and the removable bottom, great for making cheesecakes and all those things you cant lift out of a regular pan without mangling the sides. Two of my friends recently got engaged and wanted heart shaped cakes for the engagement party. I thought it would be easy tracking down one of these tins, but it turns out the stores only stock them around Valentine's Day. I somehow still ended up finding one and thought I'd give it a try, though I was a little concerned about the springform side of things.  When you unclip the side to remove the bottom, the sides of the tin have to expand somewhat and I was worried that the tin couldnt possibly keep shape.
I was right--That dreaded burning smell half way through cooking the cakes informed me that the tin ended up leaking, dropping batter onto the oven floor and burning up that debris. So just a word of warming if you're planning on using a heart shaped springform tin. Check for gaps first, and slip a few layers of baking paper in the leaking areas before pouring your batter in.
I also thought I'd test store bought rolled fondant. I usually make my own, but sometimes its difficult to get the right consistency, so I opted for Orchards White Rolled icing. It comes in 500g packets and I used about 700g for each cake. The taste wasn't really the nicest, but I guess that's the advantage of making it from home, as you can flavour it as desired. I did find this fondant easy to use and roll and it didn't get sticky, even though I covered the cakes on a rainy old day. It was also a cool day, so I heated the fondant very briefly in the microwave (about 5-10 seconds on high) just to soften it so I could knead it more easily. I was quite pleased with how simple this icing was to manage and roll and it was really no problem.
I left the icing plain white, as was the request of the engaged couple. It turned out to be a simple and elegant engagement cake that I feel would be made by most, even if you have no prior experience. It was topped with real roses which made for an easy yet sophisticated finish, and tied with red ribbons to tuck away any unsightly edges.
Ah engagements! Brings back the day that my husband proposed to me. It's been almost 4 years now (and almost three babies later--we have been productive!) How did your man propose to you? Or did you go and pop the question to him? I'd love to hear!


HOW TO COVER A HEART SHAPED CAKE IN FONDANT

1. Bake your cake. Once cooled, place it on the cake board and flatten off the top if it has mounded. Brush away any crumbs and unsightly bits. I turned my cake over so that it was bottom up, as it made for a much smoother surface.


2. Mix up a butter icing--start with 1 cup of icing sugar, 1 tbsp melted butter and 1 tsp vanilla essence. Add more icing sugar, or water, until it comes to a medium thickness, smooth icing. You don't want it to be runny, but you don't want it to be too thick that it pulls crumbs off the sides of the cake. Smooth it evenly over the surface of the cake with the flat of a butter knife. Use the icing to cover and fill any gaps and holes that may have formed when removing the cake from the tin.


3. Set the cake aside. Take the Rolled icing and kneed with your hands until it becomes smooth and pliable. You may want to microwave it very quickly (5-10 seconds on high) if it's a cold day and it has become hard. Lightly flour the rolling surface with a little icing sugar and roll to desired size and thickness. It's a good idea to lift and turn the fondant after every few rolls to get an even surface and good shape, and to make sure the fondant has not stuck to your rolling surface.


4. Once you have the correct size and desired thickness, lift the fondant and partially drape it onto the rolling pin for stability. Gently lay it over the butter icing-covered cake, removing the rolling pin as you go. The rolling pin helps to avoid any stretching of the fondant while laying it on your cake. With your hand gently smooth the top, then the bottom corner/ point of the cake first.


5. Continue to smooth the fondant over the cake with your hands. You can see in the above picture that although the fondant has been laid nice and flat over the cake, there are areas where the fondant bunches (see top right and left sides of the cake). To fix this unevenness and to prevent a bunched surface, just run your hand around the rest of the cake to smooth the fondant, then lift these problem areas away from the cake and then smooth downward to get rid of the bunching effect.


6. Now that the surface is smooth, ensure the bottom edges meet the board. If they are a little short, do not stress, as this un-neatness can be covered with a ribbon or pipped icing around the edges if need be. With a small, sharp and non-serrated knife, cut the excess icing from the board, about 1 cm from the cake. Don't cut too closely as you may be surprised to find the fondant floating at the edge. Neatly tuck this 1 cm of fondant towards the base of the cake, and cut away any further overhang if any exists.


7. Collect the residual fondant and roll it into a ball. Wrap it in cling wrap and run it over the whole surface of the cake to smooth it for a final time. Some people prefer to use a flat smoothing device especially made to perfect the surface, but this home made little ball of fondant works brilliantly too if you don't happen to have one.


8. Clean away any residual icing sugar, fondant or stickiness from the board with a damp cloth or tissue.  Measure the sides and cut a piece of ribbon that will fit around any messy edging if desired. I simply held the ribbon on the cake with a sewing pin (with a coloured ball head so it was visible enough not to be mistaken for cake) pressed into the top indentation of the cake.


9. If you don't feel you have the know how to decorate the cake further, fresh flowers are a great idea to finish off and jazz up a special occasion cake. This can be done before serving or presenting the cake, unless you want to play around with those green foam florist islands. This is a good option if you're topping the cake with flowers as I have done with the Savoiardi and Roses Engagement Cake. I wanted to cover the gap in the boards, so I just laid the fresh flowers in between the cakes when I arrived at the engagement party. They still looked fresh and healthy by the time the cake was cut, but if the weather is warm, you may not want to decorate the cake with fresh flowers until the cutting of the cake is not too far off.


Fondant flowers are easier than you may think to make! Utilize those scraps of fondant and follow this easy guide to making beautiful fondant roses. You may want to make any fondant decorations a few days ahead, as these will need to dry in advance before going on the cake.

Wednesday, December 5, 2012

Pastel Bird Cage Cake

I think I've lost my mojo. It sometimes happens when I get sick. Or burn something. Or a special cake melts due to the heat.
I'm pretty sure all those things happened to me in the last two weeks. My little daughter turned one, and I attempted to make her a pink and white birdcage cake, covered in pastel rolled fondant roses.
It turned out looking like the leaning tower of Pisa, after I made the mistake of icing the layers with buttercream icing.
In summer.
In Brisbane.
With weather forecasts of close to 40C.
We tried to salvage the cake by putting it in the aircon, but even still, the cake leaned and leaned  and slipped and slid until it cracked horizontally half way and the top looked like it would topple. Due to the leaning, the icing began to tear and the white chocolate used for the cage lines began to crack and bow.
Thanks to my husband, we saved the cake from completely falling into a heap. He came to the rescue just before it collapsed and propped it upright with a small cushion against the wall. Oh the things you have to do to save cake sometimes!
Despite all this, I think, before it leaned all the way over and cracked, it looked pretty in all its pastel glory. My little darling was wrapped in it.  Thank goodness for her one year old eyes overlooking the flaws. I couldn't wait for the party when I could finally let the darn thing collapse as it so desired.


To learn how to make your own rolled fondant roses, follow the tutorial here.

Thursday, September 20, 2012

Little Miss Chatterbox Cake


 I had a very interesting comment a little earlier in the week. I deleted it (the privileges of being the author of a blog!) so don't go looking for it. It was hilarious though.
Someone basically had a go at me for sharing such unhealthy recipes, and directed everyone over to her healthy eating blog. Yes. You read right.
Here I am, just sharing, making peoples lives sweeter, and get chastised for giving this food to my friends and family and spreading the fat around, as I like to say. But I'm not sitting in the corner redfaced. No. I am grinning right back at you, healthy blogger.
I don't think I need to put warning signs up all over my blog for people who are not well educated in how to eat correctly. I'm all for healthy eating. I'm also all for balance and enjoying food. Sweets are on the food pyramid too...at the top, closest to heaven!
So sweet of you to be thinking of my weight, healthy blogger--it's very kind. But look at me. I obviously sit at home an eat everything posted on this site and have become obese. Don't you think?

My only crime is a twisted skirt...

Despite popular belief, I am not the blind witch that owns the gingerbread house that Hansel and Gretel stumbled across, once upon a time. I eat my veggies too!
Needless to say, no one should be living off this sort of food. I know I don't have to tell you that. Even though I just did.
There's no recipe with this post but there are a few general directions. Sometimes when I make a cake I am going to spend lots of time on just decorating, I take a shortcut and  bake a cake from the box *gasp*. I don't like doing that, but it makes life a bit easier sometimes. I have found a most delicious boxed cake mix that believe it or not, is one of the cheapest ones you can buy. I know. Sounds gross, and costs less than a dollar, just Black and Gold brand. But trust me, it tastes better than lots of those cake mixes that are quadruple the price. So I have a few up in the cupboard for occasions like this.


I made this Little Miss Chatterbox cake for my sister in law's 13th birthday party. As you might well imagine, she's the one person I know who can talk the leg off a chai, and hence, has gained the title of Little Miss Chatterbox.
I made the cake in an oven proof bowl, about 10cm wide and 8 deep. I then covered the cake, turned upside down, with buttercream icing. I used home made rolled fondant for the body, arms, legs and hair and facial features. I wanted the colours to be intense, as shown in the book of this little character. I recommend using a gel colouring for the intensity, although I used liquid food colouring, and it worked fine too. There was just a whole lot more icing sugar that had to be pounded into the fondant to make it dry enough to roll. The eyes and mouth I painted with black food colouring to get that intensity, otherwise it would have looked a bit faded. It dried quickly and worked perfectly.
Because the cake was so small, I sat Little Miss Chatterbox on a cake of her own. It was a marbled pink and white buttercake, topped with coconut buttercream. I coloured the coconut by placing it in a ziplock bag along with some green food colouring, and shaking to coat the coconut.


ROLLED FONDANT

1 tablespoon unflavored gelatin
1/4 cup cold water
1/2 cup glucose (can substitute light corn syrup)
1 tablespoon glycerin 
1 tablespoons butter
2 pound bag of icing sugar, sifted.
1 teaspoon flavoring
  
Pour water in a small saucepan. Shower the gelatin over the cold water so that the gelatin is evenly distributed.  Let gelatin soften in the water for five minutes.
Sift the icing sugar into a large bowl. When all sugar is sifted, make a well in the center of the bowl. Heat the water and gelatin over gentle heat, stirring, until the gelatin is dissolved. Mix in glucose (or corn syrup) and glycerin. Add the butter and mix until melted. Remove from heat and stir in desired flavouring. I used vanilla essence. 
Pour wet ingredients into the well of powdered sugar. Mix with a wooden spoon until cool enough to handle. 
Then use a lightly greased hand to knead the ingredients together. Knead in the bowl until most of the icing sugar is incorporated. 
Turn out on a lightly greased bench and knead until the fondant is smooth and pliable. If it feels sticky, add additional icing sugar. If it feels too dry and doesn't feel elastic, work in a small bit of butter. 
Shape into a thick disk shape and cover with a thin coating of butter. Wrap well in several layers of plastic wrap, and place in a large ziplock bag. The fondant can be used immediately, but works much better if its left to cure for at least 12 hours. The fondant will store at room temperature this way for three months, and can be frozen for up to 12 months. Add food colouring as desired.

Saturday, February 18, 2012

Sweetpea Baby Shower Cake


Recently, my blog has become a dangerous vision in this house. I can't open the page without causing hysterics. No, its not my husband.
Its my son, the little man of the house, who has gained quite a sweet tooth.
His favourite thing is "cack" and he calls for it as soon as he sees me open my blog. He whines continuously that he wants some and then he goes and pulls out the cookbooks and magazines and pages through, virtually drooling over the pictures he sees before him.
What monster have I made! The cookie monster, mini sized and eager to stuff his sweet little mouth with as much as he can get.


Here he is, a vision in cake...I mean, a vision in nothing, armed with two spoons, eating the leftovers of a baby shower cake.
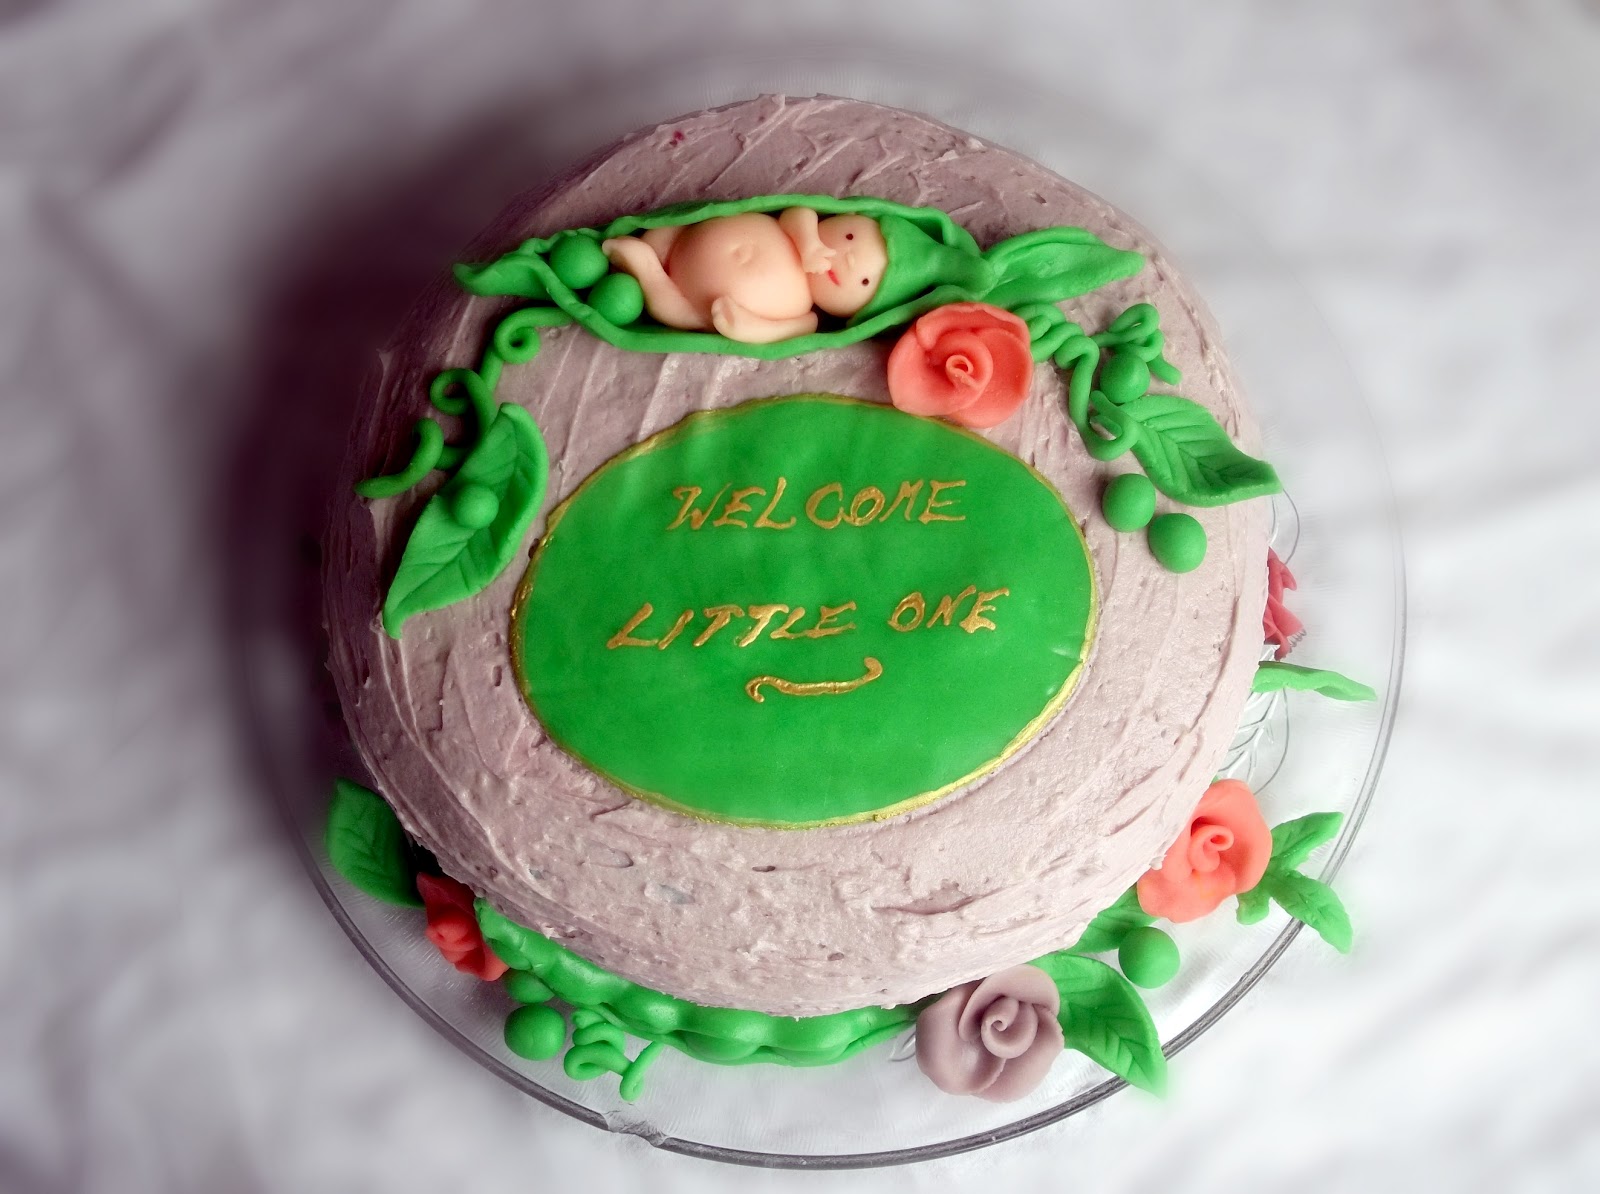
Which is really the reason for this post. It's nothing fancy, just a little project that kept me busy before my sister-in-law's baby shower. I always have grand plans, that rapidly down size themselves due to lack of time and the sweet demands of motherhood.


Flowers and other decorations were made using rolled fondant, was a lot of fun but I wish I had more time to fine tune the modeling. Here's how to make your own rolled fondant. The plaque was a little experiment of mine that didn't dry in time, hence it rippled on the cake. The writing was made using edible gold dust mixed with a little vodka.

Tuesday, January 24, 2012

How to Make Basic Rolled Fondant or Gumpaste Roses

My sister-in-law is expecting her first baby in a few months, and the occasion called for a baby shower and I put my hand up with glee. I've got a newborn myself and found that I left everything to the last moment in my disorganization. Running out of time, I set about designing a cake and found that I lacked some of the instruments necessary to go through with the project.
Not knowing the sex of the baby, I decided to go with a Sweetpea Baby Theme with a rolled fondant garden of roses, beans and peas and some other foliage with a wee baby among it all. I had no idea how I was going to make leaves and roses without any tools used to create those perfect petals and serrated edges. So I started researching and found a great tutorial on youtube. It's a very simple process anyone can use, even for those not so artistic and it doesn't require any cutting tools for your fondant. They are basic fondant roses and can be added to if you have the time and patience.
Enjoy the tutorial!


HOW TO MAKE BASIC ROLLED FONDANT OR GUMPASTE  ROSES

To make your own fondant at home, here is a cheaper and more fun alternative to store bought rolled fondant.You can also use gumpaste.

You will need:
Any amount of rolled fondant or gumpaste
A clear, plastic folder pocket

1. Take the plastic pocket and cut off the bottom and the side that usually clips into your folder. You now have a plastic sheet that can open and close as a book would.

2. Take a portion of fondant and roll it into a smooth sausage. Cut four equal portions from the sausage. You want them to be approximately marble sized when rolled into a ball.

3.Roll three of these portions into smooth balls, and the forth into an elongated ball, a bit more oval than the others.

4. Place each of the portions along side each other inside the plastic sheet. Gently smooth each ball with your pointer so that it flattens. Smooth down one side of the ball so that it is thinner than the other side. The end closest to you should be thick, sloping down gradually to be thinner. Ensure the balls are all even in size and thickness, and that the balls keep their aerial view shape.


 5. Gently remove the oblong "ball" from the plastic. Roll the thin end of it first, between your fingers, rolling towards the thick end so that it forms a spiral. This is the centre of the rose.


6. Remove the first ball from the plastic and position it flush against the centre bud, thin side up. Place it so that only the centre of the petal is stuck to the  bud, the sides free. The top of the petal should be at the same height as the bud.

7. Take the second petal and slip it in besides the first, so that the first petal overlaps it by half.  Take the third petal and slip it in half way under the second petal. Gently fold the end of the last petal around to meet the first.


 8. You now have your basic rose. Cut the bottom half off with a knife, as this is quite bulky.
You may also like to shape the petals a little with your fingers before setting is aside to dry.


The baby drying. I use an empty chocolate tray to dry the roses in. They dried in 2 days, but this depends upon the weather.

Baby's Sweetpea Cake

Wednesday, June 1, 2011

Farm Animal Rainbow Birthday Cake

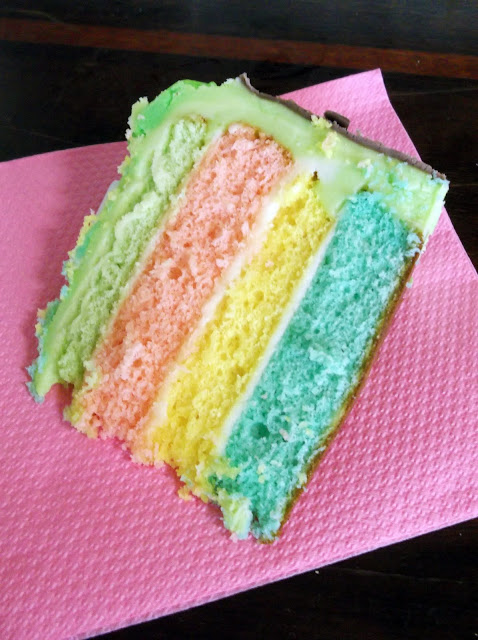
Over the weekend we celebrated my son's first birthday with some of the family. Of course, over all the presents, Benjamin was more interested in the balloons and wrapping paper than anything else, and I predicted that. I decided to give him a birthday cake he couldn't ignore. Ben doesn't speak yet, but he can make farm animal sounds and loves looking through picture books and pointing out the cows and pigs and dogs and so forth. So a farm animal cake it was to be--even though I swore never again to dabble in icing modeling after the tremendous effort of the first--and what I thought would be the last--fancy cake I made. Anyway I did it again, just because I saw someone else had one it and it looked so cute. Well I learnt from last time where none of the icing dried in time for the party and made the figurines 5 days in advance. It was enjoyable but time consuming and I was glad when it was finished! I cut a few corners and was glad of it. The rainbow buttercake was made up of two packet mix cakes I divided into four and coloured with food dye. It made the cooking process quick and easy, giving more time for the decorating. I also refrained from icing the whole cake with fondant and went for buttercream icing instead--saved some time and stress too. And Benjamin loved the cake! He got very excited about the animals and almost took the cows head off before the party...and after the party, he bit the head off the dog and ate it. Yuck!


ROLLED FONDANT

1 tablespoon unflavored gelatin
1/4 cup cold water
1/2 cup glucose (can substitute light corn syrup)
1 tablespoon glycerin 
1 tablespoons butter
2 pound bag of icing sugar, sifted.
1 teaspoon flavoring
  
Pour water in a small saucepan. Shower the gelatin over the cold water so that the gelatin is evenly distributed.  Let gelatin soften in the water for five minutes.
Sift the icing sugar into a large bowl. When all sugar is sifted, make a well in the center of the bowl. Heat the water and gelatin over gentle heat, stirring, until the gelatin is dissolved. Mix in glucose (or corn syrup) and glycerin. Add the butter and mix until melted. Remove from heat and stir in desired flavouring. I used vanilla essence. 
Pour wet ingredients into the well of powdered sugar. Mix with a wooden spoon until cool enough to handle. 
Then use a lightly greased hand to knead the ingredients together. Knead in the bowl until most of the icing sugar is incorporated. 
Turn out on a lightly greased bench and knead until the fondant is smooth and pliable. If it feels sticky, add additional icing sugar. If it feels too dry and doesn't feel elastic, work in a small bit of butter. 
Shape into a thick disk shape and cover with a thin coating of butter. Wrap well in several layers of plastic wrap, and place in a large ziplock bag. The fondant can be used immediately, but works much better if its left to cure for at least 12 hours. The fondant will store at room temperature this way for three months, and can be frozen for up to 12 months. Add food colouring as desired.


The demolition of la cake.

Rainbows inside!