Showing posts with label roses. Show all posts

Tuesday, May 17, 2016

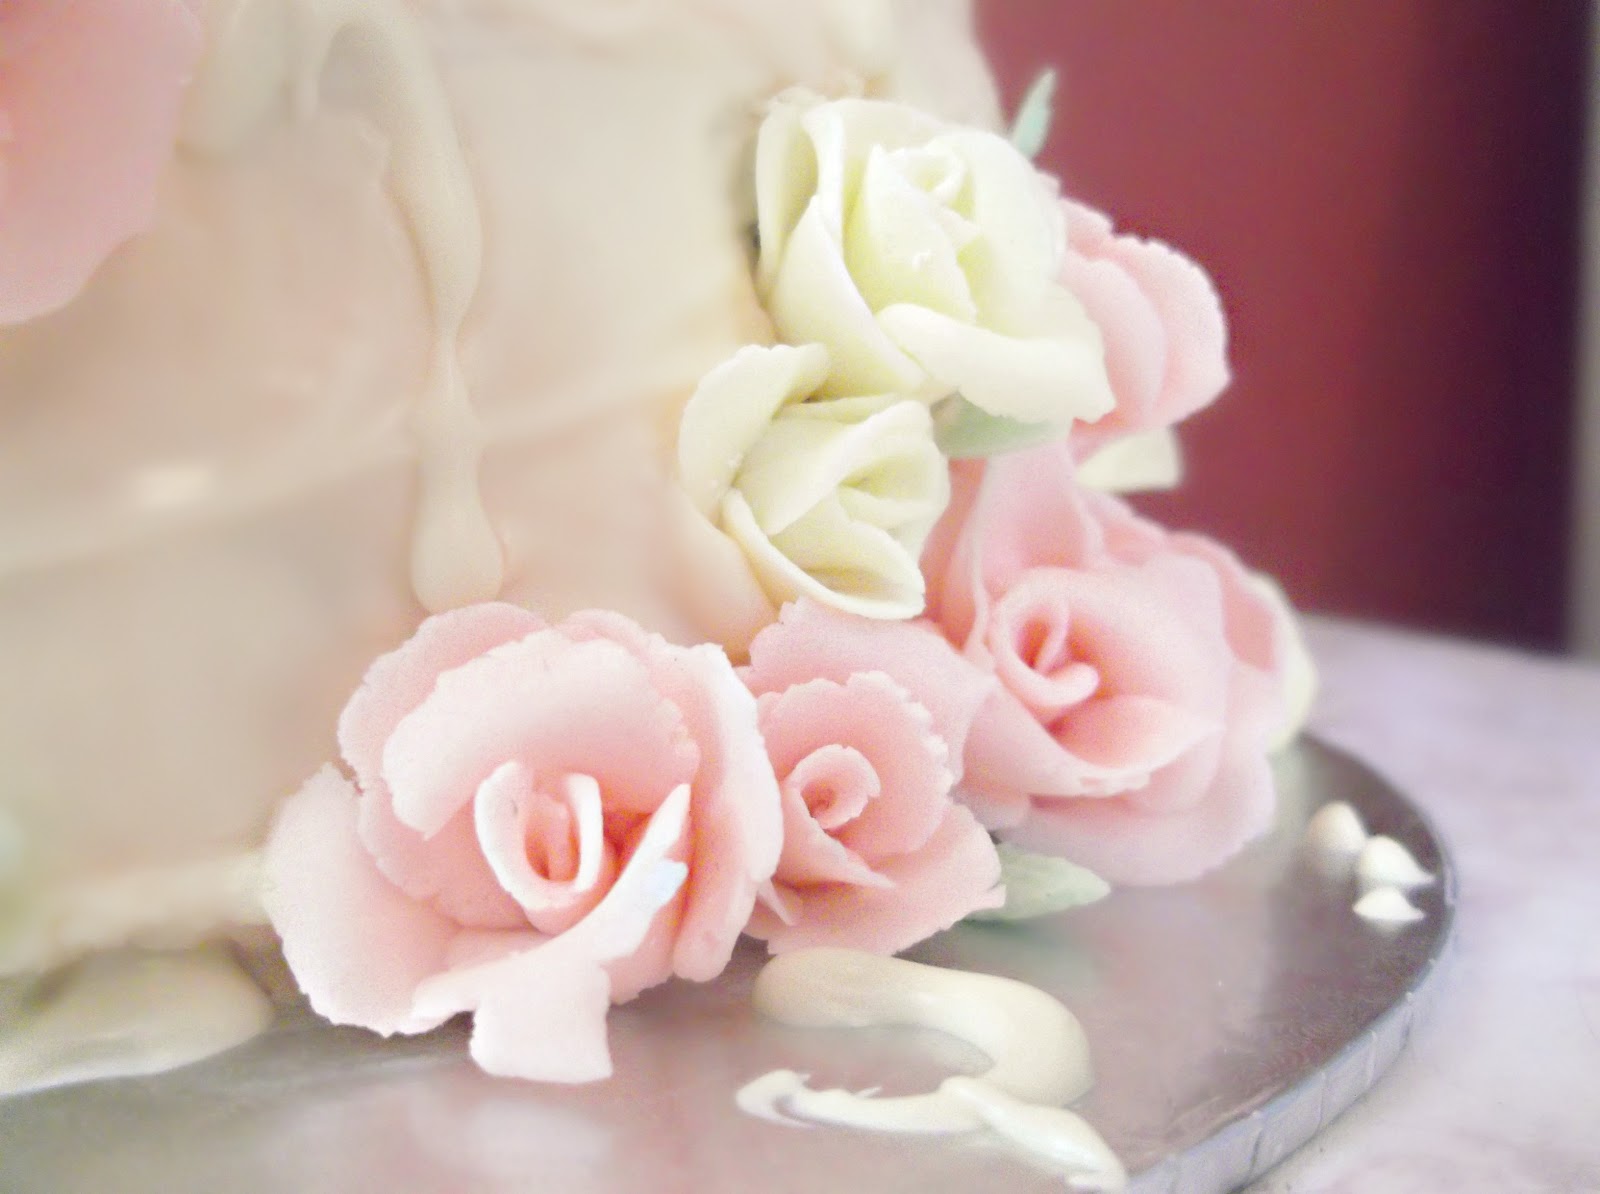
Decorated Heart Sugar Cookies with Gumpaste Roses

This Mother's Day I asked my kiddies what they would like to make for mum, and my eldest daughter pulled out the cookie cutters. Mr 5 pored through a recipe book and pointed out a recipe for sugar cookies-so we got to it. I knew these gorgeous cookies would make the perfect budget friendly gift!
How important is involving children in cooking? I think it's a crucial life skill that needs to be encouraged at a very young age. I've vowed not to let one child of mine leave home without a good set of cooking skills under their belt-and not only the essentials. If you're wondering how to instill a love for cooking in your kids, there's a wonderful guide to cooking skills outlining appropriate cooking tasks listed by age, starting from three years and up. As painfully slow and messy it can be, I always allow my kids to get involved when I'm baking. They're too small to do much yet, but they do love activities like beating, rolling, measuring, sifting, licking the spoon....


BASIC SUGAR COOKIES (Adapted by Love Food pg.16)

115g butter, softened
55g caster sugar
1 tsp finely grated lemon rind
1 egg yolk
175g plain flour

Mix the butter and sugar with beaters until creamy. Beat in the rind and the yolk. Sift in the flour and mix into a soft dough. Gently knead until smooth, then halve the dough and form into two balls. Wrap in cling wrap and refrigerate for an hour (or the freezer for 20 minutes)
Preheat the oven to 180C (350F).
Grease and line two baking trays. 
Unwrap the dough and roll out on a lightly floured surface to the thickness of about 5mm/1/4 inch. Using a heart shaped cutter, cut out the dough and place the shapes on the baking trays with at least 2cm space between them.
Bake in the preheated oven for 10-12 minutes, or until they begin to turn golden.
Remove from oven and cool on a cooling rack. When completely cool, ice with royal icing, and decorate if desired.


ROYAL ICING

2 tbsp beaten egg white
175g icing sugar
water or lemon juice, if needed

Place the egg white in a bowl and add a little sugar. Beat until smooth. Gradually beat in the remaining sugar to make a smooth, thick icing that holds soft peaks. For a thinner, spreadable icing, beat in a few drops of water or lemon juice to get the required consistency. To colour the icing, use a toothpick to add a little liquid or gel food colouring an mix thoroughly.
To ice the hearts, outline the cookies with the thicker icing and allow o ry, then fill in with a more spreadable royal icing. We decorated with a smaller version of these gumpaste roses and store bought edible pearls.


Thursday, February 20, 2014

Fondant Rose Petal Engagement Cake

One of my beautiful friends has become engaged. Slowly, as I grow older, my friends are getting married, and that not only fills me with a certain joy, but also gives me the opportunity to further my experience making their engagement cakes.
I have long admired the "exploded rose" or "rambling rose petal" look on wedding cakes and engagement cakes alike, so I purchased a case of rose petal cutters, varying in size from very large to quite small. I used the four smallest cutters from this range to cut out the fondant rose petals for this cake, with the idea of working from the centre out and graduating the size as I worked from the bud. When dried in the shape I desired, all the fondant petal edges were carefully brushed in pink petal dust for a delicate and realistic effect before their placement on the cake. The centre part of the rose had been coloured with this same petal dust with more intensity to create dimension and also a focal point to the flower.
To assemble, I started with the bud, (I made the beginnings of the rose as a separate piece) positioning it close to the bottom of the cake. Then I added larger rose petals surrounding it, fixing them with butter-cream icing. The petals fanned out from the main rose bud, and traveled up the cake in a romantic, sprawling fashion. Then I positioned a few of the larger petals at the top as if they had been scattered there.
Sadly for the weekend of the engagement party, it rained every day. This put a spanner in the works, as any humidity or rain in the air reeks havoc on the fondant, and makes it somewhat unstable. I was unable to have an air conditioned environment, so I experienced the fondant on the cake tearing, and the rose petals turing wet overnight before I put them on the cake. Fortunately, the sun came out for a period and they quickly dried, and I was able to get them on the cake without too much drama. I had one or two petals that cracked, so I had to glue them togather again with some egg white and prop them up until they dried once again.
Due to the tearing fondant for the main of the cake, I decided on going with a mummy-style wrapping effect of fondant strips around the cake, which turned out better than I expected in my depressed state of mind. You know that feeling when you envision something, and it doesn't turn out anything like you thought? Well, that was me, while it rained buckets and I struggled to cover the main of the cake. The wrapping effect did the trick though, and any unsightly bits were easily covered by ribbon and strewn petals. Happily, the cake made it to the engagement party in one piece! Ah, sometimes I wish I didn't live in a subtropical climate. Water and fondant are not friends. Anyway, I hope the pictures help if you're creating a cake like this. Sorry about the quality--now with my bigger camera and my sticky hands, amid concentrating on the cake, its no mean feat getting quality pictures. My apologies.

Rose Petal Engagement Cake


Rose Petal Engagement Cake

To begin with, cut out the rose petals from thinly rolled light pink fondant. (I used the supermarket brand Queen "White Icing". You can use any brand of fondant or gum paste if you prefer) I cut these out in four graduating sizes with cutters for individual petals. Then I placed them to dry in plastic trays in the shape I wanted them to be on the cake.


I made the centre piece of the rose first--this is the only part of the rose that is combined to create a unit of it's own. The other petals are left loose. When the petals had dried, I roughly arranged the loose ones around the rose centre to get an idea of how I wanted them set on the cake.


I used petal dust in pink and a small new eyeshadow brush to tint the edges of the rose petals and the centre of the main rose. This added definition, dimension and depth to the rose and made it look more realistic.


The cake itself was covered in flaws, so don't look too closely! Fortunately this style of flower arrangement on a cake is good if you have made mistakes, because you can cover them artistically with petals.


Sadly I couldn't wield the chunky camera and cake decorate at the same time so I missed out on capturing the building of the rose for you. Basically I positioned the main rose (the "centre" of the rose) close towards the bottom of the cake, and added the rose petals in around it, tucking in the pointy end of the petals beneath the centre rose. Some of these I fixed in place with a little buttercream icing. You may want to use some props to hold the petals in position while this "glue" dries (Don't give me away, but I used some toys--cleaned prior of course-to prop some of these petals in place overnight).


As you build further out from the centre of the rose, the loose petals do not have to be so closely inter-lapped with the others--you can even have some fly-away rose petals! It is an exploded rose after all. And yes--that's a wine in the background! I was under stress with the humidity foiling a smooth process.


Here you can see the petals are "tucked" in behind the main centre of the rose (I keep saying centre but it's anything but the centre. Hopefully you know what I mean!) I have seen this cake arranged backwards--starting with the back petals first and finishing with the centre of the rose...it's up to you.


The finished product. I had to take out a few petals and replace them as a few broke under the pressure (or maybe I made them too thin?) So be prepared, make a few extra spare petals in each size and don't worry too much. Here's a glass of wine on me!

Thursday, August 15, 2013

Christening Cake and a New Lick the Spooner

I don't usually like to spill too many household beans here on the blog. But we have some exciting news! And I have been rambling on for a long time about expecting a new little bubba, so here we go, the beans are being spilled.
It's a girl! And all that test tasting in the kitchen went towards creating a beautiful pudding, weighing in at 4.4kg! Don't ask.
Needless to say I can see my toes again and am enjoying not having heart burn....and loving fat, warm baby cuddles!

Cecelia at 5 days old--not looking so newborn!

We had our Cecelia Marie baptised one week after she was born, and I somehow still made a Christening cake.


I made most of the decorations in advance--well, the fiddly time consuming bits like the roses. All the icing work was done with store bought rolled fondant (Orchard brand White Icing) and I dabbled in a little draped icing work which I can see being highly addictive in the future. This draped icing was coloured with a little pink liquid food colouring (no need to buy the powdered stuff, and the liquid is less expensive).
I didn't have the confidence or patience at the time to mold the baby myself (remembering melting figures in the past turning into fat blobs), so I used one of my daughters little dolls to top the cake. Of course she wanted it off immediately. Even now as she stands by me looking at the picture, she wants it off.
Overall, it was a very easy christening cake to make and I feel most people would be able to put something like this together even without experience. Give it a go! You may surprise yourself. It's amazing what a little icing and some rolling can do.

One week old. One more person to Lick The Spoon!

Wednesday, December 5, 2012

Pastel Bird Cage Cake

I think I've lost my mojo. It sometimes happens when I get sick. Or burn something. Or a special cake melts due to the heat.
I'm pretty sure all those things happened to me in the last two weeks. My little daughter turned one, and I attempted to make her a pink and white birdcage cake, covered in pastel rolled fondant roses.
It turned out looking like the leaning tower of Pisa, after I made the mistake of icing the layers with buttercream icing.
In summer.
In Brisbane.
With weather forecasts of close to 40C.
We tried to salvage the cake by putting it in the aircon, but even still, the cake leaned and leaned  and slipped and slid until it cracked horizontally half way and the top looked like it would topple. Due to the leaning, the icing began to tear and the white chocolate used for the cage lines began to crack and bow.
Thanks to my husband, we saved the cake from completely falling into a heap. He came to the rescue just before it collapsed and propped it upright with a small cushion against the wall. Oh the things you have to do to save cake sometimes!
Despite all this, I think, before it leaned all the way over and cracked, it looked pretty in all its pastel glory. My little darling was wrapped in it.  Thank goodness for her one year old eyes overlooking the flaws. I couldn't wait for the party when I could finally let the darn thing collapse as it so desired.


To learn how to make your own rolled fondant roses, follow the tutorial here.

Monday, May 14, 2012

Giant Sugared Rose Petal Cake

When I think of all the things that got me interested in cooking, the first thing I think of is my mum. She claims to be a "basic" cook and doesn't think too much of her own meals, but she doesn't know her own worth or skill when it comes to the kitchen. She may not have had all the time in the world for fancy flourishes and trying new things constantly, but she is consistently great at what she does. And she was brave, letting a seven year old loose in the kitchen to cook from her head with all the ingredients she could wish for. Yes, that little child was me. I remember being so proud when my first creation came out of the oven. It was a spongy sort of cake compiled of lots of eggs and coloured sprinkles, baked in a slice pan. I believe it tasted solely of egg, and was probably sneaked into the bin after a few attempts to enjoy it, but I would never have known. It must have created an interest in me.
So here's one for the wonderful Mums in my life, for Mother's Day. I have been blessed with two: My mum Sue, and my mother in law Geraldine. (Now how many people can say they have a great mother in law?) They're the best mums a girl could have.


 I cheated a little with the cake making as I knew I wouldn't have the time to whip one up from scratch and decorate. So I used a packet butter cake recipe, coloured soft pink. I made it in a oven proof bowl to get a more domed shape, but the original cake was made in a regular spring-form cake tin, and looked pretty much the same. I liked the dome effect though, so if you have an oven proof bowl, try it! The measurements of this bowl were 10cm high, 18cm wide across the top lip. The finished cake is on a 25cm round cake stand.
It honestly took me about 4-5 hours to complete this cake with frequent interruptions in between. Make sure you have a child free morning or afternoon when you attempt it. Also, just a note about feeling discouraged. The cake doesn't look like a rose until the very end, so keep working on those rows and rows of petals. The final touches are so exciting and satisfying!
What does it taste like? Heaven. Imagine subtle hints of Turkish delight in every sugar coated, crunchy bite. Imagine rose water. They're surprisingly delicious, and the sugared petals also make pretty additions to cupcakes and other desserts, placed individually as decoration. Roses are edible of course, but be sure that your roses have not been sprayed with pesticides. Home grown roses are the best to use if you are unsure.


A special thanks to my husband, who brought me home roses and saw me tear the heads off and dismantle them with great gusto. You're a true gem.
GIANT SUGAR ROSE PETAL CAKE

1 bunch of pink roses (about 10 heads)
1 egg white
2 cups caster sugar
1 butter cake packet mix
1 tsp. pink food colouring
2 cups icing sugar
1/8-1/4 cup milk
1 tbsp butter or margarine, softened

Preheat your oven a advised on the cake box. Grease and line your cake tin (20x20cm) or oven proof bowl. Make the cake batter as directed in your recipe, or on the cake packet instructions. Add the pink dye to the batter and lightly swirl through.Scoop batter into the prepared tin.
Cook as directed. Cool on a wire rack before commencing the decorating.
Place the egg white in a small bowl and lightly whisk to break up the albumen.
Place the caster sugar in a shallow dish. Line several trays with paper toweling.
Very gently remove the stems from your roses, so that you have just the heads. You can either take the rose petals off individually or pierce the very bottom of the rose with your nail where it joins to the receptacle, removing all the petals at once. Discard any blemished, broken or bruised petals. The more open the rose, the better, as the further in towards the centre of the rose, the more curled and small the petals become.
With a pastry brush, smooth egg white over the whole petal, then coat in caster sugar. Lay the sugared petal on the paper toweling and repeat with the remaining rose petals. Any petals which are too curled at the edges, lay flat on their faces so that the curved edges are pushed flatter. A little curve is nice and gives definition, but too much can ruin the way the petals sit together on the cake. Leave all the petals to dry. (Depending upon weather conditions such as humidity etc, petals may vary in drying time. I set my trays on the stove with a little heat in the oven and they dried within the hour.)
Place the icing sugar in a medium bowl with the butter or margarine. Add enough milk to get a good icing consistency (the consistency of lightly whipped cream). Smooth carefully over the cake, creating as smooth a surface as possible.
Working from the bottom edge upwards, begin to place the petals on the cake, slightly overlapping each petal with the one besides it. Keep working your way around and around the cake in this manner. As you get towards the top of the cake, the petals will naturally start to stand upright and begin to form the shape of the middle. Work your way into the centre, continuing the previously mentioned overlapping. Place a single, more curled sugared rose petal in the centre to finish off the cake.


Tuesday, March 20, 2012

Chocolate Collars and Engagement Cakes

Sometimes you learn valuable lessons by making mistakes. Hopefully the mistake hits hard enough that you remember the lesson and don't repeat the error, but sometimes you still do.
Sometimes you can even pass on the lesson to other people, and this is precisely the intention of this blog entry.
Some beautiful friends of mine had their engagement party on the weekend. They are the most adorable couple and I wanted to make a cake that reflected the beauty of their relationship. I envisioned a deliciously moist orange an almond cake of three graduating tiers, surrounded in smooth walls of white chocolate, decorated with sugar encrusted pink rose petals, finished off with a bouquet of fresh rose buds on the final layer. The challenge for me was going to be the white chocolate collars surrounding each layer, which I had never attempted before, and I did my homework and it didn't seem at all complicated.
Basically you take a piece of firm but flexible plastic sheeting, cut it to the size of the circumference, paint it in an even, thick layer of melted chocolate. Then you wait until it is beginning to set, then apply it to the side of the cake and peel away the plastic when it has dried. Sounds easy, doesn't it? I made lots of mistakes and learned so much about chocolate by attempting this seemingly-easy task.
First of all it was 30C plus sort of weather and extremely humid. I live in a sub-tropical climate and we all know that moisture of any sort is chocolate's worst enemy. Well that combined with the heat was a recipe for disaster, and I ended up trying to construct the cake inside the refrigerator!
I learned a lot about what type of chocolate to use too. Who ever knew chocolate was so complex? I've always just melted it in the microwave and used it, but I fear there's a whole lot more to it than that.
Tempering. Real chocolate vs compound chocolate.
Well here's a tip for those who aren't pros at chocolate decorating--go for compound chocolate. Yes it may not taste as rich and delicious as real chocolate but it will at least set, without a doubt, and you don't have to worry about tempering it. Just evenly melt it and go for it! I wish I had known that before I started. 1 kg of chocolate later, and the cake was looking *presentable*.


And it tasted delicious! But had to be cut very  quickly as the sides started melting off again! so if you decide to try the chocolate collars, here's what you have to know:

Use compound chocolate to save you from failure
Make sure you don't make it in 30C weather!
Don't expect to get it perfect first time around.


Tuesday, March 13, 2012

How To Make A Cupcake Bouquet

When Valentine's Day came around this year, I decided to do something my husband wouldn't expect. I wanted to do something romantic and surprising, so I had a look around at florists for one that could deliver a chocolate bouquet to his work.
I found a fabulous one--40 gold Ferrero Rocher's on stems in a fancy box, and they looked like beautiful blooms! So I ordered them, and felt excited the whole of Valentine's day thinking of an embarrassing delivery being made to Luke's office.
My husband emailed me throughout the day and there was no word of anything arriving, and I didn't want to ask for fear of ruining the surprise.
He came home about an hour earlier than usual, and I greeted him at the door as always. "So, did anything interesting happen at work today?" I asked.
The answer was "No, nothing much!"
"No Valentine's day drama?"
"No" he smiled. "Why do you ask?" he then added suspiciously. "did you have something delivered?!"
"No, no what a silly idea" I laughed.
My heart sank to my feet. My attempt to be wonderfully romantic had again failed. *sigh*
"You did order something didn't you!" he asked, colour coming into his cheeks.
I guess my laugh gave it all away and I disappeared out the door with a basket of washing before he could ask me again, and before I told him.
The next day the secretary at my husband's work met him in the elevator. She apologetically told him that a bouquet had arrived for him about half an hour after he left work, and she felt terrible. Ah well...all's well that ends well. At least he got it in the end.
But it got me thinking. How easy would it be to make something like a chocolate bouquet yourself? (for about quarter of the price)
Then when I became a very proud aunty again (for the 9th time) I decided not to take a bunch of flowers...but a bunch of cupcakes. It was surprisingly easy, unique and beautiful. And a little more enjoyable than real blooms--for the stomach anyway!


HOW TO MAKE A CUPCAKE BOUQUET

What you will need to get amazing:

Cardboard
Scizzors
a stapler
large rubber band
coloured tissue paper
craft glue
a gift box
ribbon
7 disposable plastic cups
cupcake liners that fit in the top of the cups

1. Take seven disposable plastic cups and arrange as follows: one in the middle and six surrounding the sentre cup. It looks a little like a flower. Staple the cups together so they hold in this position. Some tearing of the plastic may occur, but that's okay as long as they're all holding together.

2. Measure the circumference of the cup collection. Cut out a circle in the cardboard of that size so that the cups sit neatly in the middle without too much of a rim around them.

3. Using craft glue, adhere the cups to the cardboard. Leave to dry.

4. Take the coloured tissue paper and cut as desired. Secrure it around the base of the cups with a rubber band.


5. Push the cup collection into the gift box (the gift box is optional, you could just tie some ribbon around the outside of the tissue paper if desired)

6. Add another layer of wrapping paper over the gift box for added dimension and colour and tie with a bow.

7. Now you are ready to fill your bouquet case! Make your favourite cupcakes and swirl them with soft butter cream icing in the design of a rose. For an example recipe, see below under "NOTES".


NOTES: The cupcake recipe I used was for these delicious Mini Chocolate Fudge Cupcakes in a more regular size. The icing was vanilla buttercream with a touch of pink food colouring.
Be sure to choose cupcake liners that will fit into the cups properly. I used a size of cup slightly smaller than your standard disposable cup, and the liner that fitted it was slightly smaller than the standard also. You can find all different sizes in your local super marker or at a party supplier.

Tuesday, March 6, 2012

Sugared Rose Petals

"I'd rather have roses on my table than diamonds 'round my neck."
~Emma Goldman

Roses are famed to be the most beautiful flowers in the world, and their dew scattered petals often noted in both poem and prose as one of the most incredible visions to behold. Imagine if you could have this beauty on a cake? You can, and it's simple and elegant and defiantly a cheap yet luxe addition to any edible. (you get the roses AND the diamonds in one go!)
Not only do these cake toppers look extreamly pretty, they taste delicious too. The softness of the petal combined with a delicate rosewater flavour that is experienced, is divine.
You can use the same method to coat other flowers for a pretty effect, but be sure that the flowers are edible before you begin. Some edible flowers are:

Citrus blossoms
Hibiscus
Nasturtium
Jasmine
Pansies
Violets

Just to name a few.
These would look so pretty placed individually on the top of cupcakes...it may even make a pretty Valentine's Day gift for your beloved. In fact, who needs Valentine's day as an excuse to bake for the one you love? Give them roses any day of the year!


SUGARED ROSE PETALS

1 egg white
rose petals
a pastry brush
1/2 cup caster sugar (or super fine sugar)


Hold the rose petal at the end that was previously joined to the stem. Finely brush both sides with egg white. Do not coat heavily, as this becomes problematic and will cause shedding.
Place the sugar in a small bowl. Gently dip the coated petal into the sugar until covered. You may like to pour some of the sugar onto the petal with your fingers for an even coating. Gently place the sugared petal on some baking paper to dry, or in an empty egg carton to shape the petals a little more. Leave for 3 hours or so to dry before placing on cakes, cupcakes or desserts.


If the petals are coated too heavily in egg white, the sugar begins to clump, as above (or worse, this is not a bad case) and may fall off the petal.

"It is at the edge of the petal that love waits."
~William Carlos Williams

Thursday, March 1, 2012

Easy Sponge Cakes with Fondant Roses

Since the birth of my little daughter, it has become increasingly difficult to find the time to get creative in the kitchen. I thought it was difficult before, with a toddler helping me out (hanging off my skirt and licking the spoon mainly), but it is almost impossible with a newborn wearing the apron as well!
So I have been on the hunt for quick recipes, simple elegance without the fuss and time consuming detail. I love detail, I love having the time to add all the extras and get inventive, but being a mum of two babies makes that near impossible. So any mums in my boat, here's a winner.
These little rose sponge cupcakes are just gorgeous, drizzled in a little pink icing, topped with a pre-made fondant rose. If you want to know how to make your own fondant roses, they're quite simple, but you may want to make them when you have some time on your hands, when babies are solidly asleep and no one is around to need you, but the sugar in front of you. The good news is, if you don't have the time to model fondant flowers, you can readily purchase them at your local supermarket in the cooking section.
They make an elegant afternoon tea cake, these little sponges, but if you don't have any time at all, you can make it into a single cake (see notes below). Wedged with jam and cream in the middle and a little icing sugar sprinkled over the top, you have a sponge cake whipped up in under and hour (and 80% of that is cooking time!) Honestly, this only takes 5 minutes to prepare, then into the oven, cooling time and 5 minutes to whip up some cream for the centre. Easy peasy! and did I mention super soft and delicious?


EASY SPONGE CAKES WITH ROLLED FONDANT ROSES (adapted from Better Homes and Gardens, April 2010)

 1 cup self raising flour
1 tsp cornflour
1 cup caster sugar
3 tbsp milk
2 tbsp melted butter
3x 60g eggs
finely grated zest of 1/2 lemon
1 tsp. baking powder
1 cup icing sugar
drop of red food colouring

Preheat the oven to 190C.
Grease and line a 12 hole cupcake pan with butter and paper cases or baking paper. Combine the flour and cornflour in a large bowl, then add sugar, milk, butter, eggs and zest and beat with teh electric mixer on high. Beat until light and fluffy, approximately 3 minutes. Fold the baking powder into this mixture.
Spoon the mixture into the prepared muffin tin amongst the 12 holes. Bake for 18-20 minutes until golden in colour and cooked through when tested with a skewer.
Leave to cool in pan for 5 minutes before removing to complete the cooling process on a wire rack.
To make a thin icing, place the icing in a medium sized bowl. Add water until you achieve a desired consistency, then add the food colouring. Combine well until the colour is incorporated. Drizzle over cooled cupcakes and decorate with a rolled fondant rose.
Learn how to make Rolled Fondant Roses HERE.

Makes 12

NOTES: these cakes are best eaten on the day they are made, for maximum softness.
To make a whole sponge instead of 12 mini sponges, divide the batter between two greased and lined 20cm round tins. Bake at 190C for 18-20 minutes until golden and cooked when tested with a skewer. Cool on wire racks 5 minutes after removal from the oven, and wedge together with jam and whipped cream. To decorate the top, sprinkle a little icing sugar over the surface, add some berries to the centre if desired and serve.

Saturday, February 18, 2012

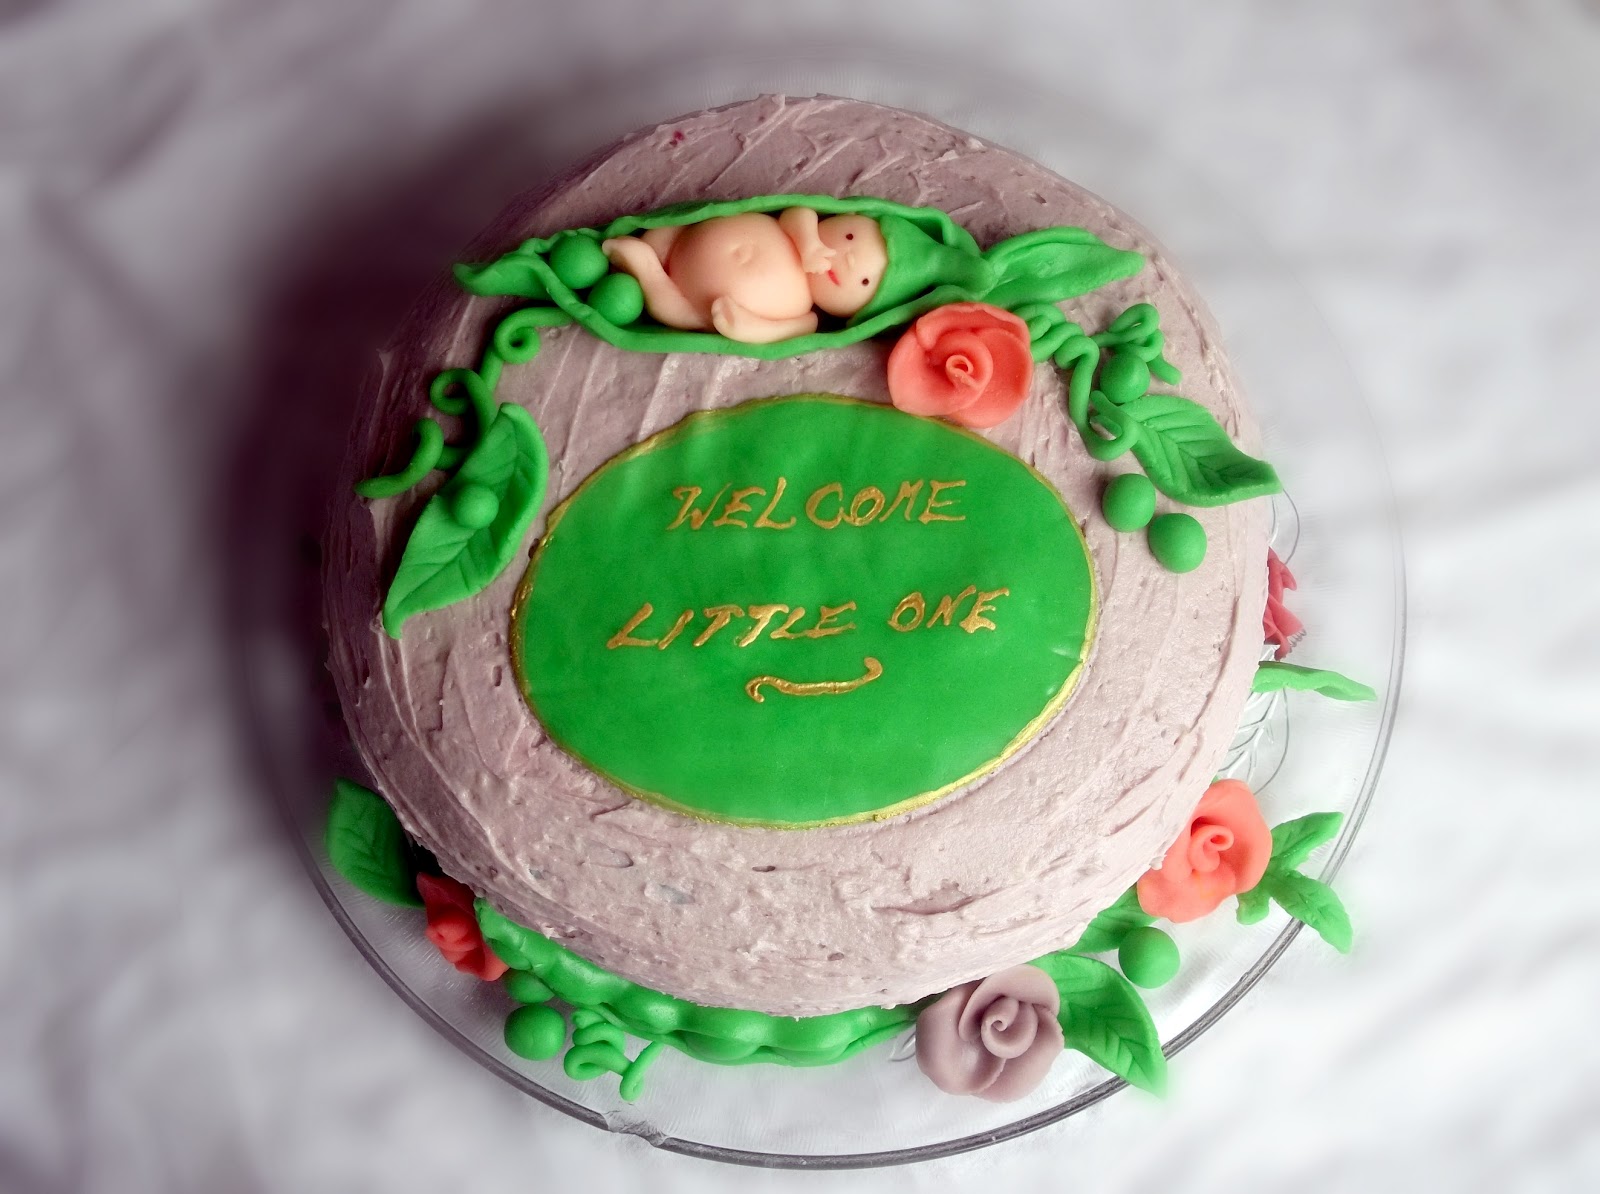
Sweetpea Baby Shower Cake


Recently, my blog has become a dangerous vision in this house. I can't open the page without causing hysterics. No, its not my husband.
Its my son, the little man of the house, who has gained quite a sweet tooth.
His favourite thing is "cack" and he calls for it as soon as he sees me open my blog. He whines continuously that he wants some and then he goes and pulls out the cookbooks and magazines and pages through, virtually drooling over the pictures he sees before him.
What monster have I made! The cookie monster, mini sized and eager to stuff his sweet little mouth with as much as he can get.


Here he is, a vision in cake...I mean, a vision in nothing, armed with two spoons, eating the leftovers of a baby shower cake.
Which is really the reason for this post. It's nothing fancy, just a little project that kept me busy before my sister-in-law's baby shower. I always have grand plans, that rapidly down size themselves due to lack of time and the sweet demands of motherhood.


Flowers and other decorations were made using rolled fondant, was a lot of fun but I wish I had more time to fine tune the modeling. Here's how to make your own rolled fondant. The plaque was a little experiment of mine that didn't dry in time, hence it rippled on the cake. The writing was made using edible gold dust mixed with a little vodka.

Tuesday, January 24, 2012

How to Make Basic Rolled Fondant or Gumpaste Roses

My sister-in-law is expecting her first baby in a few months, and the occasion called for a baby shower and I put my hand up with glee. I've got a newborn myself and found that I left everything to the last moment in my disorganization. Running out of time, I set about designing a cake and found that I lacked some of the instruments necessary to go through with the project.
Not knowing the sex of the baby, I decided to go with a Sweetpea Baby Theme with a rolled fondant garden of roses, beans and peas and some other foliage with a wee baby among it all. I had no idea how I was going to make leaves and roses without any tools used to create those perfect petals and serrated edges. So I started researching and found a great tutorial on youtube. It's a very simple process anyone can use, even for those not so artistic and it doesn't require any cutting tools for your fondant. They are basic fondant roses and can be added to if you have the time and patience.
Enjoy the tutorial!


HOW TO MAKE BASIC ROLLED FONDANT OR GUMPASTE  ROSES

To make your own fondant at home, here is a cheaper and more fun alternative to store bought rolled fondant.You can also use gumpaste.

You will need:
Any amount of rolled fondant or gumpaste
A clear, plastic folder pocket

1. Take the plastic pocket and cut off the bottom and the side that usually clips into your folder. You now have a plastic sheet that can open and close as a book would.

2. Take a portion of fondant and roll it into a smooth sausage. Cut four equal portions from the sausage. You want them to be approximately marble sized when rolled into a ball.

3.Roll three of these portions into smooth balls, and the forth into an elongated ball, a bit more oval than the others.

4. Place each of the portions along side each other inside the plastic sheet. Gently smooth each ball with your pointer so that it flattens. Smooth down one side of the ball so that it is thinner than the other side. The end closest to you should be thick, sloping down gradually to be thinner. Ensure the balls are all even in size and thickness, and that the balls keep their aerial view shape.


 5. Gently remove the oblong "ball" from the plastic. Roll the thin end of it first, between your fingers, rolling towards the thick end so that it forms a spiral. This is the centre of the rose.


6. Remove the first ball from the plastic and position it flush against the centre bud, thin side up. Place it so that only the centre of the petal is stuck to the  bud, the sides free. The top of the petal should be at the same height as the bud.

7. Take the second petal and slip it in besides the first, so that the first petal overlaps it by half.  Take the third petal and slip it in half way under the second petal. Gently fold the end of the last petal around to meet the first.


 8. You now have your basic rose. Cut the bottom half off with a knife, as this is quite bulky.
You may also like to shape the petals a little with your fingers before setting is aside to dry.


The baby drying. I use an empty chocolate tray to dry the roses in. They dried in 2 days, but this depends upon the weather.

Baby's Sweetpea Cake