Thursday, June 2, 2011

Chunky Pesto and Cashew Damper Scrolls

My husband and I recently went out for dinner at a lovely Italian restaurant, "Mariosarti". I've missed Italian food, as my hometown Melbourne is packed with Italian dining spots and I had become accustomed to that cuisine...Brisbane seems to have a lot of Thai restaurants but the Italian eateries seem few and far between.
Besides being a wonderful night, it was also slightly amusing. The restaurant was cozy, and full of laughing couples and tables of friends and people having a good time together. Besides us sat a couple on what I presume was a date. Amongst all the mirth from other diners I could hear the man sitting next to me talking in the most serious tone. "I can tell good quality herbs in a dish--I'm a food conosure. I really know food...like, really know food. I can taste quality." On and on he went into the history of this part of his meal and that, raving, and the girl sat and said nothing. I wonder if she was wondering when she would be able to go home? It made me laugh. The woman excused herself and went to powder her nose. The waiter came and asked the man if the meal was okay, and ended up standing there for a good ten minutes listening to the customer jabber about fine dining and the quality of the meal and the perfection of the cooking.
If I ever become so tedious when speaking of food on this blog, shoot me!
I love food, and he bored me to tears, and I only caught snippets of his spiels. I felt for his poor date.
Anyhow, feeling the need for another taste of something Italianesque, enter pizza scrolls. These are super yummy, especially when served straight from the oven and are very easy to make. Except, I made the error of not using enough flour when I rolled the dough, so it was a near fatality. They came out of the oven looking delicious, so all's well that ends well, as they say.


CHUNKY PESTO AND CASHEW DAMPER SCROLLS (adapted from Taste.com.au) 


3 cups self-raising flour
80g butter, chopped
Salt & freshly ground black pepper
1 1/2 cups buttermilk
Buttermilk, extra, to brush
150g container chunky basil pesto dip with cashew nuts (we used Black Swan brand)
1/4 cup finely sliced sun dried tomatoes
2 rashers bacon, fat removed, finely sliced
1 cup cheese, grated
1/4 cup Parmesan cheese


Preheat oven to 200°C. Line a baking tray with non-stick baking paper. Sift the flour into a large bowl. Use your fingertips to rub the butter into the flour until it resembles fine breadcrumbs. Season with salt and pepper. Make a well in the centre and pour in the buttermilk.
Use a round-bladed knife in a cutting motion to mix until evenly incorporated and the mixture begins to hold together. (Do not overmix. The dough should be soft but not sticky.) Turn the dough onto a well floured surface and gently knead until just smooth.
Use a lightly floured rolling pin to roll out the dough to a 30 x 40cm rectangle, about 1cm-thick. Spread the pesto evenly over the dough and sprinkle with Parmesan, sun dried tomatoes and bacon. Sprinkle a little grated cheese over the top.
Starting from a long side, roll up firmly to form a log. Brush the edge with a little extra buttermilk and press down firmly to seal. Cut log crossways into 16 equal portions, about 2cm thick. Place the scrolls on prepared tray. Sprinkle the tops with grated cheese. Bake in oven for 20 minutes or until golden brown and just cooked through. Set aside for 10 minutes to cool slightly. Serve warm or at room temperature.

 NOTES: the scrolls look and taste wonderful with some tomato pasta sauce spread on top before the grated cheese is placed onto them. You may also substitute the bacon for ham or salami, and the pesto dip for any other dip or spread. Also if the scrolls are done but the tops aren't golden, you can pop them under the grill on high for a minute or so to brown them.


With a smear of tomato under the cheese

Wednesday, June 1, 2011

Farm Animal Rainbow Birthday Cake

Over the weekend we celebrated my son's first birthday with some of the family. Of course, over all the presents, Benjamin was more interested in the balloons and wrapping paper than anything else, and I predicted that. I decided to give him a birthday cake he couldn't ignore. Ben doesn't speak yet, but he can make farm animal sounds and loves looking through picture books and pointing out the cows and pigs and dogs and so forth. So a farm animal cake it was to be--even though I swore never again to dabble in icing modeling after the tremendous effort of the first--and what I thought would be the last--fancy cake I made. Anyway I did it again, just because I saw someone else had one it and it looked so cute. Well I learnt from last time where none of the icing dried in time for the party and made the figurines 5 days in advance. It was enjoyable but time consuming and I was glad when it was finished! I cut a few corners and was glad of it. The rainbow buttercake was made up of two packet mix cakes I divided into four and coloured with food dye. It made the cooking process quick and easy, giving more time for the decorating. I also refrained from icing the whole cake with fondant and went for buttercream icing instead--saved some time and stress too. And Benjamin loved the cake! He got very excited about the animals and almost took the cows head off before the party...and after the party, he bit the head off the dog and ate it. Yuck!


ROLLED FONDANT

1 tablespoon unflavored gelatin
1/4 cup cold water
1/2 cup glucose (can substitute light corn syrup)
1 tablespoon glycerin 
1 tablespoons butter
2 pound bag of icing sugar, sifted.
1 teaspoon flavoring
  
Pour water in a small saucepan. Shower the gelatin over the cold water so that the gelatin is evenly distributed.  Let gelatin soften in the water for five minutes.
Sift the icing sugar into a large bowl. When all sugar is sifted, make a well in the center of the bowl. Heat the water and gelatin over gentle heat, stirring, until the gelatin is dissolved. Mix in glucose (or corn syrup) and glycerin. Add the butter and mix until melted. Remove from heat and stir in desired flavouring. I used vanilla essence. 
Pour wet ingredients into the well of powdered sugar. Mix with a wooden spoon until cool enough to handle. 
Then use a lightly greased hand to knead the ingredients together. Knead in the bowl until most of the icing sugar is incorporated. 
Turn out on a lightly greased bench and knead until the fondant is smooth and pliable. If it feels sticky, add additional icing sugar. If it feels too dry and doesn't feel elastic, work in a small bit of butter. 
Shape into a thick disk shape and cover with a thin coating of butter. Wrap well in several layers of plastic wrap, and place in a large ziplock bag. The fondant can be used immediately, but works much better if its left to cure for at least 12 hours. The fondant will store at room temperature this way for three months, and can be frozen for up to 12 months. Add food colouring as desired.


The demolition of la cake.

Rainbows inside!


Thursday, May 26, 2011

Marshmallow Lamingtons

Entertaining doesn't have to be difficult or stressful, or even time consuming. Of course you can always dash down to the store for a mud cake and lamingtons for your morning tea with the girls...or even better, whip something up in the nick of time that is even tastier and more unique. I think the best things in life are always the simple things, the small things. After all, when you think about what made your day, its probably your baby grinning cheekily at you over that caramelly gateaux oozing with chocolate and cream and all sorts of yummy gore.
Anyway, too often Mums and housewives like us look for some way to make things quicker, easier and as fuss free as possible. There's never enough time when you're a housewife, especially with kids, and a simple, effective and delicious recipe is always welcomed. And yes, I'd say its foolproof too. Who doesn't want that?
We called them Snowballs when we were kids, but back then they where much larger...these little guys are easier on the stomach and the hips, and you only need three ingredients. They can be made for an elegant afternoon tea with the mother in law, or a kids birthday party in bright coloured truffle cases and will go down just as well with both crowds. I assure you.


MARSHMALLOW LAMINGTONS

1/2 bag marshmallows
Approximately 350g cooking chocolate
1 cup shredded coconut

Melt the chocolate in a small bowl. Fill another small bowl with the coconut. Using a fork, dip each marshmallow into the chocolate and proceed to roll in the coconut until covered using another fork. Place the marshmallow on some greaseproof paper to dry or straight into a paper truffle case. Voila!


Sunday, May 22, 2011

Chocolate Ripple Cake

Some things are better left unmentioned. When I told my husband that the chocolate ripple cake I made for my birthday was the most unhealthy thing I would ever let myself eat he looked at me strangely. "After all," I said "Its just cookies and cream". He couldn't believe it, and then I added "and a bit of fruit juice".
"I'm going to vomit!" he said. "Fruit juice??"
So I understand that the first image that comes to mind is curdled cream and orange juice, but this cake is far from revolting. And far from being able to curdle. Its always been a family favourite for us and is such a simple affair...yet so rich and amazing, you wouldn't expect it to only have three ingredients and take just half an hour to assemble. Its the type of recipe I love best...far from ordinary, delicious, quick, simple and elegant. And practically foolproof.
And, after a large piece of this cake and after that terrible image of cream and fruit juice, my husband had another piece because of its deliciousness. So fear not his comment! It was retracted most hastily! But...if it still appears off putting, you could easily make a boozy version with tia maria or baileys in substitution for the juice...it would be amazing!


CHOCOLATE RIPPLE CAKE

1 packet chocolate ripple biscuits
500 ml cream, whipped
1 cup fruit juice
chocolate shavings to decorate (optional)

Whip cream until thick. Pour juice into a small bowl along side the serving plate chosen for the cake. Starting with one biscuit at a time, dip quickly into the juice, lather one side with cream and stand upright on the plate, immediately wedging another soaked biscuit along side it keep its position. Work in such fashion until you have built a ring of biscuits wedged together with cream. Fill the centre with remaining biscuits and cream. Use the remaining cream to lather the outside of the cake until all biscuit is covered. Grate chocolate over the exterior if desired. Cover in cling wrap and refrigerate at least 4 hours before serving. This is best served the day after making.
Serves 8-10


Wednesday, May 18, 2011

Hot Pizza Damper...Just out of the oven...

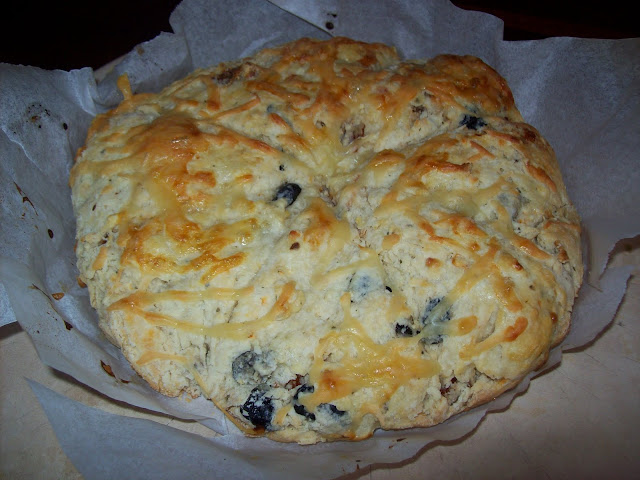
I know that a lot of  my readers are heading into summer, but here in Australia we're getting into that season where hot soups, puddings and hearty veggie casseroles are to be desired on those cooling nights that are fast on our heels. Our faux flame heater is out and keeping our toes toasty but it helps when the bellies are warm to boot...and that's where this recipe comes in. I made this pizza damper as an accompaniment to the roast pumpkin soup featured in my last blog, and they went perfectly together. We had my father in law over for dinner and he promptly asked where the pizza damper came from, because he thought it had been bought.
Yes it looks impressive, so if you're ever having guests over for dinner, I recommend you make it as a table centrepeice. It smells divine, it looks divine and its absolutely delicious. This one came straight out of the oven onto the table...nothing like bread fresh out of the oven! There's really nothing to this recipe, the buttermilk does all the hard work. It requires no bread making skills at all. I've never used buttermilk until now, and I am absolutely impressed by how delicious it makes scones, pancakes and damper. Again, this was one thing that only lasted a few minutes on the table...so make a couple! Everyone will want seconds. Even the kids who hate tomato and olives ate this baby with relish. Now that's saying something!


PIZZA DAMPER (adapted from taste.com.au)

1/4 cup sun dried tomatoes, chopped
1/4 cup  black olives, finely chopped (we used Spanish olives)
1 tsp. dried parsley
1/3 cup grated cheese
1/4 grated cheese, extra
2 cups self raising flour
1 tbs sugar
pinch salt
60g butter, chilled, diced
3/4 cup buttermilk

Preheat oven to 220°C/200°C fan-forced. Line a round baking tray with baking paper. Position oven rack in the top half of oven.
Sift flour, sugar and salt into a bowl. Add butter. Using fingertips, rub butter into flour mixture until mixture resembles fine breadcrumbs. Add the olives, parsley, 1/3 cup cheese and tomatoes. Stir until well combined, and then make a well in the centre of the mixture. Add buttermilk. Using a flat-bladed knife, stir until a sticky dough forms. Turn out onto a lightly floured surface. Knead gently until just smooth. Form into a flat disc big enough to fit inside the pan (20cm base). Cut round into 8 wedges (don't cut all the way through). Brush the top with a little buttermilk, and sprinkle the extra cheese on the top of the damper. Bake for 20 to 25 minutes or until hollow when tapped on top or turns golden. Serve hot.

Sunday, May 15, 2011

Winter Warmers--Roast Pumpkin Soup

Maggie Beer says its all the little details that count when it comes to making a great soup. Apparently she recently gave away her secret Pumpkin Soup recipe, but I like recipes that are simple and made from everyday ingredients. I mean, how many people have verjuice and marscapone cheese just hanging around the kitchen? Sounds yummy though.
Well I have a pretty fabulous pumpkin soup recipe too, excuse me blowing my horn a bit. Okay, let me blow, after all, I am revealing another one of my "not-so-secret-now" recipes, and the occasion is my birthday. Well, we're a few days off, but I'm posting it in celebration. If you want to know how young I'm going to be, it's not so secret that I'm turning 21 again. 21 is such a good age to be.
This soup is made from just a few main ingredients and herbs, and is so satisfying on one of those chilly nights we've been having here in Australia recently. Its thick and creamy and so rich in all its pumpkin-y goodness. Why is it my "secret" recipe? Well, lets just say people came from all around just to eat this soup when I made it at Marmalade Deli where I used to work. Its liquid gold. Hoot Hoot!
Some people ask what pumpkin is best to use and I personally like the butternut best--it has a silkier texture and never fails to taste delicious. But the success of this recipe is all in the roasting of the pumpkin. It's a little more time consuming but well worth it. I have cut corners with this recipe before and it just doesn't have the same pizazz. The pumpkin needs to be roasted in strips for that extra flavour.


MY SECRET ROAST PUMPKIN SOUP

1 Butternut pumpkin, cut into thin strips
1/2 cup cream
2-3 cups milk
1-2 tsp. salt
pinch pepper
approx 2 tbs mixed dried herbs (I used a pinch each of cinnamon, oregano, parsley, dried onion flakes, basil. lemon pepper etc)

Cut the pumpkin into this strips. Place under a grill or in a sandwich press until the tops and bottoms are brown or even crispier. Place roasted pumpkin in a blender and add cream, salt and other spices. Begin to process, adding milk as you go until you reach the desired texture and thickness. Add more salt and herbs to taste if desired. Place in a large saucepan and reheat before serving. Serve with a dollop of sour cream if desired. Fresh chives go down a treat as well!

Serves 4-6


                                              My son really rocks the pumpkin mustache!

Tuesday, May 10, 2011

Domestic Goddess Wannabe

 Funnily enough, my darling husband bought me a coffee mug for Mother's Day that says "Domestic Goddess" on the side. What a darling for thinking that of me! I tell him its far from the truth, but as usual when I protest to something nice, he says "I don't know what you're talking about!" Anyway, it made me think of something a few people have asked recently and I want to set it right with the world of blog readers. "Do you ever cook anything that isn't amazing?" I have been asked.
ARE YOU INSANE!?
YES! I certainly do cook some disasters, I just don't publish them, or I try and hide them in the stomach of my husband before anyone else can view the mess. Things flop for me quite frequently (Domestic Goddess indeed!) My husband doesn't mind if the meringue on my last pie was more like marshmallow than crispy melt-in-your-mouth goodness, but to me its a disappointment. Ever wondered why I added meringue swirls and lemon curd to the last pie that was seen on this page? It wasn't crispy and I needed to add crisp to that flopped meringue! So nobody is allowed to think I'm any sort of Domestic Goddess (but my husband of course) because it makes me feel like I have to be perfect and I cant be without more practice.  Of course its what I aspire to, but I definitely have not made it there yet.
Meringue, by the way, is one of my favourite sweet things and it also happens to be one of those that leaves me anxious that it will fail. Sometimes it simply refuses to crisp up and flops into a gooey, caramely heap. Still tastes amazing, but probably cant be considered meringue anymore. (although my darling brother in law says he prefers it this way) Anyway, when I made these lemon mini meringue tarts, I was determined not to have a failure on my hands. So I combined three successful recipes that I knew were brilliant and we had a lovely crisp topped meringue that melted in your mouth, zesty, gooey lemon curd and perfect pastry cases....mmmmmmh!  I think the pictures say it all. Needless to say, they certainly did not last long! Enough of the citrus recipes already!


MINI LEMON MERINGUE TARTS

PASTRY CASES:

1 1/2 cup plain flour
2 tbs icing sugar
125g butter, chilled, cubed
1 egg yolk
2 tbs water, chilled

Place flour, icing sugar and butter in bowl of a food processor. Process until mixture resembles fine breadcrumbs. Whisk together egg yolk and water. With motor running, add egg yolk mixture and process until pastry just comes together. Transfer pastry to a lightly floured surface and bring together with your hands. Lightly knead until just smooth. Shape into a disc, wrap in plastic wrap and place in the fridge to rest for 20 minutes.
Use a lightly floured rolling pin to roll out pastry on a lightly floured surface until desired thickness. Using a round cutter, cut out 24 circles and place in mini muffin tin. You may trim any excess, but the pastry shells do tend to shrink a little while cooking. Place in freezer for 30 minutes. Preheat oven to 190°C. Place pastry case on baking tray and bake for 10-12 minutes. Remove and leave to cool in the tin.

BEST LEMON CURD:

(This recipe makes twice as much curd as is needed to fill the pastry shells. However, it is difficult to halve the recipe due to it requiring three egg yolks. But if you're like me, you'll use the rest on toast, croissants and through other desserts! YUM!)

1 cup caster sugar
1/2 cup cornflour
1/2 cup (125ml) lemon juice
1 1/4 cups water
2 tsp finely grated lemon rind
3 egg yolks
60g butter or margarine

Combine the sugar and cornflour in a medium saucepan. Gradually add the lemon juice and water while stirring continuously until mixture is smooth. Place saucepan over medium heat and cook, stirring, for 3-4 minutes or until mixture boils and thickens. Reduce heat to low and cook, stirring, for 30 seconds. Remove from heat. Add the lemon rind, egg yolks and butter. Continue stirring until the butter has melted and mixture is well combined. Remove from heat and set aside to cool. 

BEST MERINGUE:

1/2 cup caster sugar
2 egg whites

In a clean, dry bowl, beat the egg whites until soft peaks form. Continue beating, adding a tablespoon of sugar at a time, until the sugar has dissolved and the meringue forms stiff, glossy peaks.

ASSEMBLY:

Preheat the oven to 150C. Spoon lemon curd into the pastry shells that are still sitting in the tins, filling them to the rim of each shell. Fit a piping bag with a large star nozzle, and fill with the meringue mixture. Pipe swirls on top of the lemon curd, making sure you pipe to the edges of the pastry cases. When complete, place in the oven and cook for 20 minutes. Revolve the tray and cook for another 10 minutes or so, until the meringue feels hard to tap and begins to turn golden. Remove, cool and devour!


one day...

Sunday, May 8, 2011

Lemon Lime Meringue Pie

So a few days back while plotting out what delicious morsel I was going to make for Mother's Day, I wondered--how many of you made the World's Best Scrambled Eggs, and why aren't there any photos being posted of dazzling engagement rings? Goodness. Did no one get a proposal after making that creamy, amazingly moreish breakfast for their boyfriends? I am thinking I might have to make a video so you can see my technique...its all in the technique! A bit like making choux pastry really--all in the timing and the hands. Sigh. I was expecting gushing stories and wedding invitations coming my way.
Anyway. I just wanted to say a word about Mums, seeing as I saw a recent poll on facebook about Mother's Day and it seems--No one makes much of an effort! The largest percentage of mothers said its "a day like any other" in their household and I think its a shame. Come on, those women carried you for nine months (and you lived off her like a parasite), went through numerous hours of painful labour to squeeze you out, and then nourished you for years, looked after you, was on call 24/7, kissed all those booboos, loves you beyond any other--cant you bake her a cake? Make her scrambled eggs in bed? Do the dishes at least? I hope every Mum got pampered!!
Okay, end of rant. This was my first Mother's Day and being new to the whole mum thing, I feel sensitive about this. Something should be done!
By the way, my mum is an absolute legend and an inspiration to me in every possible way.

Mum--A domestic goddess if there ever was one.

She never complained about anything but her own cooking, and we thankless children didn't know how delicious her meals were until we left home. Her style is quick and simple, and truly, she inspires me. When I fly home next month, I am raiding her mind for her recipes. Since I cant be home with her to celebrate this day of great women, I am dedicating this Lemon Lime Meringue Pie to her, and will probably eat it myself myself...how generous of me! I still have citrus on the brain. Happy Mother's Day all you Yummy Mummies!


LEMON LIME MERINGUE PIE (taste.com.au)

1 1/2 cup plain flour
2 tbs icing sugar
125g butter, chilled, cubed
1 egg yolk
2 tbs water, chilled
3 eggs, room temperature
1/3 cup caster sugar
3/4 cup thickened cream
100ml fresh lemon juice
2 1/2 tbs fresh lime juice
3 egg whites, room temperature
pinch of salt
1/2 cup caster sugar, extra

Place flour, icing sugar and butter in bowl of a food processor. Process until mixture resembles fine breadcrumbs. Whisk together egg yolk and water. With motor running, add egg yolk mixture and process until pastry just comes together. Transfer pastry to a lightly floured surface and bring together with your hands. Lightly knead until just smooth. Shape into a disc, wrap in plastic wrap and place in the fridge to rest for 20 minutes.
Use a lightly floured rolling pin to roll out pastry on a lightly floured surface until 3mm thick. Line a shallow 23cm (base measurement) fluted tart tin with removable base with pastry. Trim any excess. Place in freezer for 30 minutes. Preheat oven to 190°C. Place pastry case on baking tray and bake for 20 minutes or until light golden.
Meanwhile, place eggs, caster sugar, cream and lemon and lime juices in a bowl, and whisk until well combined. Remove cooked pastry case from oven and reduce oven temperature to 160°C. Pour filling into warm pastry case and return to oven for 30 minutes or until filling is lightly set in centre. Remove from oven and place, still in the tart tin, on a wire rack. Set aside for 1 hour or until cooled to room temperature.
Preheat oven to 180°C. Use an electric beater to whisk egg whites and salt in a clean, dry bowl until soft peaks form. Gradually add extra caster sugar, a spoonful at a time, whisking constantly until thick and glossy. Spoon meringue on top of tart. Use back of a spoon to spread meringue, doming it slightly in centre and decorating with large swirls. (Make sure meringue is touching pastry right around top edge.) Bake for 8 minutes or until light golden and meringue is lightly set. Set aside for 15 minutes.


Fancied up with extra meringue swirls and lemon curd! YUM!