Showing posts with label savory. Show all posts

Thursday, June 16, 2016

Pumpkin & Bacon Lasagne

Here's another nostalgic recipe from the other side of the family. It's loosely based on one of my husband's family favourites. His mum had created the recipe, but it was just something she kept in her head, not a written thing. I got the gist of it, added a few of my own bits and bobs, and have written up the recipe for sharing.
At first I was highly skeptical about how the pumpkin and tomato would mesh, but this wonderful marriage of flavours has to be tasted to be believed-it's honestly even better than a meat lasagne-and I have a wonderful recipe for that too! The bacon pieces scattered through the golden cheesy white sauce that tops this great family meal really makes it sing.  You could easily leave out the bacon for a vegetarian meal if you so desired.


PUMPKIN & BACON LASAGNE

800g-1kg pumpkin, peeled, deseeded and cubed
1/2 cup sour cream or cream
3x chicken stock cubes
1/2 cup hot water
700g jar tomato passata
400g can diced tomato
1 tsp garlic, crushed
1 tsp mixed herbs
1-2 boxes dried lasagne sheets
2 tbsp butter
3 tbsp plain flour
1 cup cheese, grated
2 cups milk
3 tbsp Parmesan cheese
80g diced bacon


Place diced pumpkin in a saucepan with water covering the top. Cook until soft. Strain the water and place the pumpkin in a blender with the sour cream, chicken stock and water. Puree until smooth.
In a saucepan heat up the passata, diced tomatoes, garlic and herbs until warm.
Heat the oven to 180C.
Place a layer of the pasta sheets on the bottom on the 9x13 inch lasagne dish. Top with a layer of the tomato mixture. Place another layer of the pasta sheets over the tomato mixture. Spread a layer of the pumpkin puree over these pasta sheets. Repeat, alternating the tomato mixture with the pumpkin puree between the layers of pasta until exhausted (the ingredients, not you!)
The last layer should end with pasta sheets.
To make the white sauce which covers these pasta sheets, place the butter and flour in a saucepan on low heat. When the butter melts, quickly whisk the butter into the flour while pouring in a little of the milk at a time, to make a smooth paste. Add the remaining milk and heat through. Add the grated cheese and stir through, and continue stirring until it has melted, and the white sauce is thick.
Pour this white sauce over the final pasta layer. Sprinkle with Parmesan and cooked bacon pieces.
Cook in preheated oven for approximatey one hour, or until the top layer forms a golden cheesy crust.
Cool for 10 minutes before serving.

Serves 8


Monday, December 14, 2015

Slider Buns -Mini Burger Buns

I've been quite unwell the last 6 months, so I have refrained from doing any new projects. If you've noticed my lull, I appologise-new babies and health problems don't mix well with food blogging. With Christmas on the radar, I am back into cooking! So much of the mirth around Christmas time revolves about food, dinner tables shared with family and friends and an added emphasis on gourmet foods and drinks.
Recently we had a fundraising beer tasting session which I volunteered to cater for to raise money for St Philomena's School in Park Ridge. It's a blossoming little Catholic school where my eldest son is starting prep next year. (Yes, I'm feeling sad already!)
I made lots of scrumptious finger food and thought how well the same food might go at a Christmas party or gathering with friends on Boxing Day.
I did a quick poll on facebook about what foods people would like at the beer tasting, and slider buns came out on top. You know those adorable miniature hamburger buns you sometimes see in magazines and on blogs? Well I couldn't for the life of me find where to get hold of them  (apparently Coles sells them but I'm thinking that might be a grand old myth.)
Well they're the perfect entertaining bread roll. And I needed them.
So I made them from scratch and they were fabulous. Cute even.
Hubby cooked up a pork roast and we shredded it, and threw on a bit of lettuce with mayo for the centres too. Scrum-diddly-umptious!
They were a hit! The favourite of the night by quite a few accounts.
And just on a side note, the beer presenter and connoisseur Matt Kirkgard was nothing short of fabulous. If you ever get the chance to go to one of his tastings, run to it! I don't even like beer and completely enjoyed myself listening to him from the kitchen. It was fascinating and funny and everyone had a wonderful time.
So try out these gorgeous home made mini burger buns. They're perfect for entertaining and will be a big hit on your Christmas table for friends and family big and small. Merry Christmas!


SLIDER BUNS-MINI BURGER BUNS (adapted from Cook Republic)

7g dried yeast
250ml (1 cup) lukewarm water
400g bread flour, extra for dusting
1/2 tsp salt
2-3 tbsp. sesame seeds
1 egg, beaten

Preheat the oven to 250C and line and grease two cookie trays with non stick paper.
In a large bowl, combine yeast and water, and set aside until foamy, approximately 5-10 minutes.
Add the flour and salt. Lightly flour a clean surface. Gently mix the contents of the bowl, and dump this loose dough onto the prepared surface. Kneed for 10 minutes until soft and elastic and well incorporated. Roll the dough into a smooth ball.
Lightly grease a glass bowl and place the dough inside. cover with cling wrap and let it sit to rise for 30 minutes.
It should double in size.
Knock back dough and divide into 24 golf ball sized rounds. Roll them a little bit in your palms to get a nice shape.
Place them on the prepared trays with a generous gap between them to allow for spreading. Cover the trays with clean tea towels and allow them to double in size, about 10-15 minutes.
Beat the egg and blush this egg on the tops of each uncooked roll. Sprinkle with sesame seeds. Place in the preheated oven. Spay the bottom of the oven with water and cook for 10-12 minutes.
Serve warm with your choice of filling. You can also freeze these for 2 months.


Makes 24


Sunday, May 10, 2015

Ultimate Potato Soup

Recently I touched on a topic I am sure we have all experienced at some stage in life before-food ruts. You buy the same ingredients repeatedly and use the same recipes. You cycle through and through until you no longer enjoy eating and cooking what you're serving. Or worse still, you have no idea what you're having for dinner, and end up spending a fortune on take away or some last minute ingredients that are quick and easy solutions. So how do you get out of food ruts? Here are a few ideas on how to move away from living the same food day in day out. Any step is a step forward!

1. Buy something you've never tried-a vegetable you've never tasted, that quinoa that everyone has been raving about, or that weird gooey stuff you have been curious about in the foreign food isle at your supermarket. Ensure it gets used within your grocery period. It might just become a new favourite.

2. Menu plan, making sure that you schedule to try one new recipe. Menu planning not only ensures you're only buying what you need for the week/fortnight, but you have everything ready to go without any last minute grocery store dashes (and lets face it, you always end up buying more than you intended!) Menu planning has been the best way in cutting down costs for me personally. Our shopping bills have been heavily reduced. There is great peace of mind in knowing what you're cooking at the beginning of the day.

3. Use pinterest for inspiration-sometimes all it takes is a little tweaking of the same ingredients to make it a whole new meal. Do you always buy chicken breast? There are a million and one ideas on how to change up chicken breast on that damned addictive site.

4. Challenge yourself to use what is in the pantry before stepping out to grocery shop. Had a can of  cream of chicken soup in the pantry for a few months? Got chicken and pasta and broccoli? Type these ingredients into a recipe finder such as Recipe Matcher to generate dozens of new recipes using those ingredients.

5. Buy a food magazine every so often. Woolworths and Coles often has publications they give out for free. Have them in a central area like the coffee table and you will probably have other family members looking at them and making requests. These mags are also great reminders that you are in a food rut and should or can do something about it.

Good luck getting out of the rut and finding new favourites to cycle through! Here's one to kick start you off. It's the best potato soup I have ever tasted. It's the ultimate comfort meal- hot and hearty, thick, cheesey, bacony, potatoey goodness just packed with flavour. You will have people groaning with delight as they spoon this down-it's a real keeper! I have served this at the end of a party once, serving it in mugs as everyone huddled around the fire outside. My guests just couldn't get enough! I have also served it as a dip in a cob loaf, which worked well, as it gets quite thick as it cools. It's one of my most requested recipes. I know you will cherish it too.
Got any other tips? I'd love to hear them! 


THE ULTIMATE POTATO SOUP

500g diced bacon
1 medium onion, finely chopped
3 cups potato, peeled and diced
1 carrot, finely grated
2 cups chicken stock
1 tsp dried parsley
1 tsp salt
1/2 tsp pepper
3 tbsp plain flour
3 cups milk
1 cup grated cheese
1/4 cup green onions, finely chopped (optional)

Fry the diced bacon until golden and crispy. Drain any bacon at that may be in the saucepan. Add the onion, potato and carrot, along with the stock, parsley, salt and pepper. Place a lid on the saucepan and simmer for 20-30 minutes, or until the potato is quite tender (this time will depend on the size of your potato chunks.) Meanwhile, place the flour in a bowl, and adding a little of the milk at a time, whisk until a smooth paste forms. Add the remainder of the milk, and mix until well incorporated. Add this milk mixture to the pot of stock and potato. Let it reach the boil, then stir continuously for a further two minutes, until it thickens. Add the cheese and stir through. Serve sprinkled with chopped green onion if desired.

Serves 6-8


Thursday, April 16, 2015

Roasted Sweet Potato with Honey and Cinnamon Glaze

How does one get out of a dinner rut? You know, how you end up always cycling through the same meals and the same sort of ingredients, and it just gets a little monotonous?
Sometimes you just have to mix it up a little at the dinner table. I always think it's a good idea to buy one new thing a fortnight and force yourself to cook with it. It's a good way to spice up meals a bit and adds to your cooking repertoire, making it more diverse and less boring.
It's a little challenging with small kids, because often you have go-to meals because you know meal time will be easier to bear. Yep, that's right! My kids would rather eat dry cat food than some of the things I serve. It's humbling. I try to reassure myself that their taste-buds haven't sufficiently developed yet, while I force feed them.
I was reading an article written by a dietician the other day about the "shared responsibility eating" theory. Basically you place the dinner on the table buffet style, and your children get to serve themselves, deciding what they want to eat and how much they will eat. There is no obligation to finish or taste anything. Well I think that's crazy. My kids would starve themselves. Or eat crackers for the rest of their childhoods. (trust me, I have been there in my own childhood, resulting in one never-hungry and malnourished girl. That's right-I never felt hungry enough to eat.)
My kids get served a portion of what we are eating and have to finish it. They at least have to have a taste of the things they're not used to, for example, if I add a new veggie or make something they've never tried before, they will have to at least experience it once.
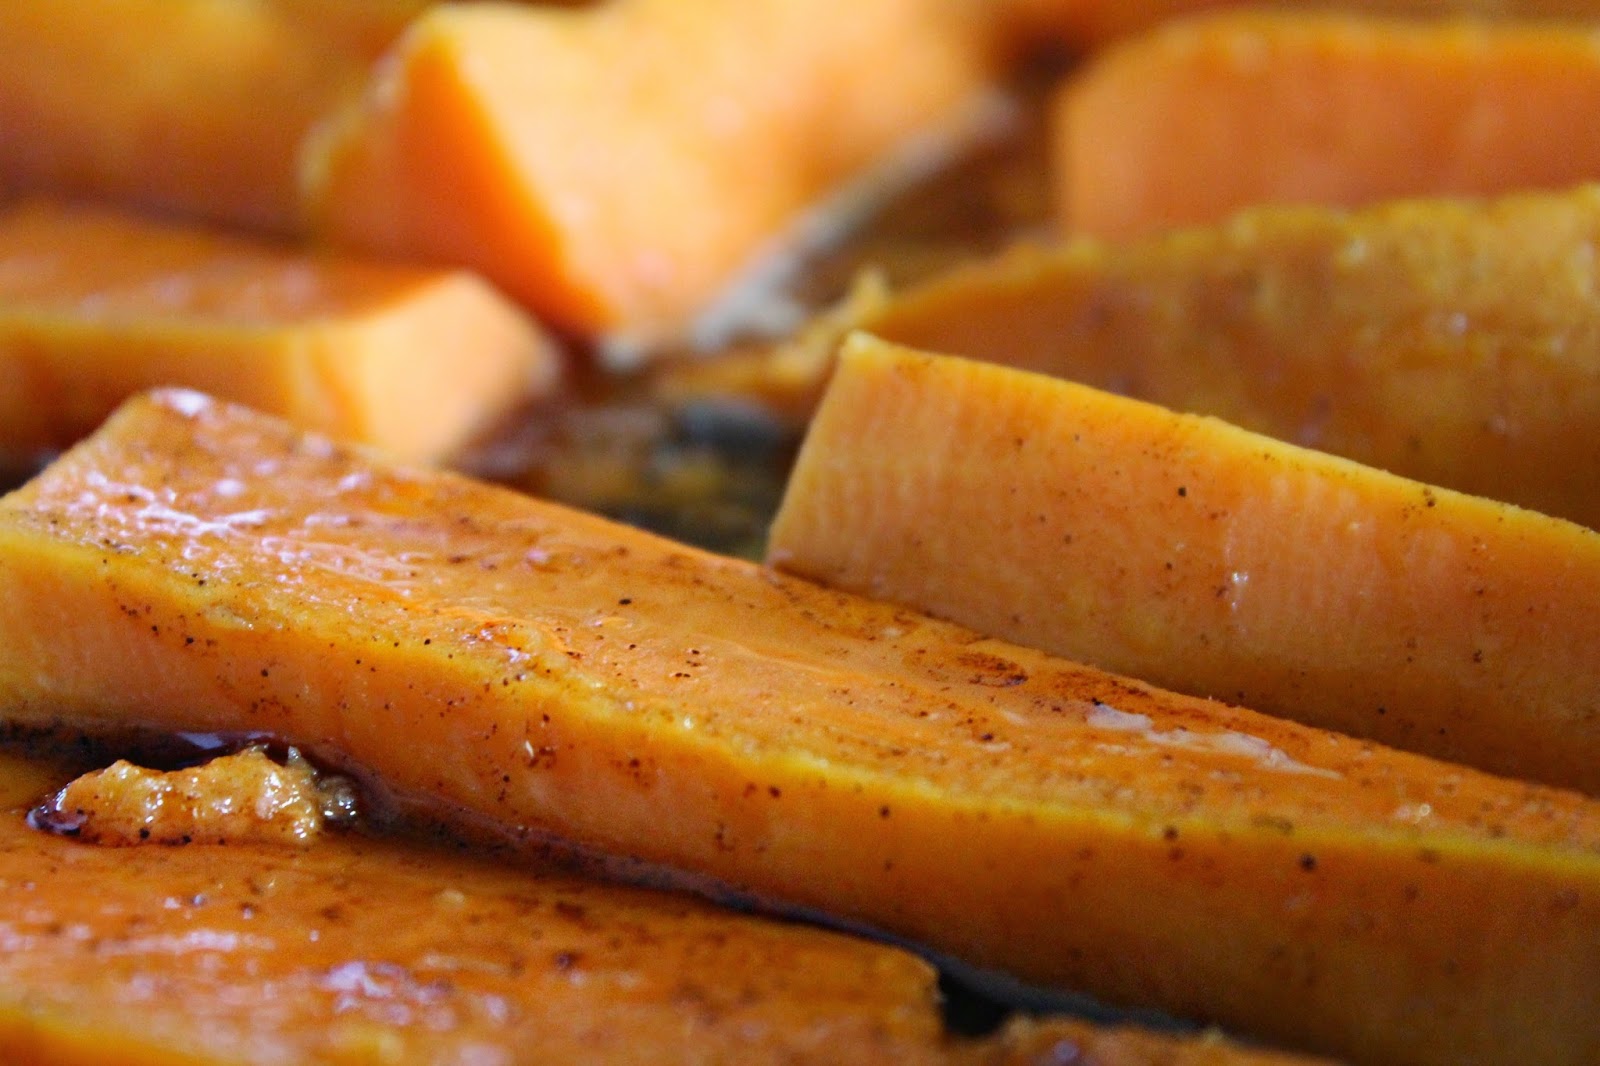
We usually have our sweet potato boiled and mashed, but for Christmas lunch I decided to roast the sweet potato in wedges, drizzled in a honey cinnamon glaze. This was served alongside Gordon Ramsey's Beef Wellington (Oh my. This is a must-make!) The roasted glazed sweet potato  was so divine that I could probably have eaten the lot of it in one sitting. I have since brought it to the dinner table as a side, and it's always been a much-savored hit.


ROASTED SWEET POTATO WITH HONEY & CINNAMON GLAZE (Adapted from Food Network)

4 sweet potatoes, peeled and cut into thick fingers
1/4 cup olive oil
1/4 cup honey
2 tsp ground cinnamon

Preheat the oven at 190C.
Lay all the sweet potato fingers flat on a lined baking tray.
Combine the oil, honey and cinnamon in a small bowl until well incorporated. Drizzle this mixture over the top of the sweet potato. Roast in the oven for 20-30 minutes or until tender. If you prefer some more colour, you can finish off the roasting with a few minutes under the grill on a high setting.
Sprinkle with salt and pepper if desired before serving.


Monday, March 30, 2015

Tomato & Spinach Tortellini Soup

I was only 19 when I met my husband and started dating him, so I had only been on a handful of proper dates with other people up until then. So maybe I just don't know what's the norm, but I always thought I'd see swags of other young people out for dinner beside us, wining and dining. Do young people not do dinner dates in the 2000's? Where do they go, and what do they do? We always seemed like the youngest ones eating out in a restaurant, surrounded by couples aged 30+. Was dining out uncool? Maybe I'm just old fashioned, but I think it's an amazing way and opportunity to get to know people better, and to me that's what dating is partially about. Those talks over dinner were priceless! I wouldn't have traded them for drinks with my boyfriend in a noisy bar. You know, the ones with such loud music that you have to yell, and then just end up giving up and dousing down another drink, with the hope to soothe your sore throat?
Okay, I realise I'm beginning to sound old now.
Moving on! What's your favourite cuisine? I have two in particular,  French and Italian, closely followed by Indian. Take me out for Italian, and I'll probably be hanging around you for life.
If you're looking for great spots to go out for dinner in Brisbane, try out the Ceylon Inn for Indian, Boucher for French and Mario Sarti for Italian. They're three of our favourite places to dine out. And they never disappoint.
Neither will this Italian recipe I'm about to share with you, inspired and adapted from a blog called Diethood. Now you know I don't believe in diets, and this soup is filled with delicious carbs (oh yeah!) It's also vegetarian, so it is perfect for those who are looking for meatless meals, which are great for Lent and Fridays. Or if you don't indulge in meat. If you'd like a meat addition, you can add any sort of tortellini, and many have a meat filling. I used spinach and ricotta filled agnelotti and it was just divine! The recipe feeds many mouths too, and is great with a dollop of sour cream and some nice, crispy garlic bread on the side.


TOMATO AND SPINACH TORTELLINI SOUP (Adapted from Diethood)

2 tbsp olive oil
1 tbsp butter
1 red onion, finely chopped
2 tsp crushed garlic
2 cans diced tomato with added herbs (basil, garlic and oregano)
4 cups passata/tomato sauce (pasta sauce)
4 cups vegetable or chicken stock
1 package tortellini (frozen or fresh is fine)
1 cup fresh baby spinach, finely chopped
salt and pepper to taste

Place the oil and butter in a saucepan, and heat until the butter has melted. Ad the chopped onion and cook for two minutes or until somewhat softened. Add the garlic for a further two minutes. Add the diced tomatoes and tomato sauce and bring to the boil on a medium-high heat.
Add the stock and return to the boil. Then add the tortellini and spinach. Cook until heated through. Add salt and pepper to taste. Serve with optional dollop of sour cream and crusty garlic bread.

Serves 6-8


Tuesday, December 9, 2014

Best Ever Beef Marinade

There are ten of us kids in the family. Well, not kids anymore, but we were kids when I was of the opinion that meat was disgusting. Twiggy little me thought it was like to hunting and killing the beast itself to get the knife through those rubbery, sinewy steaks. I felt like I was sawing away at it for hours on end just to get a bite. Okay, so there were a stack of us, and my parents couldn't give us prime steak every night. I didn't even know there was such a thing as tender, succulent meat until I had my first blissful meat experience on my dinner break when catering for Peter Rowland. My goodness! Safe to say I almost fell off my chair.
I had a brief and idiotic spell there for a while at university when I almost went vegetarian. Don't tell my husband. He will be scandalized. Honey, if youre reading this, forgive me! I momentarily lost my head trying to please everyone.
But the memory of that juicy steak woke me out of my reverie, and I decided not to follow that path after all.  It would only have been to please someone I was trying to impress, and wasn't worth impressing after all. I could have married into malnutrition and meatlessness for life. (Don't worry, I know all you vegans and vegetarians aren't horribly malnourished. What are you doing reading about steak? Get out of here!)
MEAT. It called me! I left that veggie man and took myself to the closest kitchen.
But...I had no idea how to handle the stuff, or get that juicy, tender quality I had once tasted in the back kitchen at Ripponlea Estate. How did they get that flavour?
I still don't know exactly how they got that steak so good. I figure it's probably a lot to do with a really great cut of meat, tenderizing and a the perfect chef.
But since finding out I'm super low in iron, I decided to get myself some awesome steak and get marinating. I found this wonderful recipe and got all excited over it. My husband is the king of meat, sauces and marinades, and I finally made something on his level in the savory department-I was pretty proud of myself and couldn't wait to share the recipe. It's now my go-to recipe when cooking up kebabs or beef steak. So. Delicious.


BEST EVER BEEF MARINADE (adapted from Allrecipes.com)

1/2 cup oil
1/4 cup plus 2 tbsp soy sauce
1/4 cup lemon juice
2 tbsp. Worcestershire sauce
2 tbsp french mustard (or Dijon if preferred)
1/2 tsp crushed garlic
salt and pepper to taste

Combine all ingredients in a medium bowl. Whisk until combined. Add the raw steaks and marinate for 24 to 48 hours (I only had time to let it sit for 4 hours and it was still awesome). Remove from the marinade and cook until desired doneness. Serve.


NOTES: This recipe serves 4. I also used some of the left over marinate to concoct a gravy, adding a little corn flour to thicken and some gravy powder. Combine and cook until thick, and use over your veggies. Yum!


Wednesday, September 3, 2014

French Vinegar Chicken-Poulet saute au Vinaigre

I have never been silent about my love of the french. Clothing, style, decor, food, and of course, the people. Every time I eat french food it strikes me at the simplicity of the ingredients and the surprisingly exquisite taste. They have the art of blending complimentary flavours down pat, with so little fuss. Except for macarons-now there's a bit of fuss for you!
I used to live with a darling French girl. The chicken she brought home from her sister's house is forever imprinted in my mind. It looked like butter chicken, with thick, creamy, tomatoey sauce running down it, but it tasted so very different from the Indian curry I was so familiar with. To my surprise it was tangy and sweet all at once, explosive on the taste buds, smooth and creamy, and the chicken moist-delicious! My mouth literally waters just thinking about it.
So I had to try my hand at it, and it was simple, and the end result fabulous. I wondered how my children (4, 2 and 1 years old) would go with the tangy flavour and a new dish, and even the baby went crazy for it. We served it with cous cous, but I hear it's great over mashed potato, and I imagine it would also go well with rice and a side of beans. Don't be put off by the unappetising name! I imagine it sounds better in French- Poulet saute au Vinaigre.


FRENCH VINEGAR CHICKEN(Poulet saute au Vinaigre)

2 large chicken breasts, cut into 8 pieces (or 5-6 chicken thighs)
1 tsp butter
salt and pepper to taste
3/4 cup red onion, chopped finely
1 tsp minced garlic
1/2 cup white wine (I used Rose Moscato)
1/2 cup apple cider vinegar (or red-wine vinegar)
1 cup boiling water
2 chicken stock cubes
1 tbsp honey
2 tbsp tomato paste
1 tbsp corn flour
2 heaped tbsp sour cream
1 tbsp fresh parsley chopped

 Melt the butter in a fry pan. Add the chicken and fry for 5 minutes on one side, then turn over and cook the other side until the colour of both sides match. Season the chicken, then remove the chicken from heat and set aside.
Add the onion and garlic to the fry pan and fry on high heat for one minute. Deglaze with the wine, scraping any sticking residue from the bottom of the pan. Add the vinegar. In a small bowl, combine the boiling water and the stock cubes, and stir until well combined. Add this to the saucepan, along with the honey and tomato paste.
Whisk until combined, then return the chicken back to the pan. Place heat on low-medium. Cook with the lid on for 20 minutes. Take 4 tbsp of the sauce from the pan and place in a small bowl with the corn flour. Combine until it forms a smooth paste. Add to the pan and stir through thoroughly. Keep the pan on the heat until the sauce reaches desired thickness.
Stir through the sour cream.
Serve garnished with fresh parsley, over mashed potato, cous cous or rice.

Serves 4


Tuesday, August 19, 2014

Herbed Chicken & Cream Cheese Pastry Parcels


In one of my last posts I was talking about this adorable guy I have been with for 7 years and am still dating.
He's my husband. Yep! Still dating. I'm going to shut up now because I hear that talking openly about your relationship (at least on social media) is an unlikable trait. Strange, I always like hearing about everyone else's relationships! Anyway, I wanted to share our date night dinner with you because this meal hits the list of favourites in this house. Luke brought home a gift for me one day, the most beautifully bound Italian cookbook called Limoncello and Linenwater. It's filled with nostalgia--old black and white photos, quotes from old Italian mamas and old fashioned good housekeeping advice. It's loaded with delightful Italian recipes that make the reader salivate.
The first recipe we both picked out of the book to create was for these delicious herbed chicken and cream cheese pastry parcels.

Encased in a golden envelope of pastry lies a tender chicken breast, marinating as it cooks in cream cheese, fresh rosemary, sage and thyme.

 The smell wafting out of the oven is sensational and the taste utterly enveloping of the senses. Due to its style of cooking in this herby, cheesy sauce, the chicken breast remains moist and tender, and the texture contrast is lovely.
Apologies for the flash photography-that's the trouble with cooking at the end of the day!


 Herbed Chicken & Cream Cheese Pastry Parcels (Adapted from Limoncello and Linenwater by Tessa Kiros pg. 173)

2 x small chicken breast fillets
3 heaped tbsp cream cheese
4 large tyme sprigs
4 large sage leaves
1 small rosemary branch
salt to taste
1 sheet of frozen puff pastry
1 egg, beaten

Preheat the oven to 200C (400F).
Remove the pastry from the freezer to thaw.
Meanwhile, pan fry the chicken on medium heat for a few minutes on each side until the exterior is nicely golden.  Strip the leaves off the herbs and chop finely (you should end up with 2 tbsp of herbs in total).
In a small bowl, combine the cream cheese with the herbs, and season with salt.
Cut the pastry down the middle so that there are two even rectangles. Lather both parts of the pastry with half of the cream cheese mixtire. Lay each peice of chicken on each peice of pastry. Use the remaining cream cheese mixture to spread over each chicken breast. Fold the pastry up over the sides of each breast, making sure to overlap some of the pastry so that it holds together over the majority of the breast. (It's ok to have a small gap at the top where the pastry doesnt cover the meat.) Brush a little of the beaten egg over the pastry and discard the remainder.
Cook the parcels for 25-30 minutes, or until the pastry has puffed up and is glossy and golden. Remove from oven and rest for 10 minutes before serving.
Serves 2

NOTES: The cream cheese can be substituted for sour cream or mascapone.


Tuesday, August 12, 2014

Avocado Pecan Cheese Ball

That gorgeous man gazed over at me across the crowded room again. His blue eyes twinkled and four adorable dimples popped just on either side of his mouth. He winked at me.
Meanwhile, a baby regurgitated on my blouse. Quickly wiping it away with a tissue I sighed and wondered when we'd ever get together. He flashed his wedding ring at me. Married. There goes my coffee, all over me.
Yes, that hot man is my husband, and we can never get quite enough time together.
We've been together for 7 years, 5 of which we have been married. He still makes me choke on my coffee and that smile gets me every time. What can I say, I'm completely smitten. Three children later, and many sleepless nights, we often get to the end of the day and collapse on the bed, exhausted, only to land on a dozen toys buried in the sheets. Thomas the Tank, Percy and Peter-Sam have all become day in day out characters in our lives. And we can't even escape them after the kids have gone to sleep.
Married ones-do you ever feel like you actually saw more of your significant other before you started living together? The working hours, the kids demanding you (sometimes 24/7), the weekends full of outings and chores. We wave across the room at each other over baby bowls full of mush and sinks full of dishes and wonder when we'll be next to each other without all the kids squishing in between. I am not sure how they do this, but those little bums sure work their way into the tiniest gaps between us.
So as you can see, date nights are absolutely essential, and much anticipated parts of our busy lives. Even if we don't get a babysitter in time to go out of the house,  we can always have a quiet late night cheeseboard and a bottle of wine once all those little eyes are closed. A gourmet dinner. Candles and jazz. Laughs and uninterrupted discussions. Give it to me now! The time we spend together is golden, we appreciate each other and time together more than ever before.
If you're looking for something new to share with your significant other on a night like this, or when you have company, this delicious Avocado Pecan Cheese Ball is the bomb, and will get people guessing at the ingredients. Its made up of cream cheese, cheddar cheese, avocado, paprika to season and crushed pecans. It's firm enough to handle, yet soft enough to dip a cracker into. So delicious!


AVOCADO PECAN CHEESE BALL

1 avocado, mashed
250g cream cheese, room temperature
1/2 cup sharp cheddar cheese
1/2 tsp garlic powder
3/4 cup pecans, chopped
2 tbsp sweet paprika

Peel and deseed the avocado. Mash into a medium sized bowl, then add the cream cheese, cheddar and garlic. Mix until well incorporated. Form into a ball and place in the refrigerator. In a ziplock bag, add the pecans. Crush them until they resemble crumbs. Add the paprika, then roll the avocado ball in this mixture until well coated. Serve with crackers.


Introducing the hotty that makes me spill my coffee...see what we ate for date night next post!

Sunday, January 19, 2014

Cajun Seasoning Grilling Rub

I love seasoning meat, especially chicken, with this delicious Cajun grilling rub. Eliot's Eats has cleverly put together a series of yummy meat rubs and packaged them up like you see in the gourmet gift section of specialty stores. These little bottles of herby, salty meat rubs were beautifully packaged in a wooden cigar box.
Still on my Christmas and family holiday hangover, and very disorganized in the blogging department, I left my Secret Recipe Club assignment to the last minute, and was very blessed to find a yummy, quick recipe to make, which also created a very tasty dinner for my husband at the end of the day. Don't forget to check out the other seasonings at Eliot's Eats that you can make to complete a seasoning gift pack! It's particularly hard to find presents for men, and I think this one would just about cover it for most--plus, it's DIY, awesomely unique, personalised, and who doesn't like meat? Okay vegans and vegetarians, I wasn't talking to you.


CAJUN SEASONING GRILLING RUB

5 tsp. paprika
4 tsp. fine sea salt
4 tsp. garlic powder
4 tsp. onion powder
2 tsp. ground black pepper
1 tsp. cayenne pepper
2 tsp. dried oregano
2 tsp. dried thyme

Combine all ingredients.
Place in a zip lock bag until ready to use or bottle to give as a gift.
For a recipe idea, check out this delicious Cajun chicken with mango and avocado salsa. Dinner sorted!


Thursday, July 18, 2013

Oven Baked Fried-Style Chicken

I've never really been into eating fast food like McDonalds and KFC. But I have on occasion reveled in the idea of easting a KFC twister wrap, and have indulged myself in buying one. The salad in it makes it okay, right? That's what I try to convince myself.
I'm sure it's not as unhealthy as some of the other options, but I'm also sure that chicken can't be great for you. I have no idea how they cook it however and maybe it is baked? (I highly doubt that given the name of the store, but lets give them the benefit of the doubt for a second.)
Anyway I found this great recipe for oven baked fried-style chicken, and just had to try it. I'm in love!
They are delicious portions of chicken breast covered in a layer of Dijon mustard mayonnaise, dipped in golden, crispy crumbed deliciousness on a par with KFC chicken, and healthier for certain! So if you want a recipe for KFC style chicken, this is it! I've altered it from the original recipe as I didn't have all the ingredients such as crushed bagels and melba toast--my version is very easy to make and quite irresistible. Can't wait to try it Twister-style in a wrap with some lettuce, tomato and peppered mayo!


OVEN BAKED FRIED-STYLE CHICKEN (adapted from Food Network)

1 1/3 cup crushed wheatbix
150g Shapes savory biscuits (I used pizza flavour, Chicken Drumstick biscuits worked great last time too)
1 tbsp. oil
2 tsp. salt
1/2 tsp ground pepper
1/2 tsp sweet paprika
1/2 cup mayonnaise
1 tsp dijon mustard
800g chicken breast cut into portions

Preheat the oven to 200C. Line and grease an oven tray and set aside. Place crushed wheatbix and savory biscuits in a food processor and blend until finely crushed and ground. Place this mixture in a  large plastic bag along with the oil, salt, pepper, and paprika. Mix until thoroughly combined.
In a shallow dish, place the mayonnaise and the mustard together. Stir to combine. Dip the cut strips of chicken breast into the mayonnaise mixture and thoroughly coat. Add these chicken pieces to the bag of cereal. Shake the bag until all the pieces are well covered in the dry mixture.
Lay the chicken pieces out on the greased and lined tray. Spray each piece evenly with oil and place the tray in the preheated oven. Bake until the chicken is cooked through and moist and tender, and the outer layer is crisp and golden (about 30-40 minutes depending on the size of the pieces of chicken.) This time will depend upon the size of your chicken portions, so keep a good eye on them after the 30 minute mark.


Thursday, July 4, 2013

Caramelised Red Onions

I'm not sure if there's anything on this blog that doesnt involve a little bit of sugar. Even my savory recipes sometimes have sugar in them. The good thing is, if you're trying to keep down the sugar levels in your diet, you can often greatly reduce the amount of sugar stated in the recipe.
However, when making this delicious accomaniment,  I forbid you to remove the brown sugar--it's what makes these caramelised onions sing, and well, caramelised. I've used red onions, speedily cut up with the help of Jamie Oliver's Chopping Tower which is a lifesaver when it comes to avoiding tears and cut fingers in the kitchen. You can use brown onions if you prefer, but I love the gorgeous colour of the red onions once they are caramelised, and they look rather pretty as an addition to a cheese platter with that bit of colour in them. You can also have caramelised onions with bangers and mash, on your salad and burger roll for lunch or any place you please. I like to put caramelised onion in meat pies and into rissoles and chicken burgers when I make them--that caramelised flavour really packs a punch and gets the "wows" coming out of your eater's mouths when they have swallowed.


CARAMELISED RED ONIONS (from Taste)

2 tbsp olive oil
3 large red or brown onions, sliced
pinch salt
2 tbsp brown sugar
2 tbsp balsamic vinegar

Heat the oil in a medium saucepan. Add the onions and the salt and stir to combine. On a very low heat and stirring occasionally, cook the onions for 15-20 minutes, or until soft and tender. (if the heat is up too high the onions may catch and burn)
When the onions have softened, add the sugar and vinegar. Cook the onion over a low heat, stirring occasionally, for a further 8-10 minutes to caramelise. 
Use immediatly or store cooled in an airtight jar in the refrigerator. Makes about 1 cup, depending on the size of your onions.

Serving suggestions: Caramelised onions are great incorporated into rissoles and chicken burgers, or served on top of burgers in a salad roll. They are also great with bangers and mash, served with a selection of cheeses, or added to any savory dish.


Caramelised Red Onions

Monday, April 22, 2013

Grilled Smashed Potatoes

I've been making these beauties for a while. They're a nice spin on the more plain "potatoes in their jackets", as my mum used to call them, and take almost as little time. Best of all, you can add whatever delicious toppings you want and get really creative. Chicken parmigiana smashed potatoes? Go for it!
My husband and I are avid potato lovers, so we thoroughly enjoy having these as a side dolloped with sour cream, alongside the fresh greens and meat. It's also a kid friendly and kid approved dinner side, so that is always popular when you have fussy little undeveloped taste buds in the house.  

They bring back childhood memories of camping with the family, wrapping potatoes in aluminium foil and burying them under the coals of the campfire, to later find them cooked--and then we proceeded to lather them in melting butter.

Here I have spun over to Kate's Kitchen for inspiration for the Secret Recipe Club Reveal this month and found Grilled Smashed Potatoes. I've added bacon  and tomato pasta style sauce to the recipe, and I've just sizzled them under the hot grill because unlike Kate, I don't have a grill basket (I'm not even sure what that is). They are delicious! Don't stand for plain-jane jacket potatoes any longer!


GRILLED SMASHED POTATOES (Adapted from Kate's Kitchen)

Washed and brushed potatoes, skins left on
Diced bacon
Tomato Sauce (pasta style)
Basil
Oregano
Parsley
Grated tasty cheese
Sour cream

Boil the potatoes until tender.
While they are cooking, heat up a little oil in a fry pan and cook the bacon until browned.
Remove the cooked potatoes from water and set on some aluminium foil on the grill tray. Set the grill to high to heat. Meanwhile, using a potato masher, gently crush eat potato downwards. (Don't mash it right up, you still want it to basically be in one, crushed piece.) Spread about 1 tablespoon of tomato sauce on each potato. Sprinkle the potatoes with herbs and lastly the grated cheese.
Grill until golden and bubbling, and serve immediately topped with a dollop of sour cream.


Monday, April 15, 2013

Chicken Bacon Meatballs

It's been a pretty strange six months for me. Being pregnant has thrown out my whole cooking roll--my sweet tooth, my insatiable desire to create and taste and share. This could be an explaination for my 18 month old daughter waking up at 2 am and repeatedly crying "Cupcake! Cupcake! Cake!"
Withdrawal symptoms.
Really, all I want to do is sleep, or put my feet up, or shop online for things I'll never use and clothes that will probably never fit me.
Savory food seems more appealing--as does green stuff and everything on the healthier side of life.
Got to get my mojo back.
Last weekend I had a catering job for a cocktail party and made these delicious meatballs. Chicken meatballs, to be precise, and good thing it wasn't my party or I wouldn't have stopped eating them until the plate was clean. They're full of simple goodies like bacon and herbs and smothered in a little tomato paste--and oh--chicken mince now stops my heart. I think I'm in love with it.
I've only worked with chicken mince for one recipe before. It was when I was working as cook at this adorable cafe called the Marmalade Deli. It was a quaint, shabby chic little place  that felt like your own, and we served these amazing Chicken Burgers. I will share the coveted recipe some time soon, as I have some more chicken mince in the freezer to be devoured. In the meantime, here's the recipe for the chicken bacon meatballs, which make a fantastic appetizer for any party or gathering. They were raved about.


CHICKEN BACON MEATBALLS (Adapted from Smitten Kitchen)

2 slices bread, torn up into small pieces (fresh or stale is fine, should make 1 cup)
1/3 cup milk
2 rashers bacon, very finely diced
1 small red onion, very finely diced
1 tsp. minced garlic
2 tbsp olive oil, divided
salt and pepper
1 large egg, lightly beaten
500g chicken mince
2 heaped tbsp tomato paste, divided
1 tbsp dried parsley (or 3 tbsp finely chopped fresh flat leaf parsley)
1/2 -3/4 cup dried breadcrumbs

Preheat the oven to 200C.
In a small bowl, place the shredded bread and milk, and leave it to soak for about 5 minutes. Meanwhile, cook the diced bacon, onion and garlic in half of the oil. Season with salt and pepper and cook over a medium heat until the onion is softened. Set aside off the heat.
Drain any excess milk from the bread, squeezing out what you can. Discard the milk.
In a large bowl, place this bread with the bacon mixture, beaten egg, the mince, 1 heaped tablespoon of the tomato paste and the parsley. Combine until thoroughly incorporated. Sprinkle a little of the dried breadcrumbs over the mixture. If the mixture seems too wet to make into balls, add more breadcrumbs. Roll into approximately 50 balls and place on two baking paper lined trays. In a small bowl, combine the last tablespoon of oil with the last tablespoon of tomato paste and stir until incorporated. Brush the tops of each meatball with this paste, and place in the oven. Bake for 15-20 minutes. Serve warm.

NOTES: these meatballs freeze well, and are perfect as a prepare ahead appetizer.