Showing posts with label light dessert. Show all posts

Monday, June 4, 2012

Raspberry Lemonade Slice

I knew that this May was all panning out too well not to come with some sort of price. Everything was in my favour until the last day, when I found out that I had some sort of malware warning coming up when anyone tried to visit the page though the internet browser Chrome. I had no idea what malware even was, how it got there and what on earth I was going to do about it. It was deterring visitors and scaring the heck out of me since reading a post earlier that day about blog hijacking. It will never happen to me, I thought. Anyway, it didn't get that serious that I lost control of my page or anything, but there was apparently some evil content on my page coming through the site that hosted the picture for my blog background, Shabby Blogs. So after lots of panicking and hasty researching, I came up with a solution. Delete everything connected to that wormy site! Htmls, everything had to go. Now the problem seems to have disappeared, sadly with the pretty little blog design that was the skin of Lick The Spoon. So that's the explanation for the little facelift that the blog has undergone in the last few days.
 But the recipes keep on churning out! If you've been following for a while, you'll be seeing a bit of a theme going on here. I get quite thrilled by colour when it comes to food, and like a bull, excited by red. Actually I recently heard that bulls can only see blue and yellow, and that movement is what excites them...but...you get my point. If you've been in my kitchen you will see splashes of red appearing too. There's just something about that colour.
So when I decided to buy some frozen raspberries, that made me go on a mad raspberry recipe hunt, and my eyes were instantly drawn to this vivid raspberry lemon slice.
My hubby doesn't like berries like I do, and I think it's mainly to do with the seeds that tend to sneakily linger in your teeth after devouring them. Especially raspberry seeds. Those little demons can hang around for a while and make you look pretty demented as you try to remove them. Well have no fear, all the seeds are removed from this delicious slice. I call it a slice, but as soon as I cut into it, a million ideas were pulsating through my brain.  To me this is a wonderfully versatile recipe as far as sweets go, just depending on how you cut it and decorate it. You can cut it  into a slice or squares for a casual affair, or make them fancy petits fours simply by cutting them into 2x2 inch squares, and topping them with a raspberry. If you cut them into long rectangles you could serve it as an elegant dessert, with a pretty garnish of mint, raspberry and a drizzling of cream. This slice freezes well too, so it is a perfect make ahead dessert for your up and coming dinner party menu. A no stress yet impressive dessert sounds pretty good to me. And it's practically guilt free too!
The filling has a similar texture to lemon curd that has set (as you often find in lemon meringue pies once cooked) and has that same delightful tartness, combined with the subtle raspberry flavouring and a lovely simple buttery base. It reminds me somewhat of Starburst lollies. Fruity and tangy! I think I will try this filling inside a meringue pie. How does Raspberry Lemon Meringue Pie sound to you? Makes me start craving. Keep your eyes open for the recipe!


Cut into petit fours as a lovely dessert at a cocktail party


Fancy it up with a garnish
Dessert style
A winning combination..
RASPBERRY LEMONADE SLICE (Adapted from The Improv Kitchen)


Crust:

9 tbsp butter
1/4 cup sugar
1 cup flour
1 tsp vanilla essence
pinch of salt

Filling:

2 1/2 cups frozen raspberries, thawed
1 cup sugar
2/3 cup lemon juice (about 3-4 medium lemons)
zest of 3 lemons
3 egg whites
1 egg
2/3 cup flour
pinch of salt, extra

Preheat the oven to 180C. Line and grease a 8x8 inch square baking dish.
To make the crust, cream together butter and sugar until light. Add the flour, vanilla and salt and mix until combined well. Do not over mix as this can make the base tough. Press the dough evenly into the bottom of the prepared baking dish. Bake for 20-25 minutes or until just golden brown. Remove from oven and cool.

To make the filling, place all thawed raspberries in a fine sieve and press them into a large bowl with the back of a spoon. Discard the caught seeds and skin. Add the sugar, juice, zest, whites, egg, flour and salt and combine, until well incorporated.
Pour the raspberry mixture onto the base and place in the oven. Bake for 30-35 minutes. Cool on the bench before placing in the refrigerator to set completely (about 3-4 hours) Cut and decorate as desired.

NOTES: This slice freezes well and makes a great dessert or afternoon tea to have handy for unexpected guests or dinner parties.


Wednesday, May 30, 2012

Individual Strawberry Jelly Cheesecakes

It's been a very exciting month here on Lick The Spoon. Welcome to all the new followers, I hope you thoroughly enjoy the ride, wading through lots of gooey sweets and scrumptious savories.
I am very grateful to have received news that I have reached the second level in the Gourmet Garden Cook Off!
It all began with a blog off, and the eliminations have taken place. Thankfully I was not eliminated! So where to from here? I am to go to the Brisbane Good Food and Wine show in November and have a cook off against another lucky blogger. I'm calling on a cheer squad to give me confidence! Will you be there?
Apparently I will be cooking-off against another foodie blogger on The Chopping Block Stage, and the final product is to be judged by celebrity chefs. I hope they are kind upon my savory efforts when the time comes. I have no more details as of yet, but I will certainly keep you all updated.
I didn't think I would honestly get this far, so I want to thank all the people who helped me: my husband Luke in supporting me (he even told me not to get my hopes up, the sweetie!), the family in taste testing, and also to my mother in law Geraldine for coming to look after my babies while I had a cooking marathon to prepare for the Gourmet Garden Dinner Party. Phew! Without you all I wouldn't have gone to level two. So many, many thanks. I'm counting on you all to be there on the day to cheer me on! (it's my last favour) I am going to need all the luck I can get. Whipping up something and having it plated within a half hour time span will be quite a fete.
Anyway, that's still six months away. I hope my excitement won't have cooled down too much by then.
Well, to keep us going for the next six months of waiting and growing impatient, I have a whole stack of great recipes coming up. Keep your eyes and ears open!
Here is somewhat of a re-post. Well, the recipe is re-posted, with some tweaks made to the physical form of the original. The post went down so well the first time, and it got me thinking of the endless possibilities with this delicious recipe. It was originally a jelly slice, but I love making individual desserts and they are less messy to cut. With the aid of my silicone 12 hole muffin tray from Chef's Toolbox, I made these lovely layered desserts. They have a crispy sweet base, a tangy lemon cheesecake-like filling, and are topped in delicious red jelly in a flavour of your choice. Life doesn't get much sweeter than this. It really doesn't.


INDIVIDUAL STRAWBERRY JELLY CHEESECAKES

BASE:

1 cup Self Raising flour
1/2 cup plain flour
1/2 cup brown sugar, firmly packed
125g butter, melted
1 tsp. vanilla essence

LEMON LAYER

1/2 can (200g) sweetened condensed milk
2 lemons, juiced
2 tsp. unflavoured gelatine
3/4 cup boiling water

TOP LAYER:

1 packet raspberry jelly
1 1/4 cups boiling water


Preheat the oven at 180C. To make the base combine flours and sugar in a bowl. Add melted butter and vanilla, and stir until well combined. Place a tablespoon of mixture into each of a 12 hole silicone muffin tray (or a well greased/lined metal muffin tin) Press down the mixture into each base using your fingertips, until compact and evenly covering the bottom of the tray. Bake for 15-20 minutes until golden. Remove from heat and set aside to cool. When cool enough to touch, press down the cooked bases with your fingertips to flatten.

To make the lemon filling, place the boiling water into a small bowl and gradually shower the unflavoured gelatine into it, so that it does not clump. Stir until dissolved. Add the lemon juice and condensed milk and stir until well combined. Spoon over each cooled base and cover with plastic wrap. Refrigerate until set.

When the lemon layer is firm, take the raspberry jelly crystals and combine with the boiling water. Stir until completely dissolved and sit aside to cool for 15 minutes. Gently spoon the raspberry jelly liquid over the lemon layer, evenly amongst the 12 holes. Cover with plastic wrap and refrigerate until set.
To remove the cheesecakes, smoothly run a butter knife around the sides of each cheesecake, careful not to pierce the silicone.  Dig the knife a little deeper until it is underneath the base and gently lift the cheesecake out, applying a little pressure to the tray base.
Garnish if desired, and serve.
NOTES: The above recipe makes 12 muffin sized cheesecakes. You can also use the Chef's Toolbox mini muffin silicone tray for a more miniature version, which are perfect to serve as petits fours. Use the 24 hole silicone mini muffin tray, only half the base recipe, the whole lemon layer recipe and half the amount of jelly.
If you want to purchase any Chef's Toolbox kitchen ware, head over to Pauline Phillip's facebook page and give her a holler! She's lovely.

Tuesday, May 8, 2012

Chocolate Dipped Strawberry Cheesecake Cups

When ever I see something miniature it does something to my insides. Seeing tiny baby shoes probably is one of the biggest weaknesses that makes me most gooey inside, and following those wee little accessories, mini cupcakes and delightfully delicious little morsels. Maybe it's because they're so devious and deceiving, making you think you could just pop a whole dozen of them into your mouth over a few minutes without any affect on your waistline. After all, they're just babies! They really couldn't be that fattening. Even five or six of them.
Actually, these little strawberry cheesecake chocolate cups caught my eye and made me smile because they couldn't be all that bad for you. Cream cheese, lemon, strawberry and a little dob of chocolate sprinkled with biscuit crumbs--you can't really go wrong here!They're the perfect petit four for any get together.
 Sadly due to the season, strawberries have been scarce and expensive, but I just had to make them despite all obstacles! Mind you, I ended up having to throw most of the berries out due to sogginess. I highly suggest making these in strawberry season when the berries are plump, firm and full of favour. It's well worth it, and they look super cute and are great little disassembled desserts for any party.


CHOCOLATE DIPPED STRAWBERRY CHEESECAKE CUPS (Adapted from Zestuous)

100g cream cheese, room temperature
1/4 cup lemon juice
2 tsp lemon rind, grated finely
1-2 tbsp caster sugar
12 strawberries
80-100g compound chocolate
1 crushed biscuit (we used a scotch finger)

Combine the cream cheese, lemon zest and sugar. Add enough lemon juice until you reach a smooth and pipe-able consistency. Hull the strawberries, digging deep into the berry to make a sizeable well for the cream cheese mixture.Cut off the very bottoms of the strawberries so that they have a flat end with which to stand. Dry the bottoms of any juices (otherwise the chocolate will not stick). Melt the chocolate in the microwave 20 seconds at a time, stirring between intervals to ensure even melting, until a smooth consistency is reached. Dip the flat end of each berry in chocolate, and place on parchment paper to set.
White the chocolate is setting, fit a piping bag with a small star nozzle and fill with the cream cheese mixture. Pipe the mixture into each strawberry. Top with crushed biscuit. Serve immediately or refrigerate until ready to serve.

NOTES: If you refrigerate the berries after completing them, some of the red from the strawberries may leak into the cream cheese and discolour it.


Monday, May 7, 2012

5 Minute Strawberry Cream Sponge Cake

Are you a time-poor or super distracted cook? I often find myself with the intense desire to cook and create something beautiful, but can't find the hours to spend baking and decorating as I would like. Interruptions in the kitchen don't suit at the best of times, and often I have found myself called away to rescue the baby from our frisky cat Poe, or to change a stinky nappy, or to make an unscheduled feed for a baby who has hit her head and needs comforting.
These are major cooking-mojo killers, for often you return to the kitchen to find the bottom of something overcooked, the custard lumpy, or a pot over boiling on the stove.
A failed attempt to create something awesome is enough to kill off my cooking passion for weeks. It's ridiculous, I know. But more than anything, I hate failing.
You don't have to worry about failing with this delicious sponge cake though. I've made it several times now and I'm almost at the conclusion that it's fail proof and idiot proof. There's really nothing to it skill wise and it's quick and fabulous, and looks particularly impressive with the use of a stencil or doily to help decorate the surface in icing sugar powder. That is also something that takes no skill what so ever, but looks super pretty and detailed without the effort. No longer fear thy sponge! You can assemble it in as little as 5 minutes. In fact, the thing that took me longest concerning this recipe was lining the cake tins. So here's one for time poor cooks or those who cant seem to get 10 minutes straight in the kitchen. It's the perfect recipe to whip up when guests are about to pop over and you find the cupboards bare. So little effort, so little time, and such a winner all around.


5 MINUTE STRAWBERRY CREAM SPONGE CAKE (adapted from Better Homes and Gardens, April 2010)

1 cup self raising flour
1 tsp cornflour
1 cup caster sugar
3 tbsp milk
2 tbsp melted butter
3x 60g eggs
finely grated zest of 1/2 lemon
1 tsp. baking powder
1/3 cup strawberry jam for filling
1/2 cup whipped cream, for filling
1/4 cup icing sugar to decorate

Preheat the oven to 190C.
Grease and line two 20cm cake pans with butter and baking paper. Sift the flour and cornflour into a large bowl, then add sugar, milk, butter, eggs and zest and beat with the electric mixer on high. Beat until light and fluffy, approximately 3 minutes. Fold the baking powder into this mixture.
Divide the mixture evenly between the two cake pans. Bake for 18-20 minutes until golden in colour and cooked through when tested with a skewer.
Leave to cool in pan for 5 minutes before removing to complete the cooling process on a wire rack.
Spread the top of one of the cakes with strawberry jam.Whip cream and spoon onto the top of the jam layer. Top this with the remaining sponge cake. Decorate with a sprinkling of icing powder, and serve.

NOTES: This sponge cake is best eaten on the day it is made, for maximum softness. I used a stencil on the top of the cake when decorating with icing sugar for the pictured effect. For other serving suggestions and pictures try our individual strawberry cream sponge cakes or our popular easy sponge cakes with fondant roses.


Friday, April 13, 2012

Calling the Universe to give me Homemade Icecream

My hubby and I often have a good laugh when something we have long wanted unexpectedly appears out of the blue. I know a lot of people believe in calling to the universe for their wants and expecting it to magically appear aka "The Secret". Yes, I read the book with an open mind, but I have a feeling there was something that went unmentioned in the book, hence we have a laugh in reference to it now and then in this house.
You can't simply want something, ask the universe and expect the universe to simply hand it to you. You have to do something about it too. You can want a million dollars with all your might, but if you don't do anything about it, how is that magically going to just appear in your bank account? (even if you win the lotto, you have to buy the ticket first!)
Anyway, I'm all for wanting something so much that your mind is set on getting it, regardless of the cost. Your every action is made with the view of achieving your goal, and yes, you may just get there if you keep at it!
Well, anyway, I've been wanting an ice cream maker for a long time. We found a beautiful model, and bought it as a gift for my hubby's cousin. We bought another for my mother in law.

The jealousy was rising. 

Then hubby told me he was going to buy one for my birthday, and I started to get excited in anticipation. I started collecting recipes, drooling over pictures of home made ice cream, and waiting for May with such a longing.
Bing!
The universe heard my plea *cackle*
My husband brought one home yesterday. A darling relative had overhead me discussing the gift we bought for hubby's cousin, and had one at home she never used! So she passed it on to me, and here you have it, the result I have been longing for for months. Home made ice cream, and I am never buying it from the store again. Do I care that it's almost winter in Australia?
No.

And yes it's in an ash tray (never used of course) It just looked so right at the time...hehe...


LEMON CURD ICE CREAM WITH LEMONCELLO (Adapted from Taste.com.au )

1/3 cup caster sugar
150ml water
3 egg yolks
600ml thickened cream
1/2 tsp vanilla essence
400g lemon curd (see recipe below)
Lemoncello liqueur to drizzle

Over a low heat, combine the sugar with 150ml of water in a small saucepan. Once dissolved, simmer on a medium heat for 3 minutes.
In a medium sized bowl, beat the egg yolks for a minute until frothy. With the beater still running, add the sugar syrup and combine thoroughly, until cool.
In a separate bowl, place the cream and vanilla. Whip until soft peaks form. Gently fold in yolk mixture. Gently fold in curd.
Follow the manufacturers instructions on your ice cream machine to turn and freeze the ice cream. It is recommended that the ice cream mixture is left aside overnight for optimum results, before processing with your ice cream machine.
Thaw a little before serving, with a splash of lemoncello for delicious adult decadence.

NOTES: My ice cream machine instructions note that the ice cream in the manual is best eaten within a week. I assume this is recommended for most home made ice creams. This ice cream may not be suitable for pregnant women, as it contains raw egg. You can buy lemon curd from the store, however, I highly recommend making your own with freshly squeezed lemons, as this gives the best flavour. The recipe below is my favourite lemon curd recipe. It makes more than necessary for this recipe however, so be prepared to enjoy the leftovers on your toast in the morning! (i like to smear it on a warm croissant...a wonderful way to enjoy lemon curd! For other ideas on how to use your left over lemon curd and egg whites, click here)

Makes 1 litre


LEMON CURD

1 cup caster sugar
1/2 cup cornflour
1/2 cup (125ml) freshly squeezed lemon juice
1 1/4 cups water
3 egg yolks
60g butter

Combine the sugar and cornflour in a medium saucepan. Gradually add the lemon juice and water while stirring continuously until mixture is smooth. Place saucepan over medium heat and cook, stirring, for 3-4 minutes or until mixture boils and thickens. Reduce heat to low and cook, stirring, for 30 seconds. Remove from heat. Add the egg yolks and butter. Continue stirring until the butter has melted and mixture is well combined. Remove from heat and set aside to cool.

NOTES: use fresh lemon juice for optimum flavour. If you use store bought lemon juice, increase the quantity, otherwise your curd may taste "eggy"


Tuesday, February 28, 2012

Pink Strawberry Chocolate Fondue with Strawberries

Sadly this post comes with a warning. I made a trip to the dentist yesterday and it seems I am to pay for my sweet addiction with a possible root canal. I'm sure its been coming for several years now but it reminded me of how much sugar my body processes every year. Sweets. They rule my life. Yet the cost is far greater than just that of the ingredients.
No but really, don't expect a decrease in the number of recipes being posted on this blog. Although I am shirking sugar for a while until I cease to feel guilty about that tooth, the baking continues...just not for me.
But that's really what I'm about anyway. My satisfaction in cooking comes almost entirely by giving other people the pleasure of devouring it. Of course the cooking, photography and blogging is pretty awesome too. But cooking for the people I love, just tops it right off.
So here's a little bit of decadence, a great centre piece for table when guests are over, and an elegant end to a meal. Strawberry chocolate fondue with strawberries, cake, or any other delightful nibble you want to add to the skewer!


STRAWBERRY CHOCOLATE FONDUE WITH STRAWBERRY SKEWERS

3/4 cup cream
12 oz white chocolate buttons
2-3 tbsp strawberry liqueur
1 drop red food colouring

Heat cream on a medium flame for 2-3 minutes until hot. Add the chocolate, and stir continuously until melted. Remove from heat. Add the food colouring and flavouring. Serve over tea-light flame with fresh strawberry skewers.

Serves 6 or more


Monday, December 5, 2011

Easi-yo Homemade Yogurt Cheat

I'm sure the New Zealand company Easi-yo won't be all that pleased that I found this money saving cheat. Well--of course many have found it before me, but I wanted to share it all the same for those who have not heard how you can save a few dollars on this deliciousness and get more for your money. My son and I would eat about a litre of yogurt a day if it was possible, and now it is. Without the expense.
And, unlike so many of the recipes on here, its very healthy for you.
So listen up!
You can purchase a packet of dry yogurt mix for around $4, and for those who aren't familiar with Easi-yo, all that needs to be added to this formula is water. The mixture sits in a canister in a thermos of hot water for about 8 hours, and voila! You have yourself a litre of creamy, thick and healthy yogurt.
$4 doesn't seem like much, but if you're eating a litre a day, its worth listening. If you look at the ingredients on the back of the packet, the main ingredient is  powdered milk.
So you can really quarter it, and get 4 litres of yogurt out of one packet as opposed to one litre if you add enough full cream milk powder, and its just as good! You do lose a bit of the original flavour, but you can serve it with fruit if you need the extra kick for your taste buds.


For demonstration purposes, we will simply make two litres from one packet, to simplify the process.

1/2  packet (1 cup) dry Easi-yo yogurt mix
1 cup full cream milk powder
500ml cold water
extra water to top up
1/4 cup sugar, optional
Easi-yo canister

Fill the Easi-yo canister up half  way with the 500ml of water. Add the powdered ingredients, close the lid and shake until mixed through the water. Add sugar if desired. Fill the canister to the top with extra water. Fill the thermos to the top of the red insert with boiling water.
Place the yogurt canister inside the thermos, close the lid and leave for 8 hours before removing and  refrigerating. Save the remaining dry packet mixture for your next batch!

NOTES: There are two cups of dry yogurt powder in the packets. Use the ratio 1 cup of milk powder to 1 of dry yogurt mix.

Sunday, September 25, 2011

Almond Creme Anglaise with Galliano Amaretto

My husband was given a glorious bottle of Galliano Amaretto liqueur a few years ago. He has never been able to take to it, it has a very strong almond flavour. Ever since we opened that pretty bottle, I have been looking for other ways to use it. I am sure it would be lovely in a creamy cocktail, but there's so much of it to use!
When I discovered the The Secret Recipe Club and was assigned the the blog Samayal Arai, I was thrilled to see that this delightful page had a recipe I could use the liqueur in. Her recipe Almond Creme Anglaise not only sounds amazing, but tastes just glorious with those bright red strawberries dipped into it. For one, I am addicted to custard, and this creamy anglaise is so smooth, with that slight nutty taste to make it just that little bit fancier. You can use it as a fruit dip instead of chocolate for a lighter option in these warming spring months without feeling too weighed down...yet keeping that satisfying happiness of indulgence.


GALLIANO AMARETTO CREME ANGLAISE (adapted from Samayal Arai)

1/2 cup cream
1/2 cup milk
1/4 cup white sugar
1 1/2 tsp. custard powder
2 egg yolks
1 tbsp. Galliano Amaretto liqueur (or 1/2 tsp almond essence)
Fruit such as strawberries to serve.

Separate the eggs.
Place cream, milk and sugar in a small saucepan. Set the heat on medium and whisk until warm and the sugar begins to dissolve. Add the custard powder and yolks and continue to whisk. Whisk until the custard thickens but be sure not to let it boil as this may curdle the mixture. Remove from heat and set the saucepan in a few inches of cold water so as to cease the cooking process. Cool and add the liqueur to flavour. Serve with strawberries or a fruit of your choice.

NOTES: This recipe makes about 1 cup of creme anglaise. You can toast some almonds before you start the cooking process and add them to the milk and cream mixture at the beginning, removing them at the end, like Samayal Arai did in her recipe for that extra nutty flavour if desired.


Monday, March 28, 2011

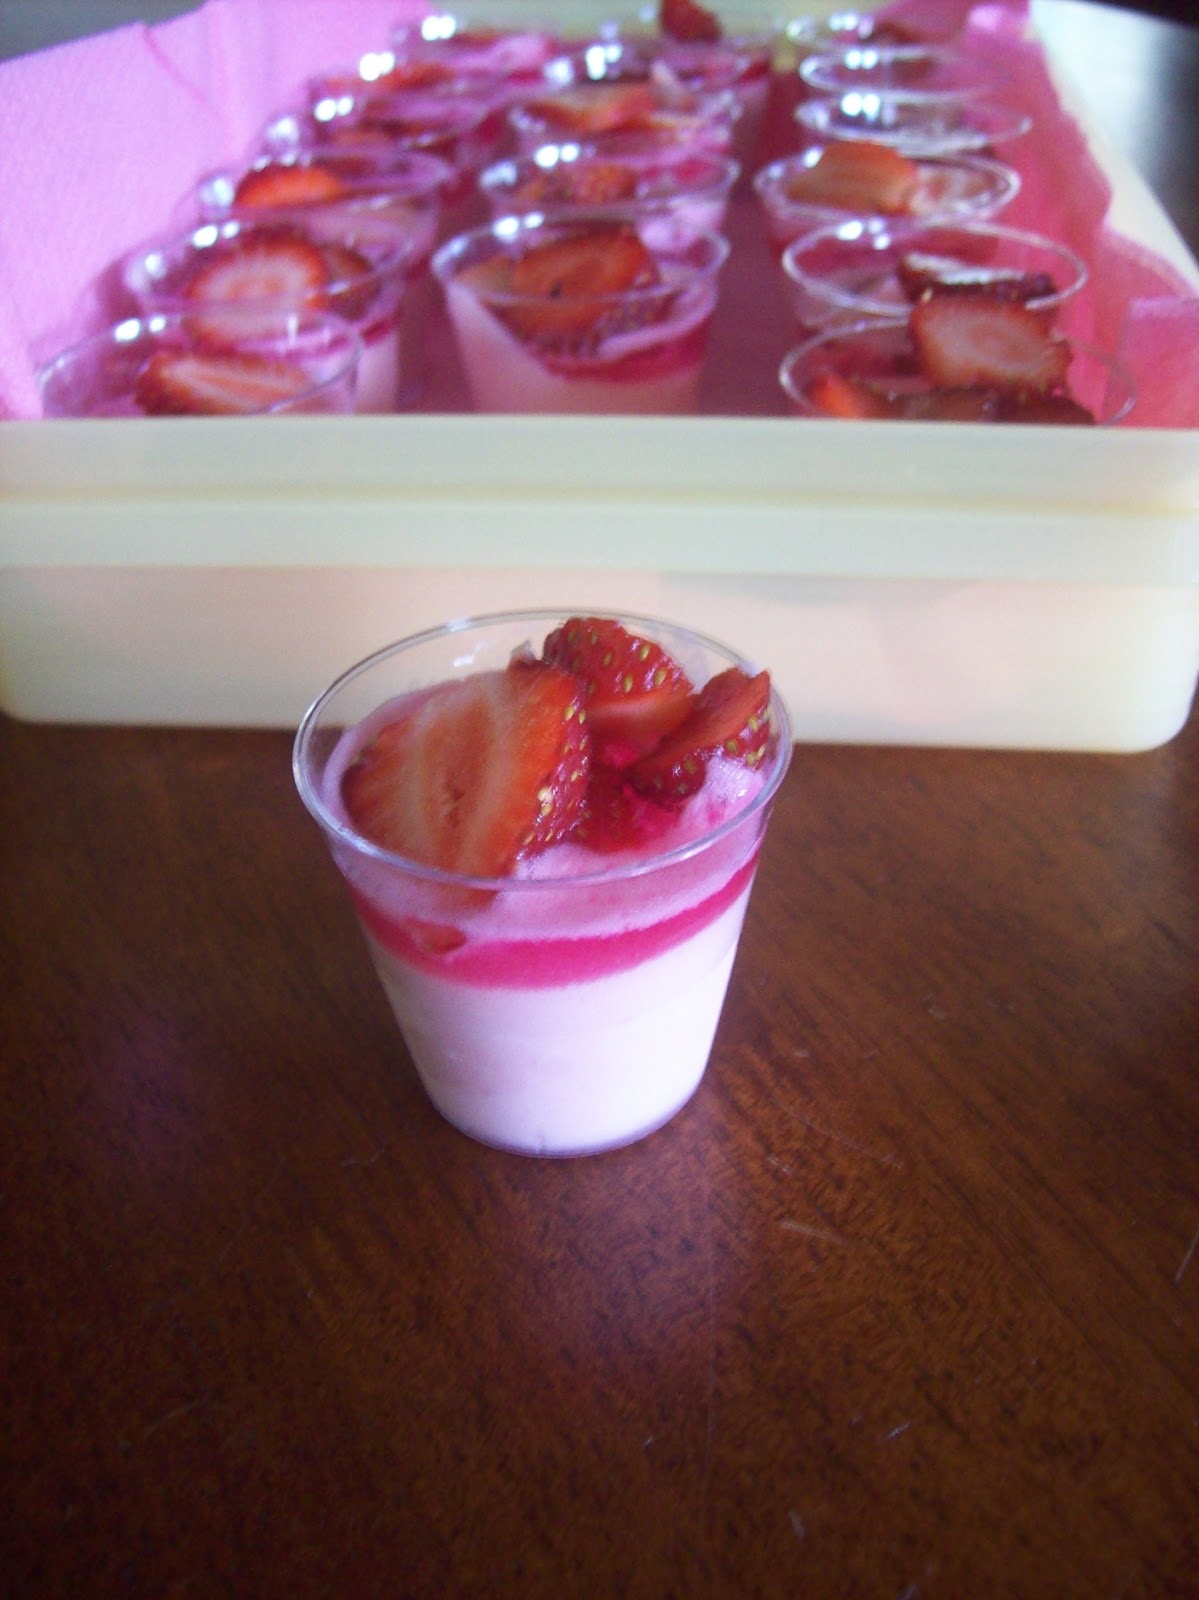
Strawberry Mousse Cups

Oddly enough, when I was a child and even a teenager, I hated food. I was never hungry, and it was always forced into me because I wouldn't eat otherwise. In fact, it started at a very young age and I became quite sick from eating so little. Then there were the thousands of nights I would still be sitting at the dinner table poking at my silver-beet and peas and concocting sly ideas in that little mind how to stifle the food from the plate without eating it so I could leave the table. Tissues were handy, as was the small ledge under the table near my chair, that soon became the burial grounds for carrots and fried zucchini and bits of potato.
The first time I ever felt hungry was after a day of skiing, when I was 16 years old. I was shocked! Now, my love for food has grown at such a rapid pace, and I blame it on working in gourmet hospitality over the last 4 years. My mind has exploded with ideas. I dream food, I create food, I even live in food. You know how it is, living with a toddler. I don't know why I bother sometimes. White is an absolute no-no, and showering seems near useless, for as soon as I'm fresh and clean again, a Vegemite toast is smeared down my leg and I find bits of custard in my hair. He catapults pureed apple across the room with his spoon, and a few hours later, after answering the door and going down the street, I happen to look in the mirror and find smeared fruit dried to my face. So yes...I live in food.
Food has finally become a part of life. It certainly helps that my husband is a conosure of sorts and happens to cook scrumptious meals for me now and then.
But food! It's about to become something I cant bear to eat, smell and cook. Salt and vinegar chips were all I could keep down last pregnancy, so I fear a little for the frequency of this blog over the next few months. Stay tuned though. I have a large amount of recipes I have made and photographed over the year that I have not had time to put up on here. Just don't expect  me to be as enthusiastic with my food descriptions!

I'm still whipping out recipes from Marcela's Kitchen Tea Party!


STRAWBERRY MOUSSE CUPS


3x 85g packets Strawberry Jelly Crystals
3 cups boiling water
375ml can evaporated milk
strawberries to garnish


Dissolve two packets of  jelly crystals in 2 cups of boiling water. Refrigerate until chilled, but not set.
Meanwhile, beat evaporated milk for a few minutes on high until thick and foamy. Stir the cooled jelly through evaporated milk.
Pour into shot glasses or small cups. Refrigerate to set, covered in plastic wrap.
Dissolve the remaining jelly crystals in 1 cup of boiling water. When cool, gently ladle over the top of the set creamy jelly, cover in plastic wrap and refrigerate to set.
Serve with strawberries and cream if desired.


NOTES: you may use any type of jelly crystals and any type of fruit. You can even jazz it up by mixing fresh fruit or grated chocolate through the mousse. I cannot tell you how many shot glasses this recipe makes, but it will make over 30. I ended up using the remaining mousse for another recipe which will follow, so you may like to halve the recipe or serve in glasses or molds larger than shot glasses if you wish, unless you have a large group to serve. Keep in mind you will definitely want more than one!

Coming soon--another way to use this delicious mousse recipe!
YUM!

Saturday, March 26, 2011

Brandy Snaps and Cream Horns

Okay, so maybe I wasn't talking to a black hole as much as I thought I was. The silence on here is so deafening, I thought it was high time I cooee'd and tried listening for a reply. The news of me having "one in the oven" flew around surprisingly fast, so I am guessing I have an audience. Hello readers! I feel better now.
So just continuing on from the brandy snap basket blog, I wanted to share some findings, and tell everyone how easy it is to make those delicious brandy snap cream horns you only dream of being able to create. They're super easy, all you need is this blog, the ingredients and a cone shaped glass..and a little self control. Finding number one: Brandy snaps are irresistible when just out of the oven...chewy, gooey and seductive in their toffee-ish goodness! Back to what you need. If you don't have a cone shaped anything, the end of a wooden spoon will do the trick, or a cylindrical handle of any other utensil  (preferably wooden or plastic.) I found I didn't have enough cone shaped glasses on hand and used one of my son's mini toy witches hats (yes, a replica of the cones they use on the roads...washed, of course) and it worked a treat.
So what I learned by trial and error may save you some time, ingredients and disappointment. Don't you love it when someone makes the mistakes for you?


Brandy Snap Cream Horns:

60g Butter
1/3 cup brown sugar, lightly packed
1/3 cup golden syrup
1/2 cup plain flour
pinch of salt
1 tsp. ground ginger
A few drops vanilla essence
12 Strawberries
Vanilla sugar to dust

Preheat oven to 160 C.
Place butter, sugar and syrup in a small saucepan and stir over a moderate heat until butter melts and the sugar dissolves. Remove from heat and cool for a minute.
Sift in flour, salt and ginger, stirring to combine. Add vanilla and incorporate.
Drop 10-12 teaspoons of batter onto a ready greased tray, leaving a few inches between each for them to spread. Bake in preheated oven for 10-12 minutes.


Apologies for the awful picture, but your brandy snaps should look like this before removal from the tray

Remove and cool for five or more minutes. The longer you leave them on the tray, the harder they will be. This makes them easy to remove, unless you have left them too long. You will know they are ready to remove when you can peel them up with your fingers and they do not tear.The edges will harden first. Working quickly, gently lift each gently form each into cones or cylinder shapes, rolling around the end of a spoon or shaping by placing inside a cone shape glass.


These shapes should harden within minutes. If they remain pliable and refuse to harden, return to oven on the tray for a few more minutes, and repeat. If they are too hard to remove from the tray, return briefly to the oven, as this softens them again.
Remove from your molds when hard, and store in an airtight container in a dry place until ready to fill with custard or whipped cream. Fill just before serving as the Snaps may very well lose their "snap" after an hour or so due to the moistness of the filling. Sprinkle with vanilla sugar before serving.

Makes 10-12

NOTES: Usually honey acts as a good substitute for golden syrup. I tried this and the snaps actually turned out more like flat biscuits. Doubling the recipe also poses some complications. As they cannot all be in the oven at once, mixture may thicken to the wrong consistency while you wait to remove the trays with the ready brandy snaps. Its best to do them in lots of 10-12.

Brandy Snap Baskets with Custard and Berries

I am now under the impression that one should never smirk proudly about anything. God obviously read my last blog where I proudly mentioned my goodies have no affect whatsoever on my weight and He probably had a chuckle. I am soon to be a HUGE, gelatinous mass, without even indulging--I am pregnant!
So goodbye skinny cook, goodbye lots of gooey goodies, and goodbye cooking with wine! Serves me right for rubbing my fat immunity in everyone's faces.
As dismayed as I am to be growing massive, my husband and I are thrilled out of our minds to be having a new addition to our family! Prepare yourselves for some healthier recipes though. (not yet, as I have many recipes I have made and not put up yet, so the sweets will go one for quite a while)
Anyway, being fat may make more people take me an my blog seriously...I mean, no one really ever does trust a skinny cook, do they?
Here's a recipe for Brandy Snap Baskets with Custard and Strawberries I recently made as my mother in law's birthday dessert. They are surprisingly super easy to make and look adorable. You could fill them with any filling and fruit, but this was a delicious option and not too heavy on the stomach. (I cannot stop eating this vanilla custard by the spoonful, be sure to make extra!)

Brandy Snap Baskets with Vanilla Custard and Strawberries


World's Best Vanilla Custard:

2 cups milk
4 large egg yolks
6 tbsp. sugar
3 tbsp. cornflour
40g butter, at room temperature

Place milk in a small saucepan and bring to the boil.
Meanwhile, in a separate saucepan, combine yolks, sugar and cornflour and whisk over a low heat. When the milk has boiled, add a few tablespoons into the yolk mixture and whisk. Gradually add the remaining milk and whisk vigorously on a medium heat. Custard will thicken. Continue to whisk until boils, and remove from heat. Scrape into a small bowl and sit in a tray of ice, to cease the cooking process. When cooler, add the butter in 3-4 installments, stirring until combined. Add essence, mix and refrigerate. Stores for 2-3 days.


The Brandy Snap Baskets:

60g Butter
1/3 cup brown sugar, lightly packed
1/3 cup golden syrup
1/2 cup plain flour
pinch of salt
1 tsp. ground ginger
A few drops vanilla essence
12 Strawberries
Vanilla sugar to dust

Preheat oven to 160 C.
Place butter, sugar and syrup in a small saucepan and stir over a moderate heat until butter melts and the sugar dissolves. Remove from heat and cool for a minute.
Sift in flour, salt and ginger, stirring to combine. Add vanilla and incorporate.
Drop 10-12 teaspoons of batter onto a ready greased tray, leaving a few inches between each for them to spread. Bake in preheated oven for 8-10 minutes.

Apologies for the awful picture, but your brandy snaps should look like this before removal from the tray

Remove and cool for five minutes. Working quickly, gently lift each with an egg flip and gently lay inside the cups of a muffin tray, and push to the base, creating a cup shape. These should harden within minutes. If they remain pliable, return to oven in the muffin tray for a few more minutes. If they are too hard to push to the base to form into cups, return briefly to the oven, as this softens them again.
Remove from muffin tin when hard, and store in an airtight container in a dry place until ready to fill with custard and berries. Sprinkle with vanilla sugar before serving.

Makes 10-12

coming soon...how to get the brandy snap cream horns perfect!