Monday, October 27, 2014

Banana Raspberry Bread with Lime Cream Cheese Icing

When a dash of love is added to cooking, it is instantly transformed into something infinitely more palatable. I think real cooking is love-it's giving. When I say real cooking, I mean throwing a wad of 2 minute noodles into boiling water doesn't count. It must involve some effort, some portion of your time, some giving--as all love does require.
Just think about it-when you cook, you cook for friends, family, yourself. Often it's performed because you have to, because there are rumbling tummies and tiny (or big) wailing mouths. But even when it's done through necessity, it is done because you love those people. Some people cook for themselves, preparing amazing dishes, for the love of food. Others cook for the love of money, and so forth, but basically, good  food and love revolve around each other.
When I was studying teaching at University before I met my husband, I lived with two other girls in a quaint little townhouse on the skirts of Melbourne. We all fended or ourselves food wise, never cooking for anyone but ourselves as we all had varied schedules. We were three very different people, all living different lives, and looking back on how we ate doesn't surprise me. One held a part time job, and basically lived off 2 minute noodles, ice cream and those cream and jam filled sweet buns. The other was a student like myself and it was toast and bought sushi for her. I lived off 8 cups of coffee a day and various blends of pasta and jarred sauce. Ugh!
None of us loved food enough to bother to make any effort. We had no one to cook for and didn't even love ourselves enough to at least make an effort to eat healthily.
It was only when I met my husband that I started taking an interest in food, especially as he was a big fan of everything I made. It was such an encouraging thing that it became an addiction, and I couldn't keep my mind off food and what I was going to make for him the next time he visited. Well, I married that man, and I also simultaneously married my food addiction. Now I actually eat. And I actually get hungry. And I limit myself to one coffee a day, just to kick start me in the morning. Jarred pasta sauces are not off limits, but used sparingly, only for those wild and woolly days, where you get to the end of the day looking like you were just thrown out of a hurricane and the kids are literally ripping the hair out of your head. I love my family too much to do that to them regularly-but sometimes, necessity calls for quick and fuss free!
Well, this banana raspberry bread with lime and cream cheese icing is certainly made with love, time and thought. I love how all these flavours come together to make for a delightful treat for the senses-the sweet moistness of the banana, the slight tart accents of raspberry, the creaminess of the cream cheese icing with a zingy hint of lime zest.We couldn't get enough of this delicious cake! The icing really was what took it up several notches, and I almost wish I had made more icing! If you're a big fan of cream cheese icing, you could double the icing recipe and cover the whole top of the bread. You will not regret it!


BANANA RASPBERRY BREAD WITH LIME CREAM CHEESE ICING (A Lick the Spoon Original)

6 tbsp butter, room temperature
1 cup brown sugar, lightly packed
2 eggs
4 mashed bananas
1 cup Self Raising flour
1/4 level tsp bicarb. soda
pinch of salt
1/2 cup frozen raspberries
50g cream cheese, room temperature
1 tbsp lime juice
1/4 cup icing sugar
1 tsp lime zest, finely grated

Preheat the oven at 180C. Line a loaf pan with baking paper and set aside.
In a medium bowl, beat the butter and the sugar until light and fluffy. Add the egg gradually, beating well between additions. Add the mashed banana and beat again.  Add the flour, bicarb soda and salt and stir through until well combined. Lastly fold in the raspberries.
Bake in the oven for 1 1/4 hours until nicely browned on top. Cool in the pan for 20 minutes or so before gently removing and placing on a wire rack.
To make the icing, beat the cream cheese, lime juice, icing sugar and zest together in a small bowl until smooth. You may add a little more icing sugar if you prefer the consistency to be thicker, or a little more lime juice if you find it too thick.
Pipe or spread over the top of the cooled bread before serving.

Makes one loaf.


Thursday, October 23, 2014

Strawberry and Pear Crumbles

 It was a brown slimy substance defrosting in a ziplock bag on the counter. Brown liquid was accumulating in the bottom. My husband came home and pulled a face of disgust as he gingerly inspected it , and asked me what on earth that ungodly looking goop on the bench was. You know, when you buy too many bananas, and they start going brown on the outside and a little soft under the skin? I peel them and pop them in a ziplock bag in the freezer, ready for banana bread when I have the chance. When I told my husband that I intended to make a cake with this squelchy mess, I think he almost passed out.
He was so disturbed by it that I promised to throw it out. The next time I served banana bread, he had no idea that I used the same method for saving my bananas, and he loved that bread! I secretly chuckle and continue with the practice. What do they say-what you don't know can't kill you? I doubt that saying rings true for many cooking substances, but hey, I've worked in kitchens and seen chefs use the ten second rule and worse multiple times. Shhh...don't tell anyone I told you!
But back to over ripe fruit, it seriously carries an intensified flavour. I'm sure it doesn't apply to all old fruit and there's a fine line between old and OLD. Browning bananas always make the best banana bread, soft tomatoes make the sweetest chutney, you get the picture.
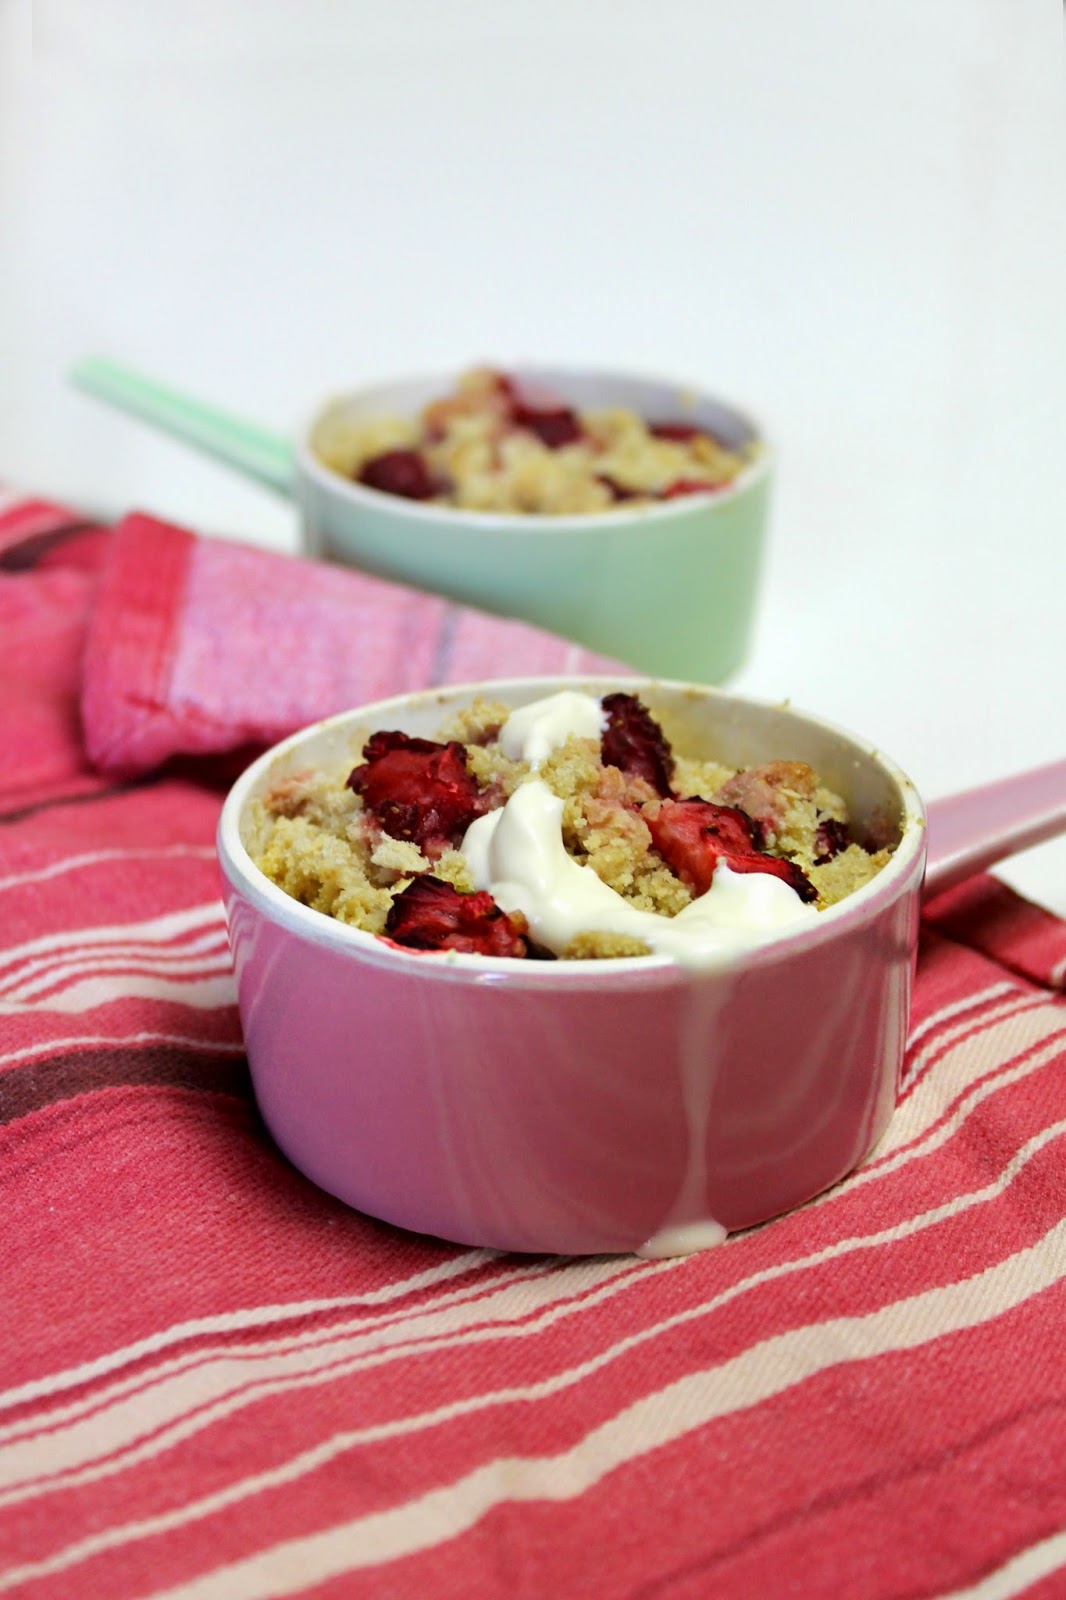
Well, I had a bruised pear and some strawberries that were looking pretty tired. I decided to slice them up and pop them into an apple crumble style dessert, without the apple. Also, being a sucker for vintage kitchen wares, I couldn't resist the opportunity to get out those pastel ramekins!
This is a really easy, go to recipe for a quick, delicious and nutritious dessert. It took as little as five minutes to assemble.
I was so surprised by how these two fruits came together in perfect harmony, topped with a delightful oat laden buttery crumble on the top with a dollop of cream. The juices of the strawberries had coloured the pear a soft pink, and it was a very pretty and scrumptious end to a meal.


STRAWBERRY AND PEAR CRUMBLES (A Lick the Spoon original)

1 large pear
1/2 cup strawberries
1 tbsp butter, melted
3 tbsp. plain flour
1 tbsp brown sugar
1 tbsp rolled oats
Cream to serve (optional)

Preheat the oven at 180C.
Peel, core and slice the pear. Slice the strawberries. Layer these two cut fruits between two oven proof ramekins. In a small bowl, pour the melted butter. Add the flour, brown sugar and oats. Combine until a crumbly dough forms. Sprinkle this mixture over the tops of the fruit in the ramekins. Cook for 15 minutes. Cool for a few minutes before serving with cream or ice cream if desired.

Serves 2


Tuesday, October 21, 2014

Traditional Home Made Sausage Rolls

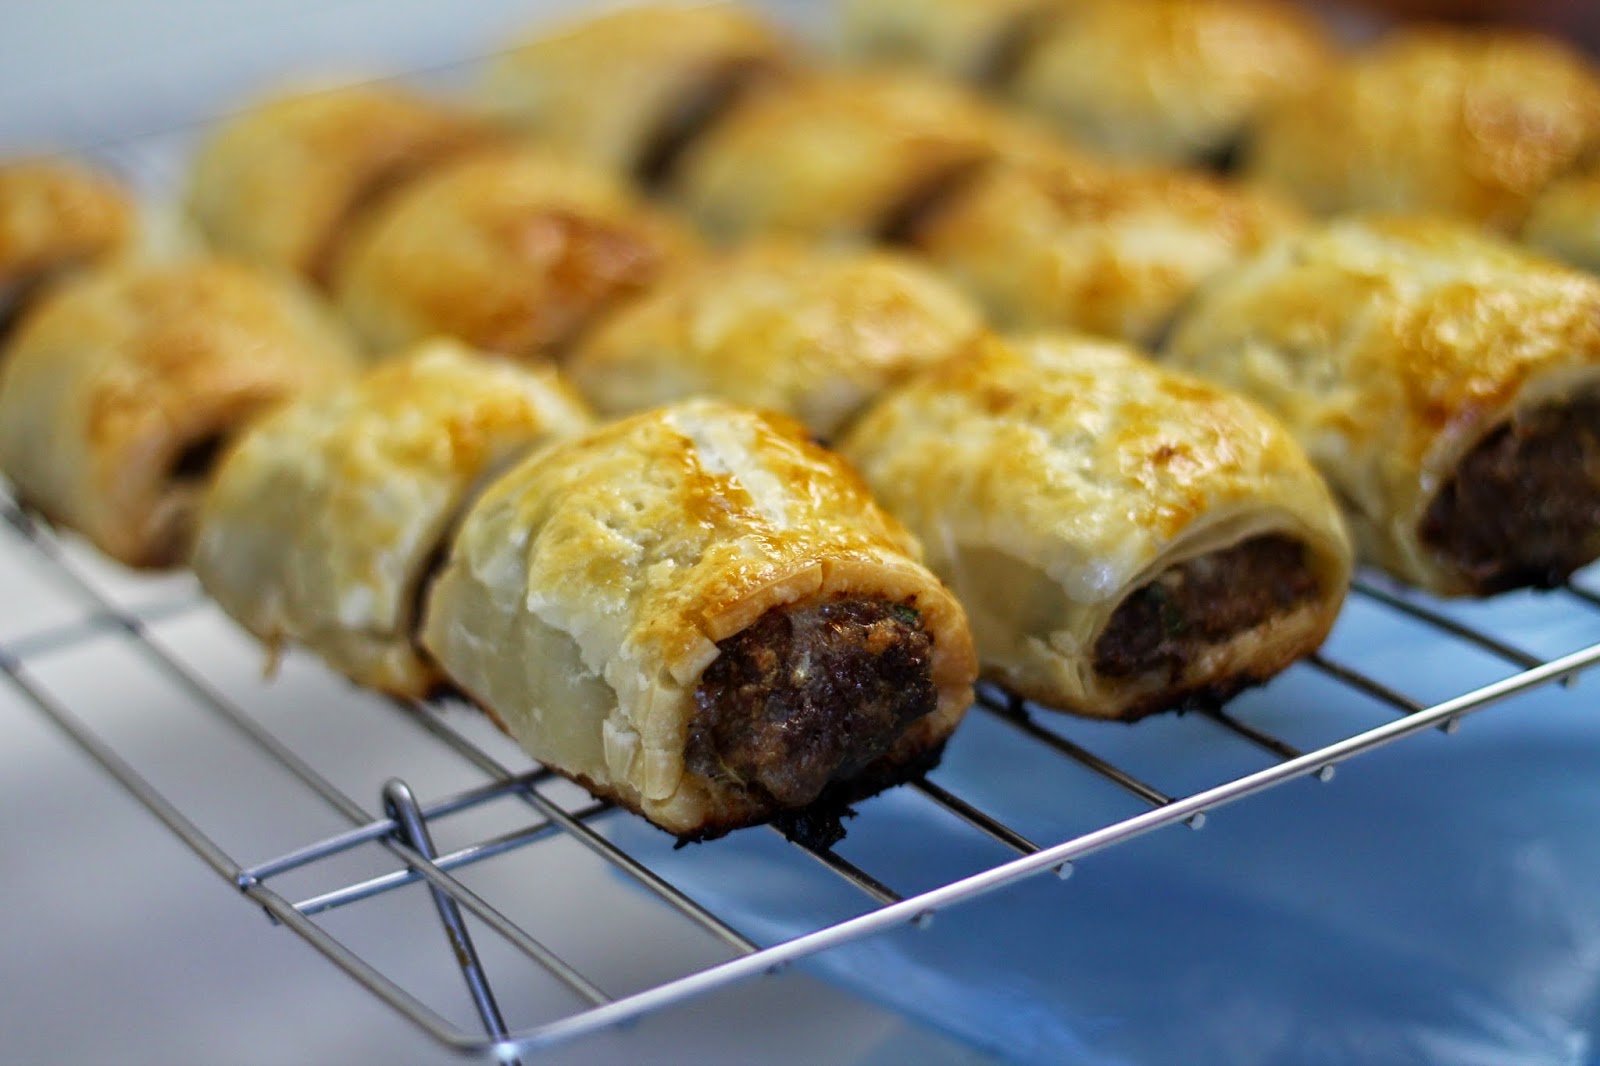
I was impressed with the ease of the sausage roll recipe and the end result was so delicious. Not one person in the house could stop eating them, and when we had our fill, there were more to pop away in the freezer for another day. Who would ever settle for store bought sausage rolls after this?
Besides the amazing flavour, these sausage rolls freeze really well and are great for an afternoon snack...or pop them in the kids' lunchboxes! They'll love them.


TRADITIONAL HOME MADE SAUSAGE ROLLS 

500g lean mince beef
500g sausage mince`
2 onions, finely chopped or grated
2 eggs
2 cloves garlic, crushed
1 tsp. mixed herbs
1 tbsp. BBQ sauce
3 tsp. Worcestershire sauce
1/2 cup breadcrumbs
3 tbsp. fresh parsley, finely chopped
Salt and pepper to taste
3-4 sheets puff pastry, thawed

Preheat oven to 180C. Line and grease two baking trays.
Combine sausage and beef mince, onions, 1 egg, garlic, sauces, parsley, breadcrumbs, mixed herbs and salt and pepper in a large bowl. Mix until incorporated.
Cut each thawed pastry sheet in half. Brush each piece with the remaining beaten egg. Using a teaspoon, spoon a portion of mince mixture down the centre of each piece of pastry.
Roll the pastry over the mixture and press the edges to seal, leaving the ends open. With a sharp knife, cut the sausage rolls into four, then place on the trays seam side down. Brush with egg and lightly score the tops diagonally with a sharp knife.
Increase the heat of the oven to 250C, and cook the sausage rolls for 25-30 minutes until golden brown. Serve with BBQ or tomato sauce.

Makes  24

NOTES: These are ideal for freezing and thawing as needed!


Monday, October 20, 2014

Deconstructed No Bake Nutella Cheesecakes

Yes, food is in fashion like never before, and it looks like it is here to stay.  The Foodie Nation report states that cooking shows have inspired two thirds of us to have dinner at home over dining out or take away meals. Simple meat and three vege is so 1990's. While shows like Masterchef have increased the popularity of gourmet home cooking, it just brings to light how little so many people do know about cooking. Don't get me wrong, I'm no expert, and I am always learning from my mistakes, but the sheer lack of basic knowledge  from some adults makes my head spin. I agree, TV shows make the art of cooking look easy! Effortless even. But there's nothing like a flurry of questions on a food blog to make you realise just what people don't know about the very basics of even beginning to cook. They are tackling moderate to advanced recipes without even having ever boiled an egg before or made a cake from the box. They don't think in terms of food and how it works (there's a science to it.) Thumbs up for being enthusiastic and willing-I think its great people are thinking in terms of good and well presented food, but I think you need to start at the very beginning- it's a very good place to start!
I guess what spurred me to write this, or pushed me over the brink, was an adult person asking how to make chocolate dipped strawberries. It was a question posed on my friends cooking facebook page. They were simple chocolate dipped strawberries, no joke, and she asked my friend for the recipe! Astounded, I turned to my 4 year old son and asked him how he would make chocolate dipped strawberries. "You get the chocolate, melt it, and dip the strawberries in it." He said. Four year old logic. I had to have a quick look at this woman who didn't know how to dip strawberries in chocolate, and she was middle aged an regular looking. How she has survived until now, I do not know. Who could live without choc dipped berries, after all?
Anyway, we all have to start somewhere. Here are a few things I have learned about beginning to cook, which I have collected over the 20 years I have been baking:

1. Read the recipe before you begin, then read it again. There's nothing like getting half way though a recipe only to realise you needed plain flour and you only have Self Raising flour, or you have no idea what the soft ball stage is.

2. Utilize online forums and search engines like google if you have any doubts, and use conversion calculators or charts. So many questions I get after recipes are out of sheer laziness. "How many tablespoons is 50g butter?" Please google this and stop being lazy. You could have your answer within seconds. Having a printed conversion table is also a good plan.

3. Measure. So many people I have spoken to say that they simply throw the ingredients into the bowl, a bit of this, a bit of that, no specific measurements. This is recipe for disaster. You may be able to get away with this carefree style of cooking with a stew, but don't expect to succeed if you only put 3/4 cup flour in to that cake instead of 1 level cup. Precision isn't always key, but it is in most cooking for most ingredients.

4. Stick to your level unless you've been there for a while and are ready to take things up a notch. For example, if you have never cooked before, making macarons probably isn't the best way to start off. Get the basics down-pat first.

5. Don't mess with the recipe if you're a beginner! Maybe Jamie Oliver can substitute a carrot for a chicken and have it taste awesome, but it's best to stick to the recipe and not leave anything out or add anything if you're a beginner. Successful experimenting comes later.

6. Do the prep work, such as lining trays, preheating the oven and sifting flour. Every step is there for a good reason.

7. Don't stress if you fail! There is always next time.

And here's an easy beginner level  dessert for two that is impressive as well as delicious! it's non bake too, so it's pretty hard to be unsuccessful with these deconstructed nutella cheesecakes. They're perfect for hot summer nights when you don't want to turn on the oven, and are very quick and simple to put together. They also look elegant in tall glasses, topped with berries or shavings of chocolate.


DECONSTRUCTED NO BAKE NUTELLA CHEESECAKES (Adapted from Sweet & Savory by Shinee)

4 chocolate biscuits, crushed
1/4 cup hazelnuts, crushed (optional)
1 heaped tsp. butter, melted
100g cream cheese, room temperature
4 tbsp. sweetened condensed milk
3 tbsp. nutella

Place the crushed biscuits and hazelnuts together in a small bowl. Add the melted butter and stir to combine. Divide this mixture between two dessert glasses, reserving a teaspoon for garnishing if desired. Place in the refrigerator.
In a medium bowl, beat the cream cheese, sweetened condensed milk and nutella together until smooth and thick. Fit a piping bag with a large star nozzle and fill with the cream cheese mixture. Pipe the mixture into the glasses, garnish with the reserved crumb mixture, and refrigerate for at least 30 minutes before serving.

Serves 2


Thursday, October 16, 2014

Strawberry Creme Fingers

Last night I took my little daughter on a mummy-daughter date. We went shopping and had a baby chino and mini strawberry macarons together. My husband had set a meeting point for 8pm, and while heading there after our little girlie outing, I happened across a cute kitchen store that had these lovely omelet fry-pans with a non stick finish in a variety of colours. I couldn't resist, and bought a red one for my husband, knowing he would love it. Plus, his sunday omelets are to die for, and that was to be encouraged. We've been meaning to buy new fry-pans for a while and it just hasn't happened until now. I knew he'd appreciate it.
I saw him at a distance, waiting at the agreed upon spot. As I drew nearer I noticed he had a red no stick omelet fry-pan in his hand. My son ran up to me and said "Mummy! Look what we bought for you!"
Great minds think alike, right? Even the same colour!
The women at the store had a good old cackle when I took my purchase back to the store. They couldn't believe it! And I have a shiny new red fry pan.
It sort of reminded me of the idea that people and their pets begin to look alike after a long time of being together. My husband and I now think it unison. Or something like that.
Onto more exciting things, today we have Strawberry Creme Fingers for your viewing pleasure. I've been testing out my new softbox for the first time, as well as shooting in manual mode for the first time where food is concerned, and I'm rather happy with the whole combination. For the first time I have not had to edit my photos! (maybe I should have for a few, but hey, practice makes perfect.)
These elegant little fingers are perfect for a hasty, no bake afternoon tea for when you're thinking you have nothing to serve guests. I had these left over savoiardi fingers up in the cupboard after making a tirimisu. I had no idea what I was going to do with them, so I created a strawberry filling to wedge them together, and topped them with a berry (I only had some rather wizened looking frozen berries, of course fresh ones would look infinitely better) You can purchase these firm sponge fingers crusted in sugar crystals in the specialty section of most grocery stores, and last almost forever in an airtight container until you're ready to fill them. You can also use any flavoured jam in the filling, and any berries to garnish. Decadent!


 STRAWBERRY CREME FINGERS (A Lick the Spoon Original)

1 tbsp. butter, melted
2 tbsp. strawberry jam
1 tbsp. heavy/thickened cream
1 cup icing sugar
30 saviovardi sponge fingers
1 tbsp extra icing sugar to dust
15 fresh berries to garnish

Melt the butter in a small bowl. Add the jam, cream and a little of the icing sugar to the butter. Stir, gradually adding the remaining icing sugar. Beat on high with an electric beater or mixer until thick, smooth and creamy. Fit a piping bag with a small star nozzle, and spoon the filling into the bag. Pipe lines of this mixture along the centre of half of the sponge fingers. Place the uniced sponge fingers on top of the iced ones to form pairs. On one end of each pair, pipe a small star, and top with a fresh berry. Dust with the extra icing sugar before serving, if desired.

Makes 15


Step by step photos:


Wednesday, October 15, 2014

Blue Cushion Christening Cake with Sugar Veil Lace

I'm sitting in the silence of my home with a forbidden late night coffee and naughty chocolate biscuits from the stash no one knows about. I can hear the low rumble of my dessert stomach asking for more chocolate and caramel, and who am I to deny it?
I deserve it-finally the kitchen and living room have recovered from the last cake explosion-to my husband's delight it is tidy and clean again. It's not the kind of interesting explosion where the oven flies open and spurts of semi-cooked chocolatey lava-like cake batter comes blurting out. Its the two day cake mess, and then days of aftermath. First of all, there are three small people under the age of five that abide in my home. They all like to get very involved whenever anything edible comes out and it's a recipe for sticky disaster. The rolling pins are dug out and they need their share of fondant and cutters-a quick and easy trade for 10 uninterrupted minutes. Moments later there are sticky footprints on the wall and lumps of sucked fondant through my daughter's hair. And if you have seen my Vienna Rose, that's a discovery worth crying over. She has the curliest cloud of hair and it's like to removing bubble gum when anything makes its way into that glorious bird nest.
I love cake decorating. But attempting it with kids make it awfully, awfully hard to do successfully, and hence, world war three zone becomes a reality. Every time.
I am certain my cake decorating interest is a burden for my husband. It comes with a load-or should I say loads.That is mountains of bowls and pots and sticky things in our tiny kitchen. And those fondant foot prints up the wall, I mean, how on earth?
It takes me about a week of dish washing o finally have a cleared kitchen again. Time to get a dishwasher. But here's the cake that came of the mayhem. A gorgeous pale blue cushion with bows at each corner, featuring sugar veil lace trims and a we fondant baby under a crochet rug. It was for my Godson's christening-and worth the trouble.


It was my first time using the sugar veil and mats to create the lace. I live in a subtropical climate, so this stuff can be the substance of nightmares, and a sticky one to boot. It is quite unstable in humid climates, and I baked it rather than leaving it to set for hours (which I wasn't sure it would do any way considering where I live.) The oven was effective for the most part, with significant trial and error. I was thrilled with the lace it created, as it added a very elegant and delicate touch to the cake. You can fix this lace with water, and I also added small pearl cashous to the top of the swags for a finished look. The cake itself was a 20x20cm square Mississippi mud cake, cooked in a square pyrex dish with rounded edges. The centre sunk a little after cooling but it gave the impression of softness when covered, especially as the baby lay in the middle of the cake. I lightly carved down to the corners of the cake and curved the sides inwards to create the pillow cake look I was going for. Before laying the fondant, I did a thorough crumb coat with coffee flavoured butter cream icing, refrigerated it, and went over it again for a final and smoother coat of butter cream icing.
The baby is less than perfect, as it was my back up baby which I never thought I'd have to use. Silly me left the cake on the table, and came back to find the cake intact in every way but the baby was carefully removed by little fingers. I found it in my daughter's mouth moments later, and she was hiding behind the door. While impressed by her delicate removal system, and grateful I didn't have to remake the whole cake, baby two had to be inserted under that crochet cover, and he happened to have a bit of a scarred face. Don't look too closely!
So-ever wonder why cakes are so expensive to have made? So much work and detail goes into them, even the simple looking ones-It's too hard to put a price on the hours and hours of work that creating a cake entails. If I was paid by the hour for this I'd be charging an arm and a leg! So cakes will be few and far between..for personal eating only and for very select VIP like my new Godson Raffie. When the babies are grown, I'd like to make cakes for everyone. When the time and the environment is right. Bring it on!