Showing posts with label accompaniments. Show all posts

Thursday, August 22, 2013

Dulce de Leche /Condensed Milk Caramel


SWEETENED CONDENSED MILK CARAMEL/ DULCE DE LECHE

1 can sweetened condensed milk
1 saucepan of water

Remove the paper label from the side of the can. Immerse the can into the saucepan of water so that the water covers the top of the can. Place over a high heat on the stove and set the stove timer. Boil for three hours, checking frequently to top up the water to cover the can if it has evaporated. (It is important to keep the can covered, as failure to do so may result in the can exploding). Turn off the heat and allow the can to cool before removing and opening. You can boil the can for a further hour if you wish the dulce de leche to be thicker and darker and more intense in flavour. 3 hours is a good amount of time if you wish to add this dulce de leche to cooking or baking, such as brownies. (images show sweetened condensed milk that has been boiled in the can for 4 hours.)


Thursday, July 4, 2013

Caramelised Red Onions

I'm not sure if there's anything on this blog that doesnt involve a little bit of sugar. Even my savory recipes sometimes have sugar in them. The good thing is, if you're trying to keep down the sugar levels in your diet, you can often greatly reduce the amount of sugar stated in the recipe.
However, when making this delicious accomaniment,  I forbid you to remove the brown sugar--it's what makes these caramelised onions sing, and well, caramelised. I've used red onions, speedily cut up with the help of Jamie Oliver's Chopping Tower which is a lifesaver when it comes to avoiding tears and cut fingers in the kitchen. You can use brown onions if you prefer, but I love the gorgeous colour of the red onions once they are caramelised, and they look rather pretty as an addition to a cheese platter with that bit of colour in them. You can also have caramelised onions with bangers and mash, on your salad and burger roll for lunch or any place you please. I like to put caramelised onion in meat pies and into rissoles and chicken burgers when I make them--that caramelised flavour really packs a punch and gets the "wows" coming out of your eater's mouths when they have swallowed.


CARAMELISED RED ONIONS (from Taste)

2 tbsp olive oil
3 large red or brown onions, sliced
pinch salt
2 tbsp brown sugar
2 tbsp balsamic vinegar

Heat the oil in a medium saucepan. Add the onions and the salt and stir to combine. On a very low heat and stirring occasionally, cook the onions for 15-20 minutes, or until soft and tender. (if the heat is up too high the onions may catch and burn)
When the onions have softened, add the sugar and vinegar. Cook the onion over a low heat, stirring occasionally, for a further 8-10 minutes to caramelise. 
Use immediatly or store cooled in an airtight jar in the refrigerator. Makes about 1 cup, depending on the size of your onions.

Serving suggestions: Caramelised onions are great incorporated into rissoles and chicken burgers, or served on top of burgers in a salad roll. They are also great with bangers and mash, served with a selection of cheeses, or added to any savory dish.


Caramelised Red Onions

Monday, September 17, 2012

Roasted Strawberry Poppy seed Salad

I told you I had strawberries coming out of my ears, didn't I? Forget 4 kg of berries...the quantity eventually exceeded that, and I fear this whole month will be comprised of strawberry recipes due to us all wading through those fat, shiny and delicious berries here in Queensland.
I don't hear anyone complaining.
And I certainly wasn't complaining when I discovered a delightful Strawberry Poppyseed Salad through The Savvy Kitchen. I missed out on being part of the Secret Recipe Club last month but I'm back in the game with this tantalizing and festive looking combination of leafy greens, poppyseeds and fruit. I admit, it's an unusual medley, and something that has been on my to-make list for a long time. Thankfully my husband enjoys the occasional blind-date with a new and unusual gourmet creation of mine, so I put it to the test with him 1.) knowing that he hates small seeds such as poppy seeds and strawberry seeds in anything because they are hard to get out of your teeth, and 2.) that he comes from a line of people who do not have fruits or nuts in their salads.
The outcome? "That's really good! surprisingly good!" says he as we stabbed our forks around that colourful bowl of salad.
And so it was. The textures and the flavours were beautifully balanced--the nuttiness of the slivered almonds, the crunch of the onion, the tanginess of the strawberries, and the sweetness of the dressing were all a feast for the senses. Not to mention how pretty it looked. To top it off,  neither of us ended up with any demon seeds in our teeth.
I made this recipe with a little twist, as I had been experimenting with strawberries at an earlier point. I decided on baking a tray of sliced strawberries for a few hours in the oven and arrived at a very interesting new garnish. I thought these roasted strawberries would go beautifully in this salad. The roasting process seems to infuse the air with the sweetest strawberry aroma, removing that sweetness from the berry and leaving a very tangy crisp strawberry chip at the end. I think it went beautifully in the salad, but if you cant afford the time in strawberry roasting, fresh berries would be equally as delightful.


ROASTED STRAWBERRY POPPY SEED SALAD (adapted from The Savvy Kitchen)

2 tbsp. sugar
1 tbsp. mayonnaise
2 tbsp. milk
1 tbsp. poppy seeds
1 tbsp. vinegar
1 bag mixed lettuce
1 cup roasted strawberries
3 tbsp. slivered almonds, toasted
1/2 small red onion, sliced thinly

In a small bowl, combine sugar, mayonnaise, milk, poppy seeds and vinegar. Whisk to combine thoroughly.
Ina large serving bowl, place the washed lettuce leaves. Spinkle the strawberries, almond slivers and onions over the lettuce. Dollop the poppy seed dressing onto the salad and serve.

Serves 6 as sides


Tuesday, September 4, 2012

Zucchini Boats

Have you ever come across someone that says they don't like eating something particular, and then you find out that they have never tasted it in their life? Have you ever wondered what makes people dislike certain  things they know nothing about? Just because an eggplant is called an eggplant doesn't mean it tastes like egg. Just because a chocolate icing looks brown like mud doesn't mean it tastes like mud!
You would think I'm talking solely about little children, but I'm talking adults here too. Well, I'm included there, I often find myself feeling prejudice against the poor old cauliflower, the parsnip and spinach. I think it comes down to families and what is frequently eaten and not eaten in the home. I love when people say they don't like something in particular because it sets me on a mission to convert them over.
This instance I converted myself!
Besides my zucchini soup which I love, I found it hard to prepare zucchini in a way that didn't repulse me. How could this stuff be cooked in a way that made it delicious? Well I was delighted when I came across this recipe for Zucchini Boats, and they look gourmet too (Something that never goes astray in my books). They're very easy to prepare and don't use many ingredients, but they pack a punch of flavour.
My little son and I found some cherry tomatoes that had grown in our very neglected vegie patch--somehow surviving the deathbed that it grew up in. We picked them, sliced them and put them on this garlic and lemon seasoned zucchini half, amongst the cheese that was then grilled and browned into a sizzling, delicious, golden crust.


ZUCCHINI BOATS (adapted from Proud Italian Cook)

4 small zucchinis
1 tbsp crushed garlic
3 tbsp olive oil
dash of lemon juice
pinch of salt and pepper to taste
1 punnet (approximately 16) cherry or grape tomatoes
1/2 cup grated mozzarella cheese
sprinkling grated Parmesan cheese

Set the oven at 180C.
Slice the zucchinis lengthways and arrange on a baking tray. Slice a slither off the bottoms if they do not lay evenly. Using a teaspoon, scrape the seeds out of each zucchini half, and discard.
In a small bowl, combine crushed garlic, oil, lemon juice, salt and pepper and stir to combine. Brush the tops and ridges of the zucchinis with this mixture, then place the tray in the oven for 20 minutes.
Remove the tray from the oven and sprinkle the mozzarella in the zucchini ridges. Top with halves cherry or grape tomatoes, then sprinkle with a little Parmesan. Place underneath a hot grill or broiler and cook until sizzling and the cheese has browned. Serve immediately.

Makes 8 zucchini boats


Tuesday, June 26, 2012

Wicked Dark Chocolate Fudge Sauce

What's your favourite and most used foodie adjective? I love describing food, but I have to stop myself from getting too carried away and from getting too poetic. I get on a roll talking about it and I often think it must bore people who aren't as interested in food as I am. Its a bit like when the boys start talking footy, I tend to zone out and stare blankly into the distance and all I hear is blah blah blah blah.
I apologise to you if I have ever talked you into a daze with my foodie nattering. I suppose if I had, you wouldn't be here, coming back for more.
Anyway, I once worked for a wonderful woman who told me to make a salad look "sexy" for the display cabinet. I couldn't believe my ears, and wondered what on earth I was meant to do to that salad. Give it curves?
I always thought that was a weird way to describe jazzing up food. It didn't seem to be the right word to use, but I suppose some would disagree. I thought it sounded a bit off. I don't want to eat sexy food, do you?
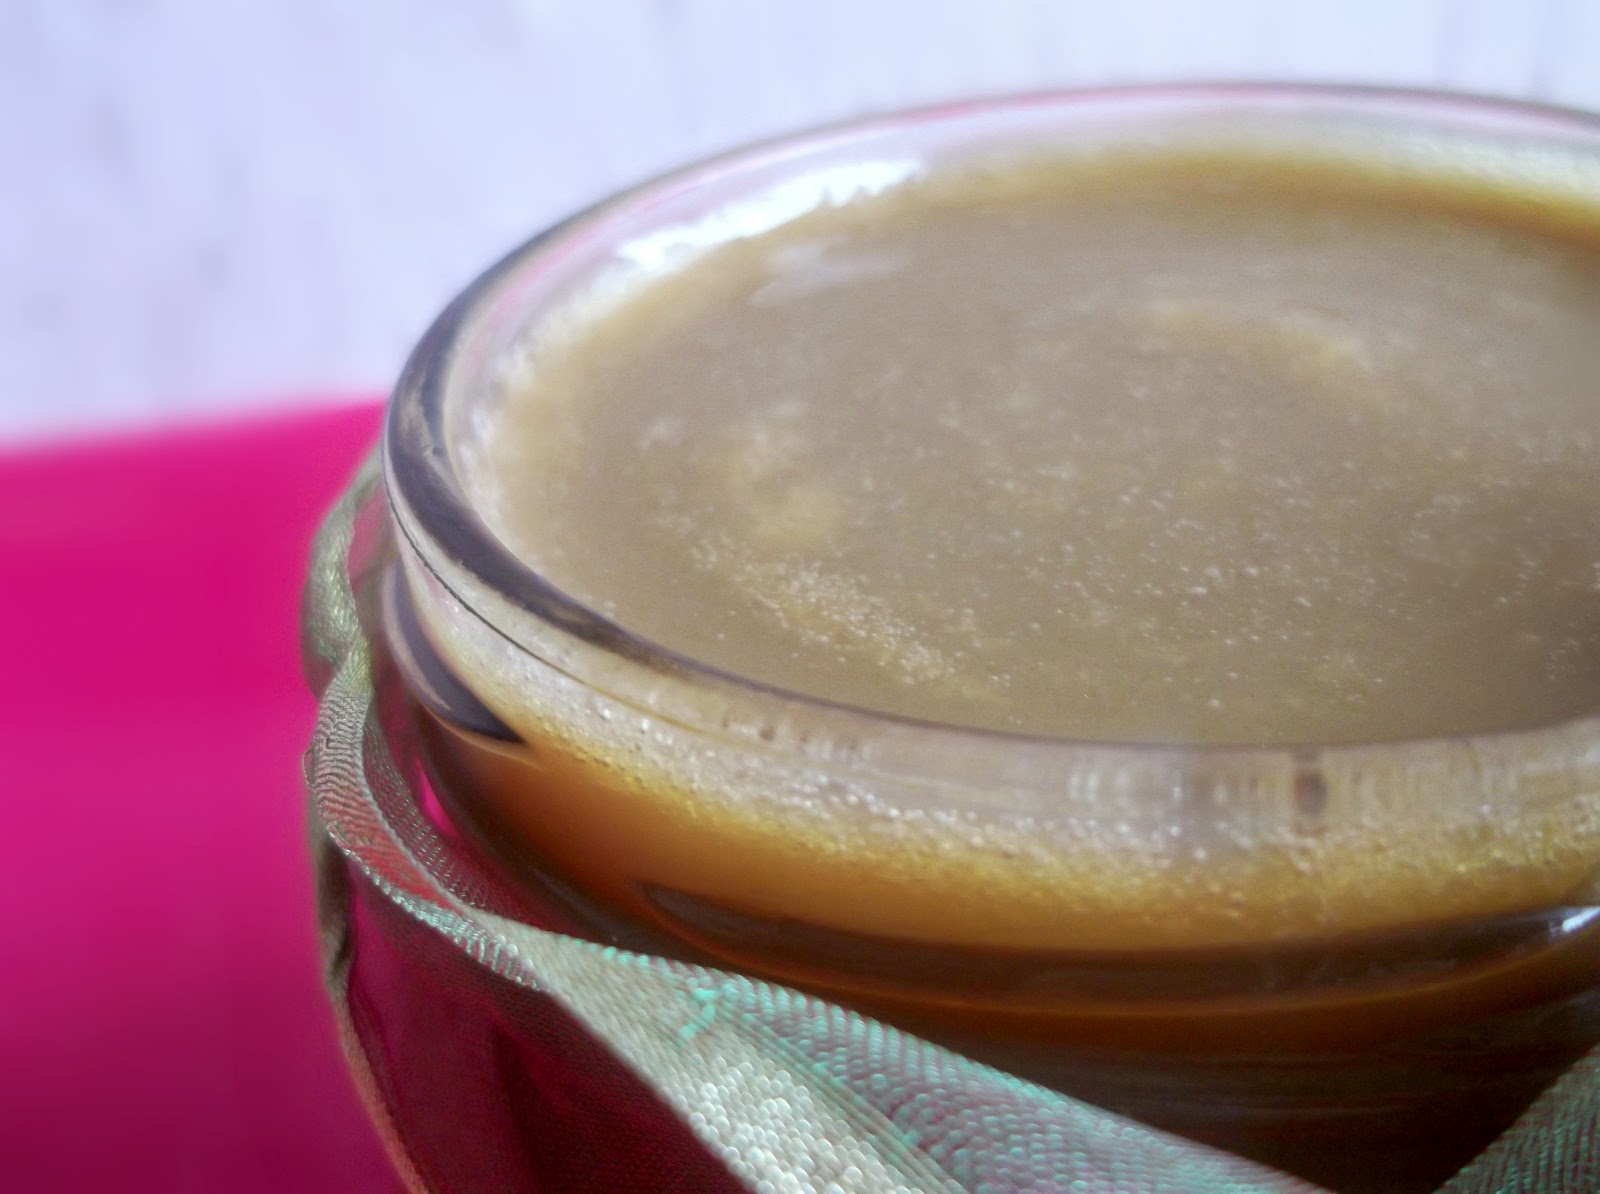
But when I describe this dark chocolate fudge sauce as being wicked, I mean it. It is almost black with cocoa, drizzles slowly with a certain lethal attitude, is super thick and holds a deadly sheen. If it could laugh it would sound like a deep, evil chuckle. It looks so delicious served warm and drizzled over ice cream, and tastes even better than it appears. You will want more ice cream after a bowl of it, just to experience that chocolate fudge sauce again. It's the ultimate temptation, and that's why it is so wicked. To make things even better, its slightly boozy, and can be flavoured as desired. I added Frangelico liqueur to this mix, but hubby and I both agreed that creme de menthe or mint liqueur would have also been amazing.


WICKED DARK CHOCOLATE FUDGE SAUCE (adapted from My Sweet and Saucy)

200g good quality dark chocolate bits
1/4 cup sugar
3 tbsp. golden syrup (corn syrup can substitute)
1/2 cup water
3/4 cup unsweetened cocoa powder
3/4 tsp. instant coffee granules
1 tbsp. frangelico or other flavouring

Place the chocolate in a microwavable bowl. Cook at 20 second intervals, removing to stir before setting on for a further 20 seconds. The melting time will depend on the strength of your microwave, however when there are just small lumps of chocolate among the melted, you can just give it a good stir until it's smooth. Set aside.
In a medium saucepan, place sugar, golden syrup, water, cocoa and cofee granules. Set at a medium heat and whisk constantly until the mixture comes to the boil. Cook, still whisking, for a further minute, before removing from the stovetop. Whisk in the chocolate and alcohol until smooth. Serve warm over icecream, profiteroles etc, or bottle and refrigerate until ready to use.

NOTES: I recommend using a bottle with a wide mouth that a spoon can fit into if refrigerating, as the sauce thickens when it cools. You can reheat the mixture quickly in the microwave, but be careful not to burn it. Makes about 2 cups.

Friday, May 18, 2012

Herb & Garlic Bread Knots

 We enjoyed these lovely, fresh and hot out of the oven garlic and herb bread knots as an accompaniment to the Thai Sweet Potato soup for our second course of our Gourmet Garden dinner party. They are best eaten straight out of the oven and lathered in butter, and dipped into that silky goodness we had as an entre.


An accompaniment to Course 2:

HERB AND GARLIC BREAD KNOTS (adapted from Swapna's Cuisine)

DOUGH:

3 cups bread flour
1 tbsp. sugar
2 tsp. dry yeast
1 1/4 salt
2 tbsp.oil
1/4 cup milk
1 cup lukewarm water

GLAZE:

3 tbsp. Mediterranean seasoning or selection of mixed herbs
1 1/2 tsp. Gourmet Garden Garlic paste
2 tbsp. seasoned olive oil

Place flour, sugar, yeast and salt in a large bowl. Stir to combine, and then add the oil, milk and water. Mix the ingredients with your hand until a dough forms. Kneed the dough for 8-10 minutes with your hands in the bowl until the dough is soft and pliable, and forms a ball. Brush a little oil over the surface of the dough and place in bowl. Cover with plastic wrap and sit for 1 hour until it has doubled in mass.
Take the dough and make into ten even portions. Roll each piece into a ten inch long rope and tie a knot in the middle. Take the end laying above the knot and fold it underneath and back into the centre. Take the end underneath the knot and fold it over the top and into the knot centre. Place on lined baking trays and cover with a clean tea towel for a further 45 minutes until puffy.
Preheat the oven to 175C. Combine the ingredients for the glaze. Brush over the tops of each roll with a pastry brush. Bake until lightly browned, approximately 15-18 minutes. Served warm with butter.

Makes 10 rolls

NOTES: These rolls are best eaten on the day they are baked.

Monday, April 30, 2012

Sour Cream, Chives and Onion Dip

You're probably as astonished as I am. I don't know if it was Lenten fasting that did it to me, or the influx of sweet, sticky, melty goodness that engulfed me over Easter, but I've been a little more interested in savory things of late. Imagine my amazement to find something delicious enough to blog about that wasn't sweet and was made by my own hands. I never thought I had it in me.
Like lots of amazing things, this delicious dip was created by chance. My mind does not think in savory ways (my thoughts are not too unsavory, I hope), so anything invented by myself that isn't sweet, and tastes good, is surely a fluke.
It's very simple really, and utterly, ridiculously addictive. I stumbled upon it while creating my last Secret Recipe Club post, and, on licking that spoon, discovered that I had indeed invented another recipe at the same time. I almost had to make another batch, as I instantly whipped out the rice crackers and my son and I sat on the floor and dug in with glee. Between bites he sang out "Mumm mmum mmmum!" I take that as pretty high praise. "Yum" has become "Mum", oh that's how I like it!


SOUR CREAM, CHIVES AND ONION DIP

4-5 stalks fresh chives, chopped (2 tbsp)
1 cup thick sour cream
2 tsp french onion soup powder
1 tsp crushed garlic

Place the sour cream in a small bowl, and stir the garlic through. Finely chop the chives and add to the sour cream. Sprinkle the onion powder over the chives and stir to combine.
Refrigerate if not serving immediately. Enjoy with crackers.


Sunday, April 15, 2012

Bacon and Sage whole Stuffed Potatoes

Sitting down after a long Easter Sunday, I realized I had probably eaten a little too much. It brought back the memory of the days when food was my archfoe, and would have lived off dry crackers if my parents hadn't stepped in. In fact, I was so shocking with food at the time that my mother had to wake me up in the night to give me a steady dose of Sustagen ( nutritional supplement) to try and bring me back to my former self. I guess I was skeletal.
It's only since I got married that I've started to thoroughly enjoy food and eat properly. I have my darling husband to thank for that. He makes me want to actually eat, and now, here I am, food rocks my every day. So there's hope for those who don't fancy food as being a great and enjoyable part of being alive.
It made me think though, if I had been allowed to live off sweets, would I have? Probably not, I cant remember being addicted or interested in any food at all. But sweets is the way my mind thinks now, not so much the savories. My brother in law thought this blog could improve with some savories...so here it is, for you David. With extra cheese, just for you!


BACON AND SAGE WHOLE STUFFED POTATOES (adapted from Coles Autumn Magazine March 2012)


12 small potatoes
2 tbsp olive oil
salt to sprinkle

2 rashers bacon, diced finely
1/2 cup cheese, grated
1/4 cup dried breadcrumbs
1 tsp ground sage
sour cream to serve

Preheat the oven to 200C. Wash the potatoes and remove any residue. We recommend using potatoes that are brushed and washed. Place one potato on the chopping board and place an item, such as a chopstick or container lid, on either side. This ensures you do not cut through to the base of the potato in the next step.
Slice the potato thinly down to the chopstick level, and repeat until the whole top of the potato is a series of slices. Repeat with the remaining potatoes. Place on a baking sheet with the sliced side up, then rub with oil.. Sprinkle the tops with a little salt to flavour. Bake for 1 hour or until tender .
Meanwhile, pan fry diced bacon for one or two minutes. In a bowl, combine breadcrumbs, cheese and sage.
Remove the potatoes from the oven. Randomly wedge pieces of bacon into the cuts of each potato and sprinkle with the breadcrumb mixture. Return to oven until cheese has melted. Serve immediately with sour cream dolloped on the top.

NOTES: These were yummy as they were, but I personally found the skin a little hard to chew through. You could peel the tops before slicing, if preferred. This may increase the enjoyability of the stuffed potatoes. Also ensure they are served hot!


Monday, March 19, 2012

Caramel Sauce

 I don't know about you, but there's little I love more than sweet, sticky, gooey and thick caramel. It's one of those delicious things you can just about put on or in anything to create a delightful morsel. It's one of those all-rounder additions, whether it be on top of ice cream, in a pie, or spread on toast or between the layers on a cake. If I wasn't trying to cut back so much on sugar (thanks to a recent and rather uncomfortable dental trip) I would have this delicious caramel sauce as a staple in my refrigerator. The opportunities to use caramel sauce are simply endless, and this is a particularly delightful recipe discovered on From My Sweetheart, a dessertaholic's blog put onto me by The Secret Recipe Club, where we bake, blog and share.
Now really, Anne, you and I should be visiting DAA (Dessert Addicts Anonymous) on a weekly basis due to the deliciousness of your blog. I tweaked the recipe a bit to go along with a somewhat limited pantry content, and it was simply delicious. This sauce would make a delightful gift, bottles in a pretty jar with ribbon and a retro tag! Don't forget to check out Anne's version for the original recipe!


CARAMEL SAUCE ( lightly adapted from From My Sweetheart)

2 cups brown sugar
1/2 cup water
1 1/2 cups heavy cream
1 tsp vanilla essence
2 tbsp butter
large pinch of salt

Add the water and sugar to a medium saucepan, and stir to combine. Place over a low heat until the sugar dissolves, refrain from stirring. Increase the temperature to a medium heat and boil for about 5 minutes until the sauce turns a golden brown. Using a swirling motion, move the saucepan around  to stir the sauce. Be sure to keep a close eye on the sauce as it can easily burn at this point. Remove from heat and slowly add cream and vanilla essence. At this point the caramel will solidify--then add the butter and the salt. Return to the stove on a low heat, stirring continually until the ingredients are well incorporated the sauce becomes a smooth caramel. Cool for at least four hours, then bottle and refrigerate. Sauce will become thicker on cooling and refrigeration.

Makes approximately 3 cups of delicious caramel.


Saturday, December 17, 2011

Mango Chilli and Lime Aioli with Prawns

 My husband is an amazing cook. I'm not just saying that because he's my husband, it's a fact, and a sweet one at that. A man that can cook and will cook and enjoys it! There should be many more of them.
Anyway, we've decided to get the family over for Boxing Day celebrations. As seafood lovers, my husband and I have decided to have prawns for appetizers before dinner, and we found the most amazing accompaniment for those orange and white babies. We jut had to try it before hand to make sure of the fact. This recipe has been adapted by my husband from Curtis Stone's Christmas Magic. So tasty!


MANGO CHILLI AND LIME AIOLI

1 small mango, peeled, stone removed
1.5 tsp fresh peeled ginger, chopped finely (we used Gourmet Garden Ginger paste)
1 tsp chilli garlic sauce
1 tbsp lime juice
1 egg yolk
1/2 cup virgin olive oil
1 tbsp fresh coriander, finely chopped

Place mango, ginger, chilli and lime juice in the food processor and blend until a puree forms. Add egg yolk and pulse until combined. With the motor still running, add the oil until you reach a smooth creamy consistency. Season with salt and pepper if desired, and add coriander.

NOTES: This aioli can be made a day ahead as the flavours develop over time. You can also use sweet chilli sauce instead of chilli garlic sauce. Serve with prawns.