Showing posts with label gifts. Show all posts

Tuesday, May 17, 2016

Decorated Heart Sugar Cookies with Gumpaste Roses

This Mother's Day I asked my kiddies what they would like to make for mum, and my eldest daughter pulled out the cookie cutters. Mr 5 pored through a recipe book and pointed out a recipe for sugar cookies-so we got to it. I knew these gorgeous cookies would make the perfect budget friendly gift!
How important is involving children in cooking? I think it's a crucial life skill that needs to be encouraged at a very young age. I've vowed not to let one child of mine leave home without a good set of cooking skills under their belt-and not only the essentials. If you're wondering how to instill a love for cooking in your kids, there's a wonderful guide to cooking skills outlining appropriate cooking tasks listed by age, starting from three years and up. As painfully slow and messy it can be, I always allow my kids to get involved when I'm baking. They're too small to do much yet, but they do love activities like beating, rolling, measuring, sifting, licking the spoon....


BASIC SUGAR COOKIES (Adapted by Love Food pg.16)

115g butter, softened
55g caster sugar
1 tsp finely grated lemon rind
1 egg yolk
175g plain flour

Mix the butter and sugar with beaters until creamy. Beat in the rind and the yolk. Sift in the flour and mix into a soft dough. Gently knead until smooth, then halve the dough and form into two balls. Wrap in cling wrap and refrigerate for an hour (or the freezer for 20 minutes)
Preheat the oven to 180C (350F).
Grease and line two baking trays. 
Unwrap the dough and roll out on a lightly floured surface to the thickness of about 5mm/1/4 inch. Using a heart shaped cutter, cut out the dough and place the shapes on the baking trays with at least 2cm space between them.
Bake in the preheated oven for 10-12 minutes, or until they begin to turn golden.
Remove from oven and cool on a cooling rack. When completely cool, ice with royal icing, and decorate if desired.


ROYAL ICING

2 tbsp beaten egg white
175g icing sugar
water or lemon juice, if needed

Place the egg white in a bowl and add a little sugar. Beat until smooth. Gradually beat in the remaining sugar to make a smooth, thick icing that holds soft peaks. For a thinner, spreadable icing, beat in a few drops of water or lemon juice to get the required consistency. To colour the icing, use a toothpick to add a little liquid or gel food colouring an mix thoroughly.
To ice the hearts, outline the cookies with the thicker icing and allow o ry, then fill in with a more spreadable royal icing. We decorated with a smaller version of these gumpaste roses and store bought edible pearls.


Sunday, December 21, 2014

Homemade Limoncello

If you were to ask what the most exciting thing I have made and tasted this year it would be this-heavenly, liquid gold. Lemony, sweet, alcoholic, utterly refreshing and served ice cold straight from the freezer, this home made limoncello is definitely a case of saving the best till last. It's a recipe with history, passed around Italy. I nabbed it from the glorious hardcover Italian cookbook Limoncello and Linenwater by Tessa Kiros, and she writes

 "This recipe is from Massimo, Giovani's friend, and he got it from his Sicilian friend's grandmother." 

Don't you just love recipes that have been passed on through numerous people and generations? You just know there's something special about it, something coveted. It just adds to the flavour.
This drink really is a labour of love. But food and drink always does taste better with lashings of passion and love poured into it, I am certain of it. I had blisters on my hands after spending hours peeling the lemon yellow off the pith with a potato peeler-but it was so worth it. I can not stress how worth it it was. Thankfully we made a double batch of this lovely drink, so that we could gift it to friends and family this Christmas. It's the ultimate homemade Christmas gift for anyone who enjoys a good drop and is a foodie lover.
We had been saving interesting liqueur bottles over the years for this very moment-after weeks of soaking the peel and waiting for it to settle, we finally got to bottle our very own home brewed limoncello. The feeling of satisfaction was beyond what I expected, especially after we had chilled it in the freezer and taken our first sips. Ahhhhhhhhhh! The perfect beverage to have on a hot summer's day.
Just to test how good our limoncello was, we poured a comparative shot glass of limoncello we had purchased from a well known boutique liqueur store in the Sunshine Coast hinterland. Theirs is a clear pure colourless liquid scattered with gold leaf and set in a cello shaped bottle. Fancy!
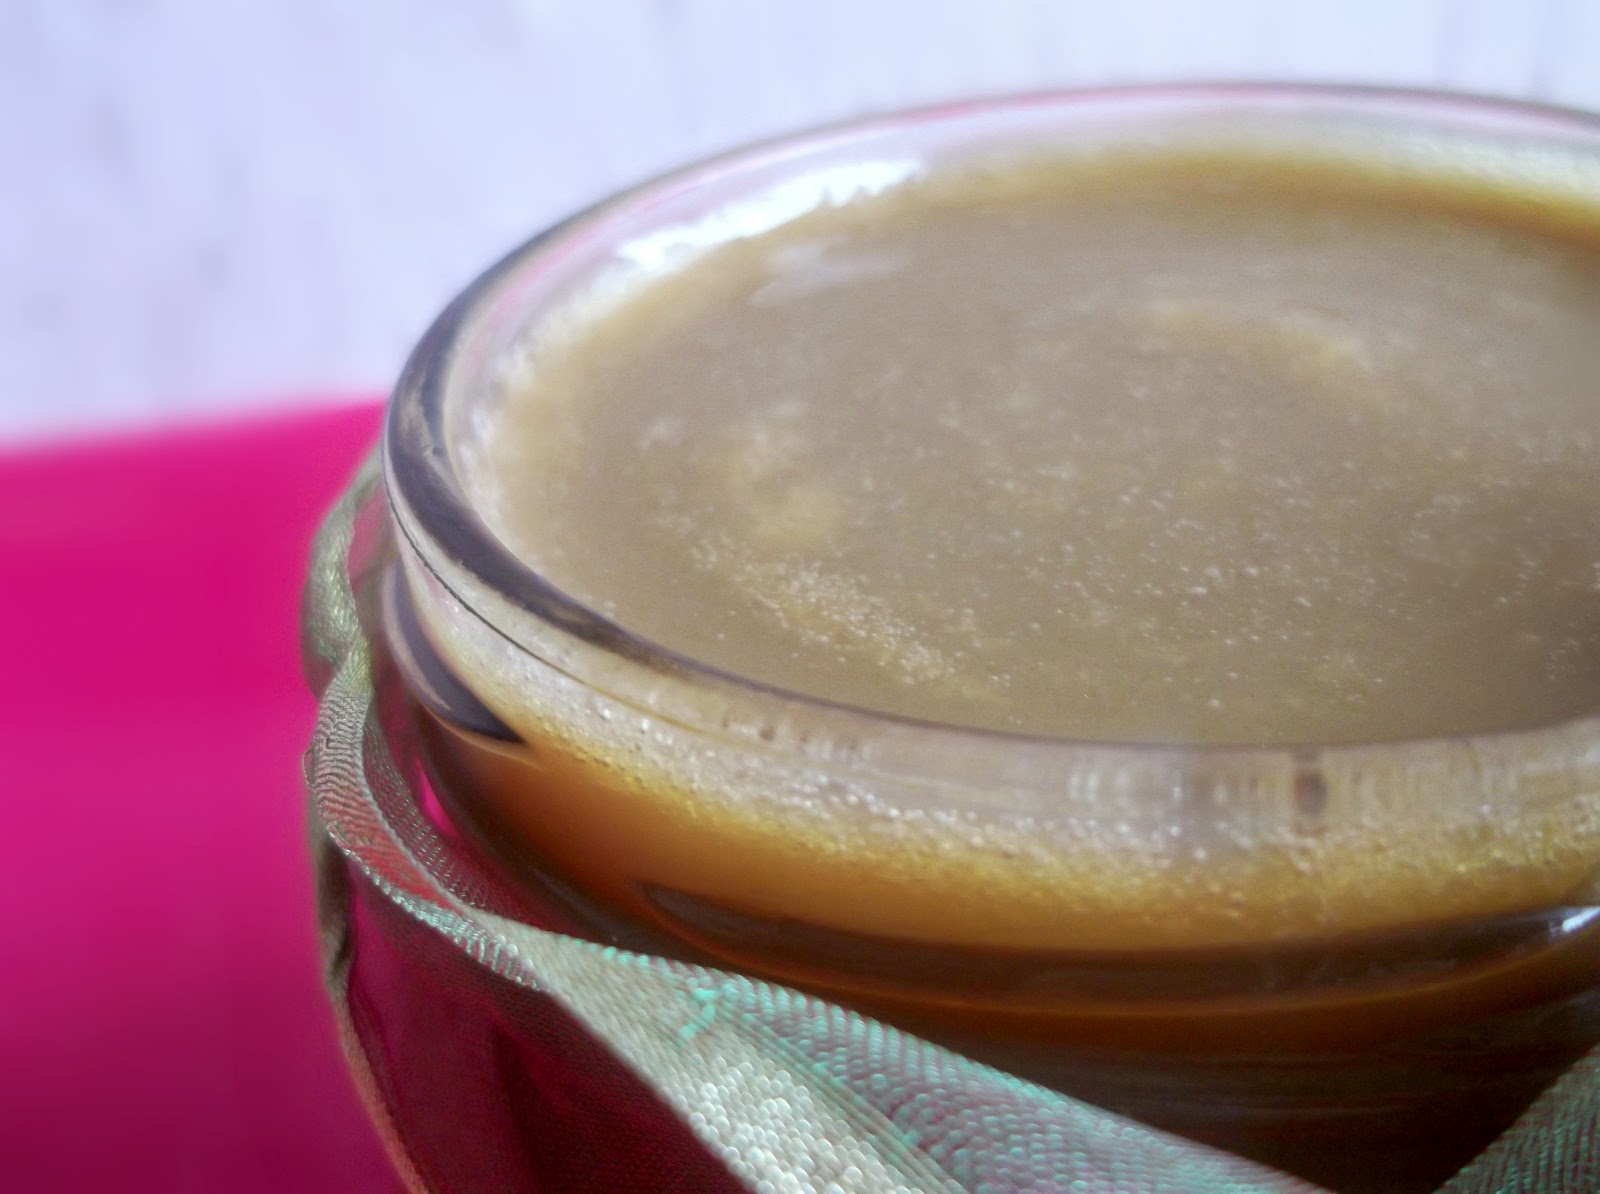
Ours is a clear, lemon coloured liquid, brilliant to the eye. In comparison, ours smells and tastes much more lemony, sweeter, with an alcoholic warmth at the end. The store bought one is less aromatic, and perhaps more alcoholically potent. The first impression is "Wow, strong alcohol! Mmmh, lemon."
It's the exact reverse for the home made limoncello.
I'm pretty biased, but I prefer our batch, as does my husband. That dash of love sure is a tasty addition. We hope to carry on our home made liqueur tradition to many future Christmases.And you may ask, what am I going to do with all those peeled lemons? Make old fashioned cloudy pink lemonade of course!


HOMEMADE LIMONCELLO (From Limoncello and Linenwater, by Tessa Kiros. pg. 17)

8 lemons
1 litre (4 cups) pure alcohol
1 kg sugar
1 litre (4 cups) water

Wash and scrub the lemons very well.
Pare them with a potato peeler, removing only the yellow of the skins (any white pith will make the limoncello bitter, so just skim off the yellow). Put the yellow skins in a wide mouthed glass carafe  with about a 3 litre capacity.
Pour the alcohol over the top and seal. Keep covered for one week, shaking occasionally to make sure all the peel is soaking.
Put the sugar in a saucepan with the water and stir until the sugar has dissolved. Bring to the boil and simmer for just under 10 minutes. Remove from the heat. Using a fine strainer or sieve, filter the alcohol into a jug and discard the lemon peel.
Slowly pour the strained alcohol into the hot sugar syrup and stir to combine thoroughly.
Cool completely.
Pour back into the carafe. Cover again and leave for 10-15 days.
Serve well chilled. You can even keep it in the freezer.

NOTES: We used vodka as the alcohol in this recipe. Most pure alcohols are between 96-98%. Makes about 2.25 litres. We made a double batch, and spent about $100 on vodka, sugar and lemons, and got about 4.5 litres of pure Italian bliss. (8 varied sized bottles!) You can store this in the freezer permanently for a super chilled drink-the alcohol cannot freeze.


The process in pictures:


 Just to show you how thinly you need to peel the rind from the lemon, the first slice I took out of the first lemon looked like the above. The peel had lots of white on the bottom, so skim lightly and peel like the rest of the lemon pictured above.


 Your peel should look like this. In the beginning, until I got the knack of peeling well, some of my peel had white on it. This makes the limoncello bitter, so try to avoid it. My small dose of white didn't seem to affect the flavour noticeably.


 All the peel place in glass container.


 Vodka is added to the peel.


 Bottle is sealed and left to sit for a week. Careful when you go to inhale from the bottle, it will burn your nostils!

 
After that the lemon is removed and water and sugar is boiled together to create a hot sugar syrup. This is added to the vodka. It then sits for 10-15 days before bottling.


 Hubby bottling the limoncello.


Voila! Chill and serve.

Sunday, November 17, 2013

Caramel Popcorn Balls

 My son will not eat corn, hence he will not eat popcorn.
"Mum," he says "if it's corn, it's a veggie." And we all know how hard it is to get the kids to eat their veggies, even if it is in the form of popcorn. Yes, this is the three year old that knows his chocolate custard from his chocolate mousse, and isnt hesitant to make it known. "This isn't custard Dad--I think it's chocolate mousse!" While I beam with pride that my son knows the difference, part of me thinks, we probably conume more mousse and custard than we should.
My two year old daughter on the other hand, is more of the experimental type, and corn in any form does not faze her. In fact, she can't get enough. She went crazy for this popcorn when I made it. Her eyes almost popped out of her head with glee when she saw me pouring hot caramel over the fresh popcorn, and she started clapping excitedly. This recipe for caramel popcorn is from Danielle's blog, Hugs and Cookies XOXO. Danielle is the owner of a delightful blog just bursting with all sorts of scrumptiousness--and I found it hard to choose just one recipe to recreate for this months Secret Recipe Club Reveal. The caramel recipes alone left my keyboard rather drooled upon. Anyway, I've been looking for Christmas recipes for a long time, and when I came across the caramel popcorn it brought back vivid memories of Christmases gnawing away at caramel popcorn in the form of a ball.
My parents ended up making a rule against gift giving among my siblings--there are ten of us kids, so you can imagine the mountains of presents surrounding the tree and everyone getting stressed over what to buy and the lack of coin, especially among the younger ones. So my parents would give us all presents, and we would in turn, add something to the day--the Christmas tree, the wine, the pudding, the candy canes for the tree--whatever we wanted. For many years in a row I recall making caramel popcorn balls tied with ribbon, and hanging them on the tree like baubles as my little gift for the day. It's very economical and fun, and easy enough for children to make. They would make great DIY teacher's Christmas gifts for the end of school as well, tied up with ribbon in a clear cellophane bag. They would also be a great treat to sell at a school fete--cant you just see all the little ones munching away?
Now will my son eat corn?
Only if it's popped kernels covered in caramel and made into a ball shape. Somehow now, it's not a vegetable.


CARAMEL POPCORN BALLS (Adapted from Hugs and Cookies XOXO)

6 cups already popped popcorn
1/2 cup butter
1 cup brown sugar, packed
1/4 cup honey (golden syrup or light corn syrup and great substitutes)
1/2 tsp salt
1/4 tsp bicarb soda (aka baking soda)
1/2 tsp vanilla

In a large bowl, place the popped popcorn. Set aside.
Melt the butter in a medium saucepan, then add the sugar, honey and salt. Stir to combine, then let boil without stirring for 4 minutes. Remove from heat and stir in the bicarb soda and vanilla. Pour this hot caramel over the popcorn. Stir thoroughly, then set aside for 5-10 minutes to cool. The caramel is extremely hot, so cautiously test the caramel with your finger to make sure it's cool enough to handle. While it is still warm, scoop handfuls of caramel popcorn and form them into balls, about fist size. Make sure you use some pressure, so that the ball holds together firmly. Set aside to cool before tying with ribbon.

Makes approximately 6


Thursday, May 9, 2013

Mother's Day Ideas

Mother's Day--don't let her be the one who makes the cake! Although I will be, but it's only because I enjoy it so damn much. In fact, it's not a cake as such, but a Tim Tam Malt Ice cream bomb with chocolate ganache. I am sure it will make an appearance on here in the very short future. So hold your horses and keep your eyes peeled--I can't help but think it's going to be insanely scrumptious. But what about you? What's cooking for Mother's Day? Here's a secret--mums don't really care what they get or what you do, it really is the thought that counts and the fact that you made an effort and remembered. So you don't have to go out and buy something super expensive. I would say most mums would probably treasure something hand made more than anything--a piece of you! I'm a mum, I would know, right?
So here's a few ideas of edible gifts you can make yourself for Mother's Day. Hope you spoil her!


Giant Sugar Coated Rose Petal Cake--recipe here.


Raspberry Lemonade Slice--recipe here.


Pink Pancakes with Strawberry Jam and Strawberry Oreo Crumble--recipe here.


Strawberry Oreo Kulter Hund Chunks--recipe here.


Glazed Raspberry Swirl Scrolls--recipe here.


Almond Meringue Sea Shells--recipe here.


Chocolate Fudge Marshmallow Cupcakes--recipe here.


Forbidden Fairy Foam--recipe here.


Monte Carlo Cheesecakes--recipe here.

Friday, May 11, 2012

Strawberry Oreo Kulter Hund Chunks

It literally translates to "Cold Dog", but that conjures up images of jellied, chunky canned pet food to me. Have you ever wondered how dogs and cats could like eating that stuff?
Well, if eating this German Kulter Hund makes me a dog, so be it, and if it makes me a cold dog, well...maybe I am?
This German favourite is usually made with plain baby biscuits. The plain, rectangular milk biscuits that would be given to babies in the first year or two of life are the ones I'm talking about. The ones that are always the last to go from the family selection pack of biscuits.
So here's a wonderful way to use up those more plain biscuits that can accumulate in the bottom of the tin. I've used strawberry oreos for this recipe to add extra decadence. Who knew oreos have been around for 100 years? I only heard of them about two years ago...I must have been living under a rock. I suppose they're not as common in Australia as they are in America, but I decided to give them a go. After all, just about every cooking blog has something oreo. They must be good!
Truth is...they're delicious. Chocolate ripple biscuits are still my favourite all time biscuit for recipe additions though. Both biscuits have been known to make fabulous pie crusts and fillings for various desserts.
Now just a quick note about these Oreo Kulter Hund Chunks. They're so easy to put together that a child could do it, and there's no cooking involved (just the chocolate melting which can be done in the microwave). They can be a bit messy to make, especially as I made this lot in a 20x20cm bundt tin, but it's so worth it when it's set, and you cut off those lumps of chocolatey-oreoey goodness. It can be a little crumbly between cuts, so grab a zip lock bag and sweep up the crumbly bits...it's fantastic over ice cream! So...even for those of you who don't bake, there's no excuse not to whip this up for your mum on Mother's Day! It's child's play.


STRAWBERRY OREO KULTER HUND CHUNKS

450g good quality compound chocolate (I used Nestle)
250g strawberry flavoured oreo biscuits

Grease and line a pan of your choice. (I used a 20x20cm bundt tin, but a loaf pan is fine as well). Melt half the chocolate very gently in a microwave proof bowl, stopping at 30 second intervals until the chocolate is almost melted and can be stirred smooth. pour a layer of chocolate into the pan to cover the bottom. Cover the chocolate in a layer of oreos. Smooth on more melted chocolate over the oreos. Melt the remaining chocolate.
Layer again with oreos, and repeat with the remaining oreos and chocolate, finishing off in a layer of chocolate. Refrigerate to set, before cutting into rough chunks.

Wrap in cellopane and tie with a ribbon for a budget friendly and delicious Mother's Day gift!


Tuesday, March 20, 2012

Stuffed Easter Egg Halves

This Easter I wanted to do something a little different to our usual egg giving. When Christmas comes around you can always give something personalised, but Easter giving seems to be the same every year. So I decided to get myself an egg mold, some compound chocolate and start taking notes on everyone's favourite chocolate bar or biscuit. I am going to make half stuffed Easter eggs this year! I've seen Easter Egg halves for sale like this before, often filled with nougat, rocky-road or fudge and thought how easy and pretty they would be to make.
The family, not knowing my project, threw all sorts of wonderful favourites at me...mint areo bars, snickers, tim tams, honeycomb, kit kat, and the list goes on!
I was thinking how pretty they would look set in their own little boxes tied with ribbon, or even shrouded in clear cellophane with a lovely tag and ribbon...great gift idea!


STUFFED EASTER EGG HALVES

1 Easter egg mold (I used the plastic packaging off an Easter egg from last year!)
compound chocolate
filling of your choice

Melt the chocolate and stir until smooth. Brush on to the inside of the Easter egg mold until there is a thick and even coating over the entire surface. Be sure to make the edges thick as this will be the first thing to break if the coating is too thin. Reserve a little chocolate for the finishing touch.
Set the mold in the refrigerator or freezer to dry. Remove from cold, and gently push out of the mold. Fill with any sweet thing you desire--rocky road, clinkers, nougat, smarties, and then swirl over the reserved chocolate to ensure stability.
Wrap in cellophane or set in a gift box if desired.

Monday, March 19, 2012

Caramel Sauce

 I don't know about you, but there's little I love more than sweet, sticky, gooey and thick caramel. It's one of those delicious things you can just about put on or in anything to create a delightful morsel. It's one of those all-rounder additions, whether it be on top of ice cream, in a pie, or spread on toast or between the layers on a cake. If I wasn't trying to cut back so much on sugar (thanks to a recent and rather uncomfortable dental trip) I would have this delicious caramel sauce as a staple in my refrigerator. The opportunities to use caramel sauce are simply endless, and this is a particularly delightful recipe discovered on From My Sweetheart, a dessertaholic's blog put onto me by The Secret Recipe Club, where we bake, blog and share.
Now really, Anne, you and I should be visiting DAA (Dessert Addicts Anonymous) on a weekly basis due to the deliciousness of your blog. I tweaked the recipe a bit to go along with a somewhat limited pantry content, and it was simply delicious. This sauce would make a delightful gift, bottles in a pretty jar with ribbon and a retro tag! Don't forget to check out Anne's version for the original recipe!


CARAMEL SAUCE ( lightly adapted from From My Sweetheart)

2 cups brown sugar
1/2 cup water
1 1/2 cups heavy cream
1 tsp vanilla essence
2 tbsp butter
large pinch of salt

Add the water and sugar to a medium saucepan, and stir to combine. Place over a low heat until the sugar dissolves, refrain from stirring. Increase the temperature to a medium heat and boil for about 5 minutes until the sauce turns a golden brown. Using a swirling motion, move the saucepan around  to stir the sauce. Be sure to keep a close eye on the sauce as it can easily burn at this point. Remove from heat and slowly add cream and vanilla essence. At this point the caramel will solidify--then add the butter and the salt. Return to the stove on a low heat, stirring continually until the ingredients are well incorporated the sauce becomes a smooth caramel. Cool for at least four hours, then bottle and refrigerate. Sauce will become thicker on cooling and refrigeration.

Makes approximately 3 cups of delicious caramel.


Tuesday, March 13, 2012

How To Make A Cupcake Bouquet

When Valentine's Day came around this year, I decided to do something my husband wouldn't expect. I wanted to do something romantic and surprising, so I had a look around at florists for one that could deliver a chocolate bouquet to his work.
I found a fabulous one--40 gold Ferrero Rocher's on stems in a fancy box, and they looked like beautiful blooms! So I ordered them, and felt excited the whole of Valentine's day thinking of an embarrassing delivery being made to Luke's office.
My husband emailed me throughout the day and there was no word of anything arriving, and I didn't want to ask for fear of ruining the surprise.
He came home about an hour earlier than usual, and I greeted him at the door as always. "So, did anything interesting happen at work today?" I asked.
The answer was "No, nothing much!"
"No Valentine's day drama?"
"No" he smiled. "Why do you ask?" he then added suspiciously. "did you have something delivered?!"
"No, no what a silly idea" I laughed.
My heart sank to my feet. My attempt to be wonderfully romantic had again failed. *sigh*
"You did order something didn't you!" he asked, colour coming into his cheeks.
I guess my laugh gave it all away and I disappeared out the door with a basket of washing before he could ask me again, and before I told him.
The next day the secretary at my husband's work met him in the elevator. She apologetically told him that a bouquet had arrived for him about half an hour after he left work, and she felt terrible. Ah well...all's well that ends well. At least he got it in the end.
But it got me thinking. How easy would it be to make something like a chocolate bouquet yourself? (for about quarter of the price)
Then when I became a very proud aunty again (for the 9th time) I decided not to take a bunch of flowers...but a bunch of cupcakes. It was surprisingly easy, unique and beautiful. And a little more enjoyable than real blooms--for the stomach anyway!


HOW TO MAKE A CUPCAKE BOUQUET

What you will need to get amazing:

Cardboard
Scizzors
a stapler
large rubber band
coloured tissue paper
craft glue
a gift box
ribbon
7 disposable plastic cups
cupcake liners that fit in the top of the cups

1. Take seven disposable plastic cups and arrange as follows: one in the middle and six surrounding the sentre cup. It looks a little like a flower. Staple the cups together so they hold in this position. Some tearing of the plastic may occur, but that's okay as long as they're all holding together.

2. Measure the circumference of the cup collection. Cut out a circle in the cardboard of that size so that the cups sit neatly in the middle without too much of a rim around them.

3. Using craft glue, adhere the cups to the cardboard. Leave to dry.

4. Take the coloured tissue paper and cut as desired. Secrure it around the base of the cups with a rubber band.


5. Push the cup collection into the gift box (the gift box is optional, you could just tie some ribbon around the outside of the tissue paper if desired)

6. Add another layer of wrapping paper over the gift box for added dimension and colour and tie with a bow.

7. Now you are ready to fill your bouquet case! Make your favourite cupcakes and swirl them with soft butter cream icing in the design of a rose. For an example recipe, see below under "NOTES".


NOTES: The cupcake recipe I used was for these delicious Mini Chocolate Fudge Cupcakes in a more regular size. The icing was vanilla buttercream with a touch of pink food colouring.
Be sure to choose cupcake liners that will fit into the cups properly. I used a size of cup slightly smaller than your standard disposable cup, and the liner that fitted it was slightly smaller than the standard also. You can find all different sizes in your local super marker or at a party supplier.