Showing posts with label baby shower. Show all posts

Sunday, May 4, 2014

Beatrix Potter Peter Rabbit Themed Baby Shower

Seriously, who are those women? You know, the ones who have a baby shower that looks perfect beyond words and everything matches like nothing you've seen. Who ever knew there was so much pastel in the world? I am in awe of these people! Despite the fact I know I'll never hold one of those adorable parties we all see pasted all over Pinterest (and realistically, they're probably put together by party planners who charge hundreds for the display) I can but use these gorgeous photos as inspiration. And I did so in creating this Peter Rabbit themed Baby Shower for my friend Danielle.


One of the easiest themes I could have come across for my friend's baby shower was Beatrix Potter's character Peter Rabbit. It's such a cute baby shower theme, and quite neutral or genderless too. My friend didn't know the sex of the baby so this was a good one to go with. It was very economical to set up too, using Mr McGregor's veggie patch as the main table layout theme. I made sure I went grocery shopping up at the fresh veggie market the day before, so all my usual veggies were used in the display--cabbages, carrots, pumpkins bunches of herbs and yellow squashes. I arranged a plate of strawberries piled on a cake stand, and spread the table with other delicious edibles such as choc oreo mint truffles decorated as cabbages (white chocolate coloured green), fondant bunny and veggie topped cupcakes, individual dips in a cup with matchsticks of carrot, celery and cucumber, and a magnificent bassinet and baby carved out watermelon and surrounded by fruit salad...


The Peter Rabbit cake was of course, according to theme, a delightfully moist carrot cake. Peter Rabbit himself was made of fondant, or white icing as some call it. You can also model him from gum paste or the likes. I firstly looked for a tutorial on how to make a Peter Rabbit figuring and I couldn't find anything to my surprise. So I basically worked with two pear shapes of fondant-a large one for the body, and a smaller one for the head which I turned on a horizontal angle and sat upon the larger pear shape. I cut out from blue fondant a rectangle and draped it over the rabbit's back and added smaller rectangles onto the sides to act as sleeves to the jacket. I couldn't get a nice dark tone for his fur by adding brown food dye to the fondant, so I opted to paint him with the brown after he had dried, and it worked very well, giving him a nice multi-tonal look to the fur.
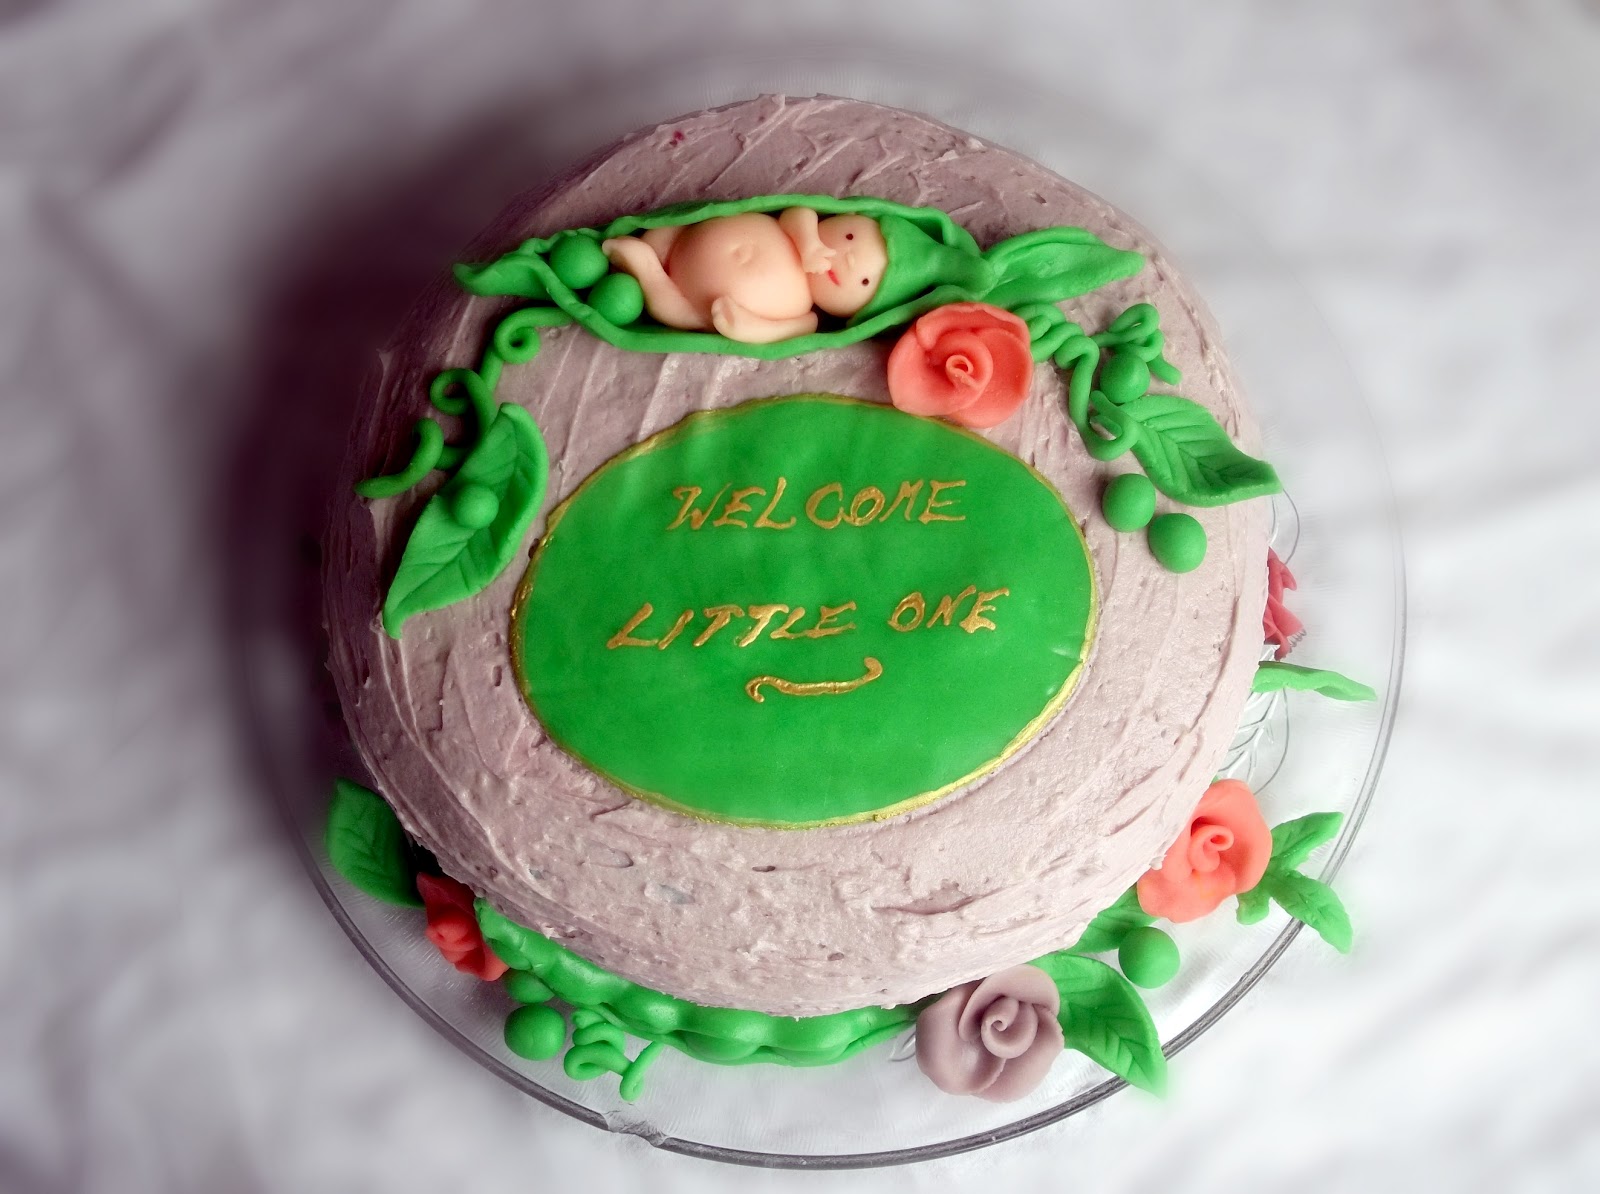
The vegetables that he sat amongst were likewise created from fondant. For the cabbage leaves that surrounded the cake and encased the fondant baby, I selected a nice veined leaf from the garden (geranium) and gave it a wipe over and left it to dry. Then as I rolled the green fondant, I lay this leaf over the fondant to give it this delicate imprint.


Mummy to be Danielle surprised us all with this show stopping carved watermelon baby in a bassinet. The head is made from cantaloupe, the nose a green grape and the eyes are black grapes. It was surrounded by kiwi fruit, yellow watermelon, red watermelon, cantaloupe, grapes and honeydew melon. Yum!


On this cake stand we have carrot cake cupcakes turned into McGreggor's veggie patch! The veggies are made from fondant, and the soil made from crushed oreos. The icing is cream cheese frosting with a bit of green food colouring.

Thursday, March 6, 2014

How to Make a Baby from Fondant or Gumpaste

 Making this gum paste or fondant newborn baby is easier than pie. With the use of a silicone baby mold, you will have a perfect miniature, edible baby within minutes--and it makes you look like a pro without being one. You can make this little bubba lifelike with a little pink petal dust to highlight the cheeks and bottom and a tan or light brown petal dust for definition in the creases and to give a more realistic skin tone. Being a very fair person myself, I instantly started creating a Caucasian newborn, but you can darken the skin as desired.
These adorable babies are perfect  for baby shower cakes, cupcakes and Christenings and can be left as is or decorated with bonnets bows and frills, or popped into a little fondant cradle or pram as a cake topper. I am going to use the babies in Anne Geddes inspired baby shower cakes atop large open fondant roses. Pictures to follow!


How to Make a Baby from Fondant or Gum paste


You will need:

Silicone baby mold
Quantity of flesh/ light coloured fondant or gum paste (about the size of a golf ball per baby)
Knife
Greaseproof paper
One or two small paint brushes
Tan or light brown petal dust
Dark brown matte petal dust
Pink matte petal dust


1. Colour fondant as desired. Make sure it is dry to the touch, not tacky. (You may want to add some icing sugar or corn flour at this stage. Tacky fondant can prove problematic.) Take a piece about the size of a golf ball and roll it into a smooth ball. Elongate this ball between the palms of your hand.


 2. Gently but firmly press this fondant into your dry mold, paying special attention to the head and feet areas. (Do not powder or grease these particular silicone molds, as it may take away the definition of the baby.)


 3. Gently cut away any excess overhanging fondant until the fondant of the baby is level with the top of the mold. Brush away any left over excess and smooth the top with your fingers.


 4. Place the mold in the freezer for 10 minutes to firm. To remove the baby, gently ease it out from the mold head first, holding the mold at the front with both thumbs, pushing from the back of the mold with your fingers.


5. Place the baby gently on some greaseproof paper. Because it has been in the freezer, it may get a damp look to it--allow it to dry.


6. Take a small brush with a little tan or light brown petal dust on it. work into the creases and over the baby's body. Build up the colour a little more under the chin, in the arm and leg creases and the sides and underneath of the tummy. If you have a darker brown petal dust, brush this over the crown for soft baby hair.


7.With a smaller brush, use the pink petal dust to touch on the cheeks, bottom, elbows, knees and hands. You can also colour the lips with the pink, or use a stronger colour such as a watered down red food colouring to carefully stain this area.


Finished.


Saturday, February 18, 2012

Sweetpea Baby Shower Cake


Recently, my blog has become a dangerous vision in this house. I can't open the page without causing hysterics. No, its not my husband.
Its my son, the little man of the house, who has gained quite a sweet tooth.
His favourite thing is "cack" and he calls for it as soon as he sees me open my blog. He whines continuously that he wants some and then he goes and pulls out the cookbooks and magazines and pages through, virtually drooling over the pictures he sees before him.
What monster have I made! The cookie monster, mini sized and eager to stuff his sweet little mouth with as much as he can get.


Here he is, a vision in cake...I mean, a vision in nothing, armed with two spoons, eating the leftovers of a baby shower cake.
Which is really the reason for this post. It's nothing fancy, just a little project that kept me busy before my sister-in-law's baby shower. I always have grand plans, that rapidly down size themselves due to lack of time and the sweet demands of motherhood.


Flowers and other decorations were made using rolled fondant, was a lot of fun but I wish I had more time to fine tune the modeling. Here's how to make your own rolled fondant. The plaque was a little experiment of mine that didn't dry in time, hence it rippled on the cake. The writing was made using edible gold dust mixed with a little vodka.

Tuesday, January 24, 2012

How to Make Basic Rolled Fondant or Gumpaste Roses

My sister-in-law is expecting her first baby in a few months, and the occasion called for a baby shower and I put my hand up with glee. I've got a newborn myself and found that I left everything to the last moment in my disorganization. Running out of time, I set about designing a cake and found that I lacked some of the instruments necessary to go through with the project.
Not knowing the sex of the baby, I decided to go with a Sweetpea Baby Theme with a rolled fondant garden of roses, beans and peas and some other foliage with a wee baby among it all. I had no idea how I was going to make leaves and roses without any tools used to create those perfect petals and serrated edges. So I started researching and found a great tutorial on youtube. It's a very simple process anyone can use, even for those not so artistic and it doesn't require any cutting tools for your fondant. They are basic fondant roses and can be added to if you have the time and patience.
Enjoy the tutorial!


HOW TO MAKE BASIC ROLLED FONDANT OR GUMPASTE  ROSES

To make your own fondant at home, here is a cheaper and more fun alternative to store bought rolled fondant.You can also use gumpaste.

You will need:
Any amount of rolled fondant or gumpaste
A clear, plastic folder pocket

1. Take the plastic pocket and cut off the bottom and the side that usually clips into your folder. You now have a plastic sheet that can open and close as a book would.

2. Take a portion of fondant and roll it into a smooth sausage. Cut four equal portions from the sausage. You want them to be approximately marble sized when rolled into a ball.

3.Roll three of these portions into smooth balls, and the forth into an elongated ball, a bit more oval than the others.

4. Place each of the portions along side each other inside the plastic sheet. Gently smooth each ball with your pointer so that it flattens. Smooth down one side of the ball so that it is thinner than the other side. The end closest to you should be thick, sloping down gradually to be thinner. Ensure the balls are all even in size and thickness, and that the balls keep their aerial view shape.


 5. Gently remove the oblong "ball" from the plastic. Roll the thin end of it first, between your fingers, rolling towards the thick end so that it forms a spiral. This is the centre of the rose.


6. Remove the first ball from the plastic and position it flush against the centre bud, thin side up. Place it so that only the centre of the petal is stuck to the  bud, the sides free. The top of the petal should be at the same height as the bud.

7. Take the second petal and slip it in besides the first, so that the first petal overlaps it by half.  Take the third petal and slip it in half way under the second petal. Gently fold the end of the last petal around to meet the first.


 8. You now have your basic rose. Cut the bottom half off with a knife, as this is quite bulky.
You may also like to shape the petals a little with your fingers before setting is aside to dry.


The baby drying. I use an empty chocolate tray to dry the roses in. They dried in 2 days, but this depends upon the weather.

Baby's Sweetpea Cake