Wednesday, March 28, 2012

Banana Caramel Blueberry Smoothie

When my husband and I come back from the markets, I get into a chopping frenzy. It's much cheaper to buy in bulk, and since Lent started, we have been making smoothies more frequent as meals. So the fruit has been rolling into the house in large quantities. I find that it's all a little difficult to use before it goes bad, so I chop up most of the bananas, strawberries and what ever other fruit we have, and freeze them in zip lock plastic sandwich bags. These are amazing for whipping up smoothies, and you don't have to add any ice because its already super chilled. I made a naughty addiction to this one with a dollop of caramel sauce, but its just as lovely without, and healthier! Enjoy!


BANANA CARAMEL BLUEBERRY SMOOTHIE

2 bananas, chopped and frozen
1/4 cup blueberries, frozen
1/4 cup caramel sauce (like the type used on ice cream)
1 1/2 cups milk

Add all ingredients to the blender and pulse. Add milk as desired for thickness of your choice. Serve in tall glasses and drink immediately.

Serves 2

Tuesday, March 20, 2012

Stuffed Easter Egg Halves

This Easter I wanted to do something a little different to our usual egg giving. When Christmas comes around you can always give something personalised, but Easter giving seems to be the same every year. So I decided to get myself an egg mold, some compound chocolate and start taking notes on everyone's favourite chocolate bar or biscuit. I am going to make half stuffed Easter eggs this year! I've seen Easter Egg halves for sale like this before, often filled with nougat, rocky-road or fudge and thought how easy and pretty they would be to make.
The family, not knowing my project, threw all sorts of wonderful favourites at me...mint areo bars, snickers, tim tams, honeycomb, kit kat, and the list goes on!
I was thinking how pretty they would look set in their own little boxes tied with ribbon, or even shrouded in clear cellophane with a lovely tag and ribbon...great gift idea!


STUFFED EASTER EGG HALVES

1 Easter egg mold (I used the plastic packaging off an Easter egg from last year!)
compound chocolate
filling of your choice

Melt the chocolate and stir until smooth. Brush on to the inside of the Easter egg mold until there is a thick and even coating over the entire surface. Be sure to make the edges thick as this will be the first thing to break if the coating is too thin. Reserve a little chocolate for the finishing touch.
Set the mold in the refrigerator or freezer to dry. Remove from cold, and gently push out of the mold. Fill with any sweet thing you desire--rocky road, clinkers, nougat, smarties, and then swirl over the reserved chocolate to ensure stability.
Wrap in cellophane or set in a gift box if desired.

Chocolate Collars and Engagement Cakes

Sometimes you learn valuable lessons by making mistakes. Hopefully the mistake hits hard enough that you remember the lesson and don't repeat the error, but sometimes you still do.
Sometimes you can even pass on the lesson to other people, and this is precisely the intention of this blog entry.
Some beautiful friends of mine had their engagement party on the weekend. They are the most adorable couple and I wanted to make a cake that reflected the beauty of their relationship. I envisioned a deliciously moist orange an almond cake of three graduating tiers, surrounded in smooth walls of white chocolate, decorated with sugar encrusted pink rose petals, finished off with a bouquet of fresh rose buds on the final layer. The challenge for me was going to be the white chocolate collars surrounding each layer, which I had never attempted before, and I did my homework and it didn't seem at all complicated.
Basically you take a piece of firm but flexible plastic sheeting, cut it to the size of the circumference, paint it in an even, thick layer of melted chocolate. Then you wait until it is beginning to set, then apply it to the side of the cake and peel away the plastic when it has dried. Sounds easy, doesn't it? I made lots of mistakes and learned so much about chocolate by attempting this seemingly-easy task.
First of all it was 30C plus sort of weather and extremely humid. I live in a sub-tropical climate and we all know that moisture of any sort is chocolate's worst enemy. Well that combined with the heat was a recipe for disaster, and I ended up trying to construct the cake inside the refrigerator!
I learned a lot about what type of chocolate to use too. Who ever knew chocolate was so complex? I've always just melted it in the microwave and used it, but I fear there's a whole lot more to it than that.
Tempering. Real chocolate vs compound chocolate.
Well here's a tip for those who aren't pros at chocolate decorating--go for compound chocolate. Yes it may not taste as rich and delicious as real chocolate but it will at least set, without a doubt, and you don't have to worry about tempering it. Just evenly melt it and go for it! I wish I had known that before I started. 1 kg of chocolate later, and the cake was looking *presentable*.


And it tasted delicious! But had to be cut very  quickly as the sides started melting off again! so if you decide to try the chocolate collars, here's what you have to know:

Use compound chocolate to save you from failure
Make sure you don't make it in 30C weather!
Don't expect to get it perfect first time around.


Monday, March 19, 2012

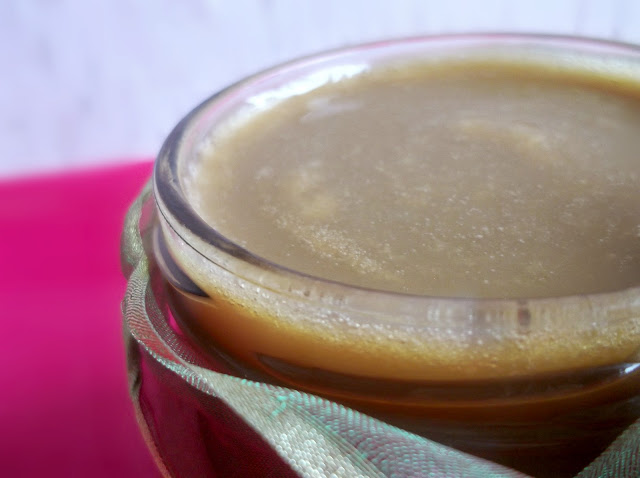
Caramel Sauce

 I don't know about you, but there's little I love more than sweet, sticky, gooey and thick caramel. It's one of those delicious things you can just about put on or in anything to create a delightful morsel. It's one of those all-rounder additions, whether it be on top of ice cream, in a pie, or spread on toast or between the layers on a cake. If I wasn't trying to cut back so much on sugar (thanks to a recent and rather uncomfortable dental trip) I would have this delicious caramel sauce as a staple in my refrigerator. The opportunities to use caramel sauce are simply endless, and this is a particularly delightful recipe discovered on From My Sweetheart, a dessertaholic's blog put onto me by The Secret Recipe Club, where we bake, blog and share.
Now really, Anne, you and I should be visiting DAA (Dessert Addicts Anonymous) on a weekly basis due to the deliciousness of your blog. I tweaked the recipe a bit to go along with a somewhat limited pantry content, and it was simply delicious. This sauce would make a delightful gift, bottles in a pretty jar with ribbon and a retro tag! Don't forget to check out Anne's version for the original recipe!


CARAMEL SAUCE ( lightly adapted from From My Sweetheart)

2 cups brown sugar
1/2 cup water
1 1/2 cups heavy cream
1 tsp vanilla essence
2 tbsp butter
large pinch of salt

Add the water and sugar to a medium saucepan, and stir to combine. Place over a low heat until the sugar dissolves, refrain from stirring. Increase the temperature to a medium heat and boil for about 5 minutes until the sauce turns a golden brown. Using a swirling motion, move the saucepan around  to stir the sauce. Be sure to keep a close eye on the sauce as it can easily burn at this point. Remove from heat and slowly add cream and vanilla essence. At this point the caramel will solidify--then add the butter and the salt. Return to the stove on a low heat, stirring continually until the ingredients are well incorporated the sauce becomes a smooth caramel. Cool for at least four hours, then bottle and refrigerate. Sauce will become thicker on cooling and refrigeration.

Makes approximately 3 cups of delicious caramel.


Tuesday, March 13, 2012

How To Make A Cupcake Bouquet

When Valentine's Day came around this year, I decided to do something my husband wouldn't expect. I wanted to do something romantic and surprising, so I had a look around at florists for one that could deliver a chocolate bouquet to his work.
I found a fabulous one--40 gold Ferrero Rocher's on stems in a fancy box, and they looked like beautiful blooms! So I ordered them, and felt excited the whole of Valentine's day thinking of an embarrassing delivery being made to Luke's office.
My husband emailed me throughout the day and there was no word of anything arriving, and I didn't want to ask for fear of ruining the surprise.
He came home about an hour earlier than usual, and I greeted him at the door as always. "So, did anything interesting happen at work today?" I asked.
The answer was "No, nothing much!"
"No Valentine's day drama?"
"No" he smiled. "Why do you ask?" he then added suspiciously. "did you have something delivered?!"
"No, no what a silly idea" I laughed.
My heart sank to my feet. My attempt to be wonderfully romantic had again failed. *sigh*
"You did order something didn't you!" he asked, colour coming into his cheeks.
I guess my laugh gave it all away and I disappeared out the door with a basket of washing before he could ask me again, and before I told him.
The next day the secretary at my husband's work met him in the elevator. She apologetically told him that a bouquet had arrived for him about half an hour after he left work, and she felt terrible. Ah well...all's well that ends well. At least he got it in the end.
But it got me thinking. How easy would it be to make something like a chocolate bouquet yourself? (for about quarter of the price)
Then when I became a very proud aunty again (for the 9th time) I decided not to take a bunch of flowers...but a bunch of cupcakes. It was surprisingly easy, unique and beautiful. And a little more enjoyable than real blooms--for the stomach anyway!


HOW TO MAKE A CUPCAKE BOUQUET

What you will need to get amazing:

Cardboard
Scizzors
a stapler
large rubber band
coloured tissue paper
craft glue
a gift box
ribbon
7 disposable plastic cups
cupcake liners that fit in the top of the cups

1. Take seven disposable plastic cups and arrange as follows: one in the middle and six surrounding the sentre cup. It looks a little like a flower. Staple the cups together so they hold in this position. Some tearing of the plastic may occur, but that's okay as long as they're all holding together.

2. Measure the circumference of the cup collection. Cut out a circle in the cardboard of that size so that the cups sit neatly in the middle without too much of a rim around them.

3. Using craft glue, adhere the cups to the cardboard. Leave to dry.

4. Take the coloured tissue paper and cut as desired. Secrure it around the base of the cups with a rubber band.


5. Push the cup collection into the gift box (the gift box is optional, you could just tie some ribbon around the outside of the tissue paper if desired)

6. Add another layer of wrapping paper over the gift box for added dimension and colour and tie with a bow.

7. Now you are ready to fill your bouquet case! Make your favourite cupcakes and swirl them with soft butter cream icing in the design of a rose. For an example recipe, see below under "NOTES".


NOTES: The cupcake recipe I used was for these delicious Mini Chocolate Fudge Cupcakes in a more regular size. The icing was vanilla buttercream with a touch of pink food colouring.
Be sure to choose cupcake liners that will fit into the cups properly. I used a size of cup slightly smaller than your standard disposable cup, and the liner that fitted it was slightly smaller than the standard also. You can find all different sizes in your local super marker or at a party supplier.

Sunday, March 11, 2012

Double Chocolate Shortbread with Pistachios

Anything that isn't chocolate, I imagine being converted into chocolate. I am still on the hunt for a good chocolate pastry recipe (if you have one, hit me up!), but recently I  found a wonderful chocolate shortbread recipe and decided to coat it in chocolate and pistachio nuts for extra decadence. An absolute match made in heaven! Where have pistachio nuts been all my life? It's always been one of those ingredients I have wanted to cook with and never got around to it, but it is soon to become a staple in my pantry.


DOUBLE CHOCOLATE SHORTBREAD WITH PISTACHIOS (adapted from Sucheela )


2 cups plain flour
1/2 cup cocoa powder
1/2 tsp salt
1 cup butter, room temperature
1/2 cup sugar
1 tsp vanilla essence
1/4 cup crushed pistachios
chocolate to dip

Preheat the oven to 150C. Grease and line two or more baking trays.
In a large bowl, beat the butter and sugar together until light and fluffy. Add the vanilla and mix to combine.Sift the flour, cocoa and salt together over the butter mixture. Fold the flour in until well combined, and begins to form a dough.
Form a ball from the dough and wrap in glad wrap and refrigerate for 1 hour or more.
Remove from the refrigerator and sit for 10 minutes to soften slightly.
Meanwhile, turn the oven on to 150C. Grease and line two or more baking trays.
Prepare a flat surface with some flour, and roll the dough out to about 1/2 an inch thick. Using a cookie cutter, stamp out shapes and place on the trays until all the dough is used up. Cook for 25 minutes before removing from the oven. Cool completely on trays before removing. When cooled, dip in melted chocolate, and sprinkle with pistachio nuts, if desired.


Tuesday, March 6, 2012

Sugared Rose Petals

"I'd rather have roses on my table than diamonds 'round my neck."
~Emma Goldman

Roses are famed to be the most beautiful flowers in the world, and their dew scattered petals often noted in both poem and prose as one of the most incredible visions to behold. Imagine if you could have this beauty on a cake? You can, and it's simple and elegant and defiantly a cheap yet luxe addition to any edible. (you get the roses AND the diamonds in one go!)
Not only do these cake toppers look extreamly pretty, they taste delicious too. The softness of the petal combined with a delicate rosewater flavour that is experienced, is divine.
You can use the same method to coat other flowers for a pretty effect, but be sure that the flowers are edible before you begin. Some edible flowers are:

Citrus blossoms
Hibiscus
Nasturtium
Jasmine
Pansies
Violets

Just to name a few.
These would look so pretty placed individually on the top of cupcakes...it may even make a pretty Valentine's Day gift for your beloved. In fact, who needs Valentine's day as an excuse to bake for the one you love? Give them roses any day of the year!


SUGARED ROSE PETALS

1 egg white
rose petals
a pastry brush
1/2 cup caster sugar (or super fine sugar)


Hold the rose petal at the end that was previously joined to the stem. Finely brush both sides with egg white. Do not coat heavily, as this becomes problematic and will cause shedding.
Place the sugar in a small bowl. Gently dip the coated petal into the sugar until covered. You may like to pour some of the sugar onto the petal with your fingers for an even coating. Gently place the sugared petal on some baking paper to dry, or in an empty egg carton to shape the petals a little more. Leave for 3 hours or so to dry before placing on cakes, cupcakes or desserts.


If the petals are coated too heavily in egg white, the sugar begins to clump, as above (or worse, this is not a bad case) and may fall off the petal.

"It is at the edge of the petal that love waits."
~William Carlos Williams

Monday, March 5, 2012

Rolo Brownie Bites with Caramel Cream Cheese Icing

I didn't think there would be any recipes on this blog surpassing that wicked richness of the Tim Tam Brownie or the Sticky Date puddings. But I hit the jackpot here...in every way possible this recipe surpasses their evil decadence. Rolo Brownie Bites with Caramel Cream Cheese Icing. Sounds delicious?
You bet.
These will be the soul reason for my adult teeth to rot out of my head. They are so good, and so addictive!
As you know, I'm a big brownie fan, and this base recipe has come out many, many times in this blog (don't you just love the versatility of some recipes!) It's never failed me. Every time its super rich and delicious, on its own or combined with chocolate, caramel and cream cheese like in this recipe below. You'll want to make these fellas in a mini cupcake tray, as a little goes a long way. They're sublime, divine, and they were a real hit! Definitely one to go in the "will make again" cookbook.


ROLO BROWNIE BITES WITH CARAMEL CREAM CHEESE ICING (adapted from Cook Lisa Cook)

1/2 cup butter
1/2 cup cocoa powder
1 cup brown sugar, firmly packed
2 eggs
1/2 tsp. vanilla
1/2 cup plain flour
1/4 tsp salt
24 Rolo chocolates

cocoa powder to dust (optional)

Icing:
4 tbsp butter, room temperature
4oz cream cheese, room temperature
about 2 tbsp. caramel topping (like that used on icecream)
1 cup icing sugar

Preheat your oven to 190C.
Melt butter and remove from heat. Stir through the cocoa and brown sugar until combined.
Beat in the eggs and vanilla. Next, blend in the flour and salt. Spoon the mixture evenly into a mini muffin tray (we used a silicone one, otherwise grease tray first). The batter should come up about 3/4 of the way in each mini muffin hole. Bake for 15 minutes. While cooking, refrigerate the rolo chocolates. As soon as the tray is removed from the oven, push one chocolate, top down, into the centre of each cake, so that the top of the cake and the bottom of the Rolo are level. Allow to cool in tray before removing.
To make icing, combine butter and cream cheese together with the electric mixer. Add the icing sugar, and lastly the caramel, until a desired thickness is achieved. Pipe onto each cooled cake, then sprinkle with a little cocoa powder. Refrigerate for a little while to stabilize the icing before serving.

MAKES 24

NOTES: I used Nestle Role chocolate block instead of the individual rolls you can buy. There are about 20 rolos in each block, and ends up being a bit more budget friendly.


Friday, March 2, 2012

Easy Strawberry Cream Sponge Cakes

 I was so impressed with the simplicity of the sponge cakes I made the other day, I just had to make them again. Who doesn't love quick, easy, versatile recipes? Mind you, there a few things I steer well away from in the kitchen for fear of failure, and one of them WAS sponge. I suppose its one of those cakes you hold your breath to throughout the whole cooking process for fear it won't have risen to its soft, airy self.
But have no fear with this recipe, I'm beginning to feel its a foolproof sponge.
There are so many great things about this cake besides the taste.
And I turned these cakes from an afternoon tea delight into a dessert, with just a change of topping! they looked delightful and were so quick to put together.


EASY STRAWBERRY CREAM SPONGE CAKES (adapted from Better Homes and Gardens, April 2010)


1 cup self raising flour
1 tsp cornflour
1 cup caster sugar
3 tbsp milk
2 tbsp melted butter
3x 60g eggs
finely grated zest of 1/2 lemon
1 tsp. baking powder
12 strawberries, to garnish
1/2 cup whipped cream, to garnish

Preheat the oven to 190C.
Grease and line a 12 hole cupcake pan with butter and paper cases or baking paper. Sift the flour and cornflour into a large bowl, then add sugar, milk, butter, eggs and zest and beat with the electric mixer on high. Beat until light and fluffy, approximately 3 minutes. Fold the baking powder into this mixture.
Spoon the mixture into the prepared muffin tin amongst the 12 holes. Bake for 18-20 minutes until golden in colour and cooked through when tested with a skewer.
Leave to cool in pan for 5 minutes before removing to complete the cooling process on a wire rack.
Whip cream and pipe onto the top of each sponge cake. Decorate with a single strawberry in the centre, serve.

Makes 12

NOTES: These cakes are best eaten on the day they are made, for maximum softness.
To make a whole sponge instead of 12 mini sponges, divide the batter between two greased and lined 20cm round tins. Bake at 190C for 18-20 minutes until golden and cooked when tested with a skewer. Cool on wire racks 5 minutes after removal from the oven, and wedge together with jam and whipped cream. To decorate the top, sprinkle a little icing sugar over the surface, add some berries to the centre if desired and serve.

Thursday, March 1, 2012

Easy Sponge Cakes with Fondant Roses

Since the birth of my little daughter, it has become increasingly difficult to find the time to get creative in the kitchen. I thought it was difficult before, with a toddler helping me out (hanging off my skirt and licking the spoon mainly), but it is almost impossible with a newborn wearing the apron as well!
So I have been on the hunt for quick recipes, simple elegance without the fuss and time consuming detail. I love detail, I love having the time to add all the extras and get inventive, but being a mum of two babies makes that near impossible. So any mums in my boat, here's a winner.
These little rose sponge cupcakes are just gorgeous, drizzled in a little pink icing, topped with a pre-made fondant rose. If you want to know how to make your own fondant roses, they're quite simple, but you may want to make them when you have some time on your hands, when babies are solidly asleep and no one is around to need you, but the sugar in front of you. The good news is, if you don't have the time to model fondant flowers, you can readily purchase them at your local supermarket in the cooking section.
They make an elegant afternoon tea cake, these little sponges, but if you don't have any time at all, you can make it into a single cake (see notes below). Wedged with jam and cream in the middle and a little icing sugar sprinkled over the top, you have a sponge cake whipped up in under and hour (and 80% of that is cooking time!) Honestly, this only takes 5 minutes to prepare, then into the oven, cooling time and 5 minutes to whip up some cream for the centre. Easy peasy! and did I mention super soft and delicious?


EASY SPONGE CAKES WITH ROLLED FONDANT ROSES (adapted from Better Homes and Gardens, April 2010)

 1 cup self raising flour
1 tsp cornflour
1 cup caster sugar
3 tbsp milk
2 tbsp melted butter
3x 60g eggs
finely grated zest of 1/2 lemon
1 tsp. baking powder
1 cup icing sugar
drop of red food colouring

Preheat the oven to 190C.
Grease and line a 12 hole cupcake pan with butter and paper cases or baking paper. Combine the flour and cornflour in a large bowl, then add sugar, milk, butter, eggs and zest and beat with teh electric mixer on high. Beat until light and fluffy, approximately 3 minutes. Fold the baking powder into this mixture.
Spoon the mixture into the prepared muffin tin amongst the 12 holes. Bake for 18-20 minutes until golden in colour and cooked through when tested with a skewer.
Leave to cool in pan for 5 minutes before removing to complete the cooling process on a wire rack.
To make a thin icing, place the icing in a medium sized bowl. Add water until you achieve a desired consistency, then add the food colouring. Combine well until the colour is incorporated. Drizzle over cooled cupcakes and decorate with a rolled fondant rose.
Learn how to make Rolled Fondant Roses HERE.

Makes 12

NOTES: these cakes are best eaten on the day they are made, for maximum softness.
To make a whole sponge instead of 12 mini sponges, divide the batter between two greased and lined 20cm round tins. Bake at 190C for 18-20 minutes until golden and cooked when tested with a skewer. Cool on wire racks 5 minutes after removal from the oven, and wedge together with jam and whipped cream. To decorate the top, sprinkle a little icing sugar over the surface, add some berries to the centre if desired and serve.