Showing posts with label Valentine's Day. Show all posts

Monday, March 16, 2015

Chocolate Rum Hearts

Lovers-it's that time of the year again. I've crawled out from my hiding place to bring you a very quick, easy and yummy recipe that is perfect for Valentine's Day, especially if you don't buy gifts but just do something thoughtful for your significant other. The only problem is life caught up with me and I wasn't able to post it on time, but never the less, it's a good recipe for just surprising your lover, regardless what day it is. Who needs a particular day to express their love anyway?
Just in case you've been wondering what rock I've crawled out from under, I am pregnant! That's one big boulder on the front of me. I haven't been up to doing much cooking or baking, and would rather be laying down and catching as many zzz's as I can muster with three toddlers under my care. Just kidding- toddlers 1, mummy 0.
But that's okay, because over the weekend, hubby and I and the kids are heading off on holidays to the Sunshine Coast. I cannot wait to get my grubby mits on that little beach house and really relax! Anyway, these heart shaped rum bites are delicious and you don't need to use an oven. If you're in one of those hot climates like I am, you will not want to pass this up. It's too hot to have that thing on.
If you're curious as to what you'll be creating, I can tell you what will be passing your beloved's lips-dense, chocolatey hearts with a nice dash of rum, rolled in red coconut. You will need a silicone heart mold. I suspect mine is supposed to be used for ice making but it's always been more handy for other non liquid creations like this...yum!


 CHOCOLATE RUM HEARTS (A Lick the Spoon Original)

350g biscuits (I used a bunch of different ones like Marie bisuits, plain sweet ones)
1/2 cup cocoa powder
1/2 cup (300g) sweetened condensed milk
2-3 tbsp. rum
1/4 cup dessicated coconut
1 tbsp red food colouring

Crush the biscuits into fine crumbs in a food processor. Pour into a medium sized bowl.
Add the cocoa, sweetened condensed milk and rum. Mix until well combined.
In a zip lock bag, place the coconut and the food colouring. Mix around until the coconut begins to change colour. Sprinkle a little of this mixture into the bottom of each heart shaped silicone old.
Press the chocolate biscuit mixture into the silicone heart molds and firmly press the tops smooth. Refrigerate for 15-30 minutes, then pop them out. Refrigerate in a airtight container until ready to serve.


Sunday, June 30, 2013

How to Cover a Heart Shaped Cake in Fondant

 Recently I've noticed heart shaped cake tins on the market--springform ones. You know, the ones with the clip at the side and the removable bottom, great for making cheesecakes and all those things you cant lift out of a regular pan without mangling the sides. Two of my friends recently got engaged and wanted heart shaped cakes for the engagement party. I thought it would be easy tracking down one of these tins, but it turns out the stores only stock them around Valentine's Day. I somehow still ended up finding one and thought I'd give it a try, though I was a little concerned about the springform side of things.  When you unclip the side to remove the bottom, the sides of the tin have to expand somewhat and I was worried that the tin couldnt possibly keep shape.
I was right--That dreaded burning smell half way through cooking the cakes informed me that the tin ended up leaking, dropping batter onto the oven floor and burning up that debris. So just a word of warming if you're planning on using a heart shaped springform tin. Check for gaps first, and slip a few layers of baking paper in the leaking areas before pouring your batter in.
I also thought I'd test store bought rolled fondant. I usually make my own, but sometimes its difficult to get the right consistency, so I opted for Orchards White Rolled icing. It comes in 500g packets and I used about 700g for each cake. The taste wasn't really the nicest, but I guess that's the advantage of making it from home, as you can flavour it as desired. I did find this fondant easy to use and roll and it didn't get sticky, even though I covered the cakes on a rainy old day. It was also a cool day, so I heated the fondant very briefly in the microwave (about 5-10 seconds on high) just to soften it so I could knead it more easily. I was quite pleased with how simple this icing was to manage and roll and it was really no problem.
I left the icing plain white, as was the request of the engaged couple. It turned out to be a simple and elegant engagement cake that I feel would be made by most, even if you have no prior experience. It was topped with real roses which made for an easy yet sophisticated finish, and tied with red ribbons to tuck away any unsightly edges.
Ah engagements! Brings back the day that my husband proposed to me. It's been almost 4 years now (and almost three babies later--we have been productive!) How did your man propose to you? Or did you go and pop the question to him? I'd love to hear!


HOW TO COVER A HEART SHAPED CAKE IN FONDANT

1. Bake your cake. Once cooled, place it on the cake board and flatten off the top if it has mounded. Brush away any crumbs and unsightly bits. I turned my cake over so that it was bottom up, as it made for a much smoother surface.


2. Mix up a butter icing--start with 1 cup of icing sugar, 1 tbsp melted butter and 1 tsp vanilla essence. Add more icing sugar, or water, until it comes to a medium thickness, smooth icing. You don't want it to be runny, but you don't want it to be too thick that it pulls crumbs off the sides of the cake. Smooth it evenly over the surface of the cake with the flat of a butter knife. Use the icing to cover and fill any gaps and holes that may have formed when removing the cake from the tin.


3. Set the cake aside. Take the Rolled icing and kneed with your hands until it becomes smooth and pliable. You may want to microwave it very quickly (5-10 seconds on high) if it's a cold day and it has become hard. Lightly flour the rolling surface with a little icing sugar and roll to desired size and thickness. It's a good idea to lift and turn the fondant after every few rolls to get an even surface and good shape, and to make sure the fondant has not stuck to your rolling surface.


4. Once you have the correct size and desired thickness, lift the fondant and partially drape it onto the rolling pin for stability. Gently lay it over the butter icing-covered cake, removing the rolling pin as you go. The rolling pin helps to avoid any stretching of the fondant while laying it on your cake. With your hand gently smooth the top, then the bottom corner/ point of the cake first.


5. Continue to smooth the fondant over the cake with your hands. You can see in the above picture that although the fondant has been laid nice and flat over the cake, there are areas where the fondant bunches (see top right and left sides of the cake). To fix this unevenness and to prevent a bunched surface, just run your hand around the rest of the cake to smooth the fondant, then lift these problem areas away from the cake and then smooth downward to get rid of the bunching effect.


6. Now that the surface is smooth, ensure the bottom edges meet the board. If they are a little short, do not stress, as this un-neatness can be covered with a ribbon or pipped icing around the edges if need be. With a small, sharp and non-serrated knife, cut the excess icing from the board, about 1 cm from the cake. Don't cut too closely as you may be surprised to find the fondant floating at the edge. Neatly tuck this 1 cm of fondant towards the base of the cake, and cut away any further overhang if any exists.


7. Collect the residual fondant and roll it into a ball. Wrap it in cling wrap and run it over the whole surface of the cake to smooth it for a final time. Some people prefer to use a flat smoothing device especially made to perfect the surface, but this home made little ball of fondant works brilliantly too if you don't happen to have one.


8. Clean away any residual icing sugar, fondant or stickiness from the board with a damp cloth or tissue.  Measure the sides and cut a piece of ribbon that will fit around any messy edging if desired. I simply held the ribbon on the cake with a sewing pin (with a coloured ball head so it was visible enough not to be mistaken for cake) pressed into the top indentation of the cake.


9. If you don't feel you have the know how to decorate the cake further, fresh flowers are a great idea to finish off and jazz up a special occasion cake. This can be done before serving or presenting the cake, unless you want to play around with those green foam florist islands. This is a good option if you're topping the cake with flowers as I have done with the Savoiardi and Roses Engagement Cake. I wanted to cover the gap in the boards, so I just laid the fresh flowers in between the cakes when I arrived at the engagement party. They still looked fresh and healthy by the time the cake was cut, but if the weather is warm, you may not want to decorate the cake with fresh flowers until the cutting of the cake is not too far off.


Fondant flowers are easier than you may think to make! Utilize those scraps of fondant and follow this easy guide to making beautiful fondant roses. You may want to make any fondant decorations a few days ahead, as these will need to dry in advance before going on the cake.

Thursday, February 7, 2013

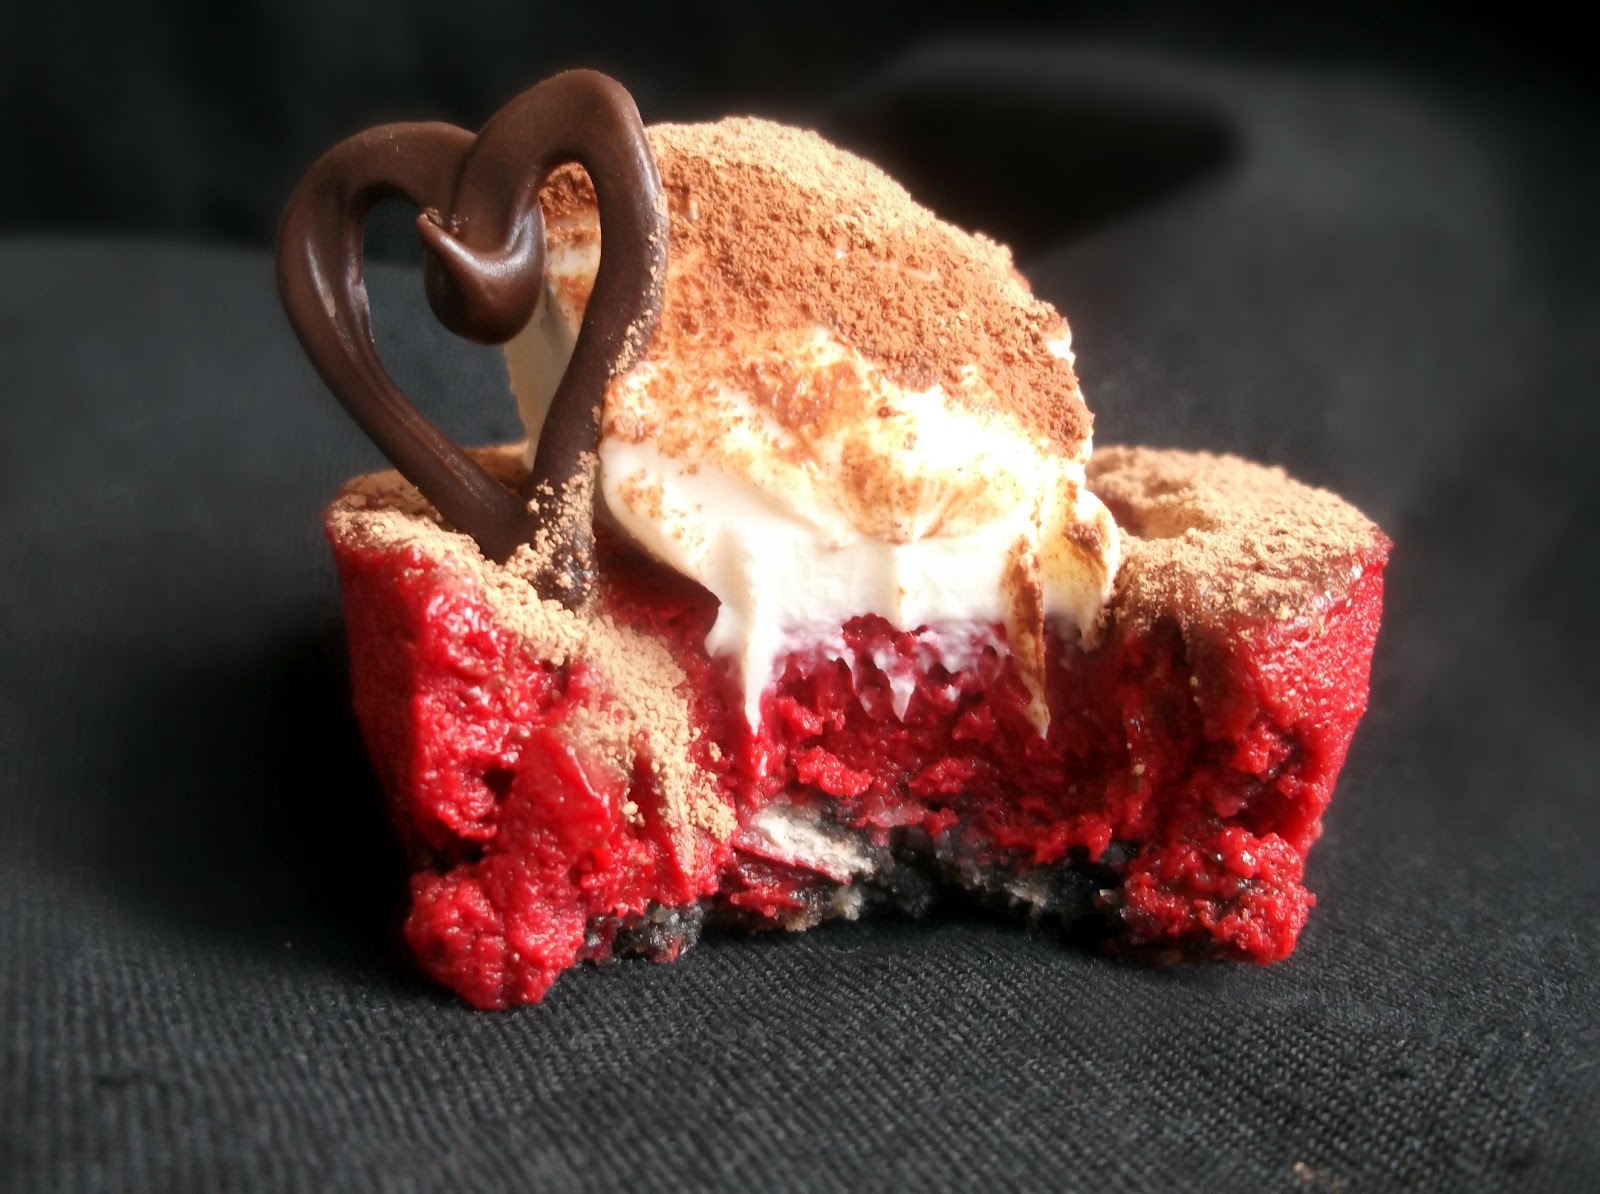
Baked Mini Red Velvet Cheesecakes

Anyone who has known me for more than a year knows that St.Valentine's Day and I have a love hate relationship. I'm a hopeless romantic. Yet The Man Up Stairs has a great sense of humor and has sent me disappointments on that day just about every year since I have been in love. Yes, I'm talking about you, ex-boyfriends. Just kidding. They never lasted till St.Valentine's Day.
I've only ever been wined and dined by my darling husband for St.Valentine's Day, seeing as we both met at 19. He's the sweetest man and always spoils me, and St.Valentine's Day is no exception. But what do you do when fate wants to put a damper on your romantic evening? Every year?
Like what if the waterfront restaurant you booked happens to float away down the river?
Or the dozens of Chinese lanterns you decked the veranda out with decide to only light up for half an hour?
The bouquet of chocolates you sent to his work didn't arrive at his work before he left?
These are just a few of the things that could go wrong on St.Valentine's Day, and for me they did. Yes, that restaurant literally drifted away down the river a few days before our booking. Ironically, the restaurant was called "Drift".
Anyway, from past experience I now know that I can't rely on anyone else to make St.Valentine's Day special--with the exception of my husband, he has planned the dinner and is cooking it himself, and I can't wait to see what he serves. As you might have guessed, I'm to create the dessert. So I've been trialing a few different recipes that would make lovely romantic St. Valentine's Day desserts. Here's one of them--baked mini red velvet cheesecakes with a chocolate crust bottom, topped with a swirl of whipped cream and a dusting of cocoa. Needless to say, I'm in love with these deliciously creamy morsels.


BAKED MINI RED VELVET CHEESECAKES

Base:
10 chocolate chip biscuits
2 tbsp cocoa powder
2 tbsp butter, melted

Filling:
250g cream cheese, softened
1/2 cup granulated sugar
2 tbsp cocoa powder
1 tsp vanilla
1 tbsp red food colouring
1 egg
1/2 cup whipped cream to decorate
chocolate shavings to decorate if desired

 Preheat the oven to 180C.
Lightly great 20 mini muffin holes (I used a silicone mini muffin tray.)
In a food blender, place the broken biscuits and chop until they resemble fine bread crumbs. Transfer to a small bowl and add the cocoa powder and melted butter. Combine thoroughly, then divide the mixture between the 20 mini muffin holes. Press the mixture firmly into each hole using your fingers or the back of a spoon. Place in the refrigerator while preparing the cheesecake filling.
To make the filling, beat the cream cheese in a medium bowl until smooth. Add the sugar and cocoa and beat until fluffy. Add the vanilla and red food colouring and beat until well combined. Add the egg and beat until smooth. Divide the cheesecake mixture evenly among the muffin holes  so that the cups are almost full. Bake for 20-25 minutes until centres are firm, and leave for 15 minutes to cool in the tray. The cheesecakes may sink a little.
Cover and refrigerate for an hour at least, before garnishing with whipped cream and chocolate, if desired.

Makes 20 mini cheesecakes


Friday, February 17, 2012

Mini Red Velvet Cheesecakes

Cochineal. You may associate this with the red dye used in Red Velvet Cakes, but when I think of the word I think cacti eating, crushed beetles.
Yes, believe it or not, that's where the red colouring comes from, the Cochineal beetle. They are found in Mexico and South America and are farmed for their colour properties. If this all sounds a little freaky, have no fear--plain red food colouring is a fine substitute, and makes these delicious red velvet cheesecakes brilliant. Not only are they delightfully delicious, they make a truly impressive appearance on the table when guests are over. I added these to our St. Valentine's Day menu for dessert, and they were a hit!


 MINI RED VELVET CHEESECAKES (Adapted recipe from Betty Crocker)


15 chocolate chip biscuits
2 tbsp cocoa powder
3 tbsp butter, melted
400g cream cheese, softened
1 cup granulated sugar
3 tbsp cocoa powder, extra
2 tsp. vanilla essence
2 tbsp. red food colouring
3 eggs
1/2 cup cream, beaten

Preheat oven at 180C.
In a small bowl, mix crushed biscuits with melted butter until well combined. Divide mixture among 12 foil regular sized cupcake cups (We used a silicone muffin pan instead) pressing into the base with a spoon.
Beat the cream cheese in a medium bowl until smooth. Gradually add the sugar, and then the cocoa powder until fluffy. Add the vanilla and red food colouring. Beat in the eggs, one at a time until well incorporated.
Divide the batter evenly among the cups, ensuring the mixture comes up almost to the rim.
Bake for 20-15 minutes until the centres are firm to touch. Cool for 15 minutes in the tray. (centres may sink a little)
Refrigerate in tray/baking cups for at least two hours before serving. Garnish with whipped cream and cocoa powder if desired.

Makes approximately 12 cheesecakes

NOTES: You can use any preferred biscuits for the base.


Monday, February 13, 2012

White Chocolate Hazelnut Rafaello Balls

With Saint Valentine's Day on the cards, I've come to ponder, what is romance? What is romantic? So I asked my husband what he thought and we both came up with the same thing.
It doesn't have to be a trip to Paris. It doesn't have to be anything sweep-me-off-my-feet movie style.
It's the little things, the thoughtful things, surprising things that are romantic in this house. I'm sure its different for everyone, but I don't need loud or extravagant gifts from my man to feel and know that he loves me.
So are you stuck for a St. Valentine's Day gift? What is romantic to you and your better half?
To be honest I swept my brow in relief to find out my husband had the same idea of romance as me. Truth be told, most couples probably share the same ideas on love and romance, otherwise they wouldn't be together.
So when I found myself stuck for a gift for my hubby, I started trying to think outside the box, and it brought me to the chocolate box. Whats that cacophony I hear? Oh its my readers...
Not a box of chocolates!
Oh hush. This isn't your ordinary box of chocolates. Its a designer box of chocolates.
So here's the idea. Its sweet, original, unique and hand made...nothing comes from the heart more than something home and hand made! It's relatively budget friendly too, if you can curb your wild creative side enough to stick within a budget.
So here it is...I am going to make a box of assorted truffles and chocolates. Each will be named after a special occasion that my husband and I have shared together eg. First Kiss, Wedding Day, Proposal, First Date, Honeymoon, you get the picture. You could also name the chocolates after pet names, places you've been on dates, or even things that spell romance to you. Each chocolate will have a little tag attached, a little story that goes with it. A box of memory chocolates! Reliving moments of romance over a box of chocolates...sounds pretty sweet to me!
So here I am, on the hunt for great chocolate and truffle recipes. I've found a few wonderful ones, so stay tuned!
Here's one for the Rafaello Fans. Ever wondered how to make your own Rafaello chocolates? Here's how. And you'll just fall in love with the simple decadence of these beauties. Coconut, white chocolate and vanilla wafer rolled around one roasted hazelnut. Divine.


WHITE CHOCOLATE HAZELNUT RAFAELLO BALLS (translated and adapted from Din Bucataria Mea)

200ml condensed milk
3-4 tbsp. full cream milk powder
50g butter, room temperature
100g coconut flakes
50g vanilla wafer biscuits, crushed
toasted hazelnut, if desired
150g white chocolate, melted
150g coconut extra

Mix butter with condensed milk, add milk powder, coconut flakes, and crushed vanilla wafers. Mix until well combined. Roll into walnut sized balls; flatten in the palm on your hand and press a hazelnut into the centre. Re-roll so that the hazelnut is well covered and positioned in the middle of the ball. Repeat until all mixture is used.
Melt the chocolate. Put the extra coconut in a small bowl. Using a fork, dip each ball into the white chocolate and coat. Let the excess chocolate drain from the all before rolling it through the coconut, then place on a tray. Repeat until all the balls are coated and refrigerate until ready to serve.

NOTES: These delicious chocolates are just as delicious without the nut in the centre, and look marvelous boxed as a gift


HAPPY ST. VALENTINE'S DAY!!

Monday, January 31, 2011

A Sinfully Wicked Dessert for Valentine's Day

Underneath a light, fluffy cloud of cream lies a dark, handsome, smooth and totally irresistible chocolate ganache, laced with a hint of cointreau, surrounded by...more chocolate. So good it's almost bad. It is not innocent, it is not kind (to your waistline) but it's so worth it. You would probably say yes to more except it is so rich, so creamy and wickedly intoxicating that it would be a crime to go back for seconds. Maybe the next day. But not any time soon.

The culprit:

Chocolate Cointreau Ganache Mousse with Cream


Don't say I didn't warn you. 
It will call you from the refrigerator at the most inconvenient times, tempting you to have that second taste of its wicked goodness. Yes, it was love at first sight.


CHOCOLATE COINTREAU GANACHE MOUSSE WITH CREAM
Mousse recipe adapted from Taste


300g good-quality dark chocolate, coarsely chopped
3 eggs, separated
125ml (1/2 cup) light olive oil
60ml (1/4 cup) Cointreau liqueur
50g cream
150g extra chocolate
cocoa powder to dust

Melt 300g chocolate in the microwave, checking every 20 seconds to ensure it does not burn. Stir until the chocolate is smooth. Set aside to cool.
 Meanwhile, melt extra chocolate in a separate bowl. Spread generously into four cup molds, ensuring the sides are thick, as well as the bottom. Refrigerate until set.
Beat the egg whites in a clean dry bowl until firm peaks form. Add the egg yolks, one at a time, beating well after each addition until combined.
Add the melted chocolate and beat until combined. Gradually add the oil and Cointreau, beating until well after each addition.
Gently remove the set chocolate cups from their molds.
Spoon the chocolate mixture into each chocolate cup. Cover and place in the fridge for 4 hours or until firm. Serve with cream and a sprinkling of cocoa or chocolate curls on the top.

NOTES: this recipe can be made one day ahead. Cover with plastic wrap and refrigerate.


Another naughty version of this amazing cointreau mousse:

CHOCOLATE COINTREAU MOUSSE TARTS


Shortbread Tart Cases:

125g butter, at room temperature
1/2 cup pure icing sugar
1 tsp. vanilla essence
1 cup plain flour
1/4 cup cornflour

Using an electric beater, beat butter, sugar and vanilla until light and fluffy. Add flours, and stir until well combined. Turn dough onto a floured surface and knead until smooth. Roll with a rolling pin and press our 20 circles. Place each in the bases of a greased muffin tray. Bake for 25-30 minutes until golden. Cool.
Using the above mousse recipe, pipe chocolate mousse into each shortbread case when cooled. You may find this easier after refrigerating the mousse for several hours prior to piping.
MAKES 20

Friday, January 28, 2011

Valentine's Day Delights

My husband and I have had a bad run with Valentine's Day celebrations. A  few of my friends seem to think I have "it all like a fairy tale"...if they only knew our run with the one day in the whole year that is celebrated by lovers worldwide!
To begin, he and I were in a long distant relationship. The first Valentine's Day that crossed us was in 2007, when I flew interstate to surprise him on the day. He happened to be working late...and both being so tired, we didn't even get to spend much time together that day, we didn't even have dinner together. It was probably one of the most romantic ideas I had ever come up with.
The next year, after moving to that state he lives in, we had a family dinner with his parents, after most of the day apart (due to Luke's cricket game). The dinner and company I might add, where amazing...but...being the pampered, selfish little brat I am, I wanted him all to myself, for the whole day...and hence, have come to loath cricket in every form.
Valentines Day 2009 was very special--we were newly engaged and spent a fabulous evening in a jazz bar with a scrumptious dinner listening to a live band, with cocktails and bubbly, and chocolate fondue to finish the night. So I cant complain about that, it was superb!
2010 we had a booking for a very romantic dinner out, finally as a married couple and still honeymooning with our lovechild on the way. But...my dear, dear brother-in-law and his fiance happened to set that very day for their engagement party. I love you Dave and Marce, but I hated the decision! I still do.
Finally, finally, wonderful 2011 arrives. We booked a great restaurant early, no one would steal this day from us. We even paid in advance, with a wonderful deal they had advertised for two. We were to receive a complimentary bottle of wine on arrival, have live jazz playing throughout our three course meal, with a table looking out over the city-lit Brisbane River.

Drift (aka Oxleys) on the Brisbane River
Well, due to recent events here in Queensland, something very devastating happened to that very restaurant. I watched on TV as before my eyes the camera caught footage of the floating beer garden being pulled from the side of the restaurant, and moments later, the whole restaurant itself simply sank into the river!

January floods..."Drift" sinks into the Brisbane River

Drift beer garden detaches and drifts off...
 Alright, I give up. It wasn't meant to be. And now, sitting here, I realise why. All along, I've been wanting to share a romantic dinner with my beloved and have been relying so much on external, material things making our Valentine's Day special. But really, its all about spending that quality time together...anywhere. Valentines smalentines! Every day should be Valentine's Day.
So, this year, my husband and I will sit out on our candle-lit veranda, when our beautiful son is asleep, and we will have a delicious home cooked meal that we have created together. Yes, Norah Jones will be playing, but no one else and nothing else will interrupt or add to our night. THAT my friends, is romance.

CHOCOLATE DIPPED STRAWBERRIES


Give me a box of these and I'll love you forever.


4.5 tablespoons of thickened cream
9 ounces of bittersweet chopped chocolate
15 strawberries
1.5 tablespoons of butter

Line a plate or tray with baking paper. Over a bowl of boiling water, melt the butter and chocolate, stirring until melted and well combined.
Add cream to the chocolate mixture and stir until smooth. Allow to cool.
When strawberries are room temperature, pick up each by its stem and dip it into the mixture. Allow any excess chocolate to drop back into the bowl. Carefully place the chocolate coated strawberry onto the greaseproof paper and repeat until all 15 strawberries are coated.

NOTES: you can box these chocolate covered berries in a fancy box and tie with ribbon as a gift. They should be consumed within 1-2 days. Be sure not to store them in the refrigerator. After the chocolate has hardened, you may inject each strawberry with a liqueur of your choice, if preferred. These also look fabulous with a drizzle of white chocolate across them!