Showing posts with label dessert. Show all posts

Thursday, May 12, 2016

Chunky Cheesecake Chocolate Brownies (flourless-Gluten free)

Dark, fudgy, brownie, with soft gooey chocolate bits dotted throughout a delightfully creamy cheesecake centre-could there be a more moorish brownie recipe out there? This incredibly effortless and elegant gluten free, flourless brownie is sure to woo guests for morning tea, afternoon tea or dessert alike.With its two toned, creamy swirled design on the top, and lines of fudge chocolate brownie pulled through the cheesecake centre, this is simply an irresistible dessert. Best of all, it's also gluten free for those who are intolerant, and also freezes well for the times that you are too busy to bake. It's a new favourite, and has guests clamoring for more. Ooh la la!


FLOURLESS CHUNKY CHEESECAKE CHOCOLATE BROWNIES (Adapted from All Recipes)

12oz (1.5 packet) cream cheese, room temperature
3/4 cup white sugar
3 eggs
2 cups semi sweet chocolate chips
1/4 cup butter
1/2 tsp baking powder
pinch salt

Preheat the oven to 175C (350F). Grease a 9in pan, and line with baking paper.
Combine the softened cream cheese with 1/4 cup of the white sugar. an one egg in a mixing bowl. Beat until smooth, then stir through 1 cup of the chocolate chips. Set aside.
In a microwave proof bowl, place the remaining cup of chocolate chips with the butter. Heat or 20 second intervals on high, stirring in between, until smooth and glossy. Stir in the remaining 1/2 cup of sugar, 2 eggs, and baking powder and salt.
Spread half of this mixture into the prepared pan, and smooth so that it covers the bottom. Then spread the whole cream cheese mixture over the top of this chocolate layer. Top with the remaining chocolate mixture (This does not have to completely cover the cream cheese.) Using a knife, swirl the top layer of chocolate into the cream cheese to create a marbled pattern. Cook for 30-35 minutes, or until the sides are firm and the top crinkled. The centre will remain softer than the outer and will firm up on  refrigeration once cool. Cut into squares after chilling, and serve.

NOTES: These brownies also freeze well.


Thursday, November 12, 2015

Decadent Flourless Chocolate Torte

When sugar, chocolate and egg come together, it's hard to imagine it becoming a cake without a flour. My amazement is in the gluten free, the slop that looks too runny to become a solid-but does upon baking. If you love gluten free treats and you love being pleasantly surprised in the kitchen, you will die over this scrumptious gluten free chocolate torte-complete with decadent, fudgy centre, crispy, crackly top and lavish deckings of thick cream and strawberries. It's indulgent and chic-the type of food that is impressive in its simplicity. Of course if you're like me and need embellishment, a pile of strawberries and cream in the middle could never go astray...and some edible gold dust is a beautiful enhancement on it's own, especially if this torte is gracing your Christmas table.
There's often  a "healthy" gritty consistency of most gluten free things I have eaten-but not this one. It doesn't contain any unusual ingredients and isn't particularly healthy. But even people with gluten intolerance need naughty, wickedly decadent desserts sometimes-I am certain of that!
By the way, I recently went for a week without dairy. My breastfed son came out in a nasty allergy looking rash, and we thought it might have been a cows milk protein intolerance. The test results came back negative, but I'd already taken myself off dairy in anticipation, and in desperation to get dairy out of my system for his sake. Did you know it takes 2 weeks for dairy to completely leave your system?
I tell you, once you start reading labels, you will never look at anything the same again! I even found dairy products listed in the tomato based pasta sauce in the pantry.
I lost 5 kg that week.
My diet consisted of ice. It was one of the only "solids" I could be sure was dairy free.
Okay, there was some fruit as well.
But little else.
I jest-but honestly, when the results for my son came back negative for that intolerance, I embraced dairy again like it was a long, long lost child of mine. How funny it is that my life revolved so much around it, and I had no idea. What foods are a staple in your pantry? I've got a feeling this torte is about to become one of mine! I have a few of those pretty glass pastry domes that don't get much use, after all...It would be wasteful not to have a torte or two not residing in them at least once a week.

Ps. I picked up that beautiful tea towel with hand crocheted trim and matching oven mitt in a lace shop in Richmond, Tasmania. Isn't it divine?


 DECADENT FLOURLESS CHOCOLATE TORTE (Adapted from Simply Delicious)

6 eggs
100g white sugar
100g brown sugar
300g dark chocolate
1 tbsp instant coffee

Optional garnishes:
100g strawberries, sliced
3 tbsp thick dollop cream
edible gold shimmer dust

Preheat the oven to 180C. Grease and line a 27cm round springform cake tin (or 2 x 13cm round springform tins like I used)
Whisk together the eggs and sugar with an electric beater until light and creamy, approximately 5 minutes. Place chocolate in a microwave proof bowl and heat  gently until melted, stopping and stirring a few times to avoid burning. Pour the melted chocolate slowly into the egg mixture, whisking continuously to combine. Fold in the coffee granules.
Pour the batter into the prepared tin, and bake for 25 minutes. The top of the torte should feel firm to the touch, and will have risen slightly.
Cool before decorating and serving.

Serves 10-12


Torte at time of serving.

Thursday, December 18, 2014

Dark Chocolate Ganache and Coconut Tart

Being in Australia, I missed out on all the foodie enjoyment associated with Thanksgiving-but that didn't stop me from making pie! I believe it's a Martha Stewart creation originally- and so simple, delicious and gluten free just as an added bonus. I love that only four ingredients are used to create this luscious silky dark chocolate tart. It's somewhat ganachy, with a gorgeous coconut crust-sort of like a giant, chocolate covered macaroon, really. It's impressive yet takes next to no effort or skill, and feeds an army due to its glorious richness. Could there be any more perfect a dessert for Christmas? Easy, quick, delicious, festive, impressive! Perfection.


DARK CHOCOLATE GANACHE & COCONUT TART (Adapted from Marin Mama Cooks)

4 tbsp butter, room temperature
2 cups dessicated coconut
350g dark chocolate
1 1/2 cups heavy cream

Preheat your oven to 180C.
Place one third of the coconut into a medium bowl with the butter and stir thoroughly to combine. using your fingers, combine the remaining coconut with the butter coconut mix.
Line a 9in pie dish with baking paper. Press the coconut mixture firmly into the base and then up the sides of the dish, leaving the top edge more loosely packed and fluffy. Lay a sheet of foil underneath your pie dish and draw a circle around it. Cut off the edges so that you have a foil cover the size of the pie. Fold this in half and cut a half circle about two inches from the edge. Unfold to reveal a "o" shaped ring of foil. Place this on the pie so that it covers the top of the edges. This will stop it from over browning. Place the pie in the oven. You will need to carefully watch the pie, as ovens vary hence does the cooking time. Also what you cook in (glass, tin, ceramic etc) will alter the browning time. I cooked mine in a tin and it took about 12-15 minutes to start tuning a golden brown. Then remove the foil and cook for a further 4 minutes until just golden on the edges. Be careful not to let the bottom get too brown. If one area is getting too brown, cover in a piece of foil to stop the browning process in that area.
Remove from the oven and set aside to cool. When the crust is cool, chop up the chocolate and place it in a medium sized heat proof bowl. Place the cream in a small saucepan. Over a medium-low heat, bring the cream just to the boil.  Pour the cream over the chocolate, and let it sit for 10 minutes undisturbed. Mix together until fully incorporated and smooth and glossy. Pour into the coconut base and smooth the top if you need to.
Refrigerate until the chocolate has set (this will depend on the the of chocolate you use, it can take from 2 to 24 hours)

Serves: 10-12 (slice small as this tart is very rich)


Monday, November 3, 2014

Orange and Beetroot Ice Cream

I've never been into weird food. Lamb's brains, liver, bacon flavoured soda. I'll pass.
I'm anxious when I hear about people adding cauliflower to their sweets, and even have my reservations abut zucchini in chocolate cakes, although I hear at least that one is quite nice.
So, adding pureed beetroot to ice cream is a real leap for me. I happen to love beetroot, despite its staining tendencies, and fell in love with the thought of churning hot pink to fuchsia coloured ice cream in my machine.
I figured someone had probably already invented beetroot ice cream, so I googled it and found a recipe for it on a lovely blog. The pictures were amazing, and yes, the ice cream was fuchsia!
Somehow mine didn't turn out so hot pink, but it was a lovely shade of pink, and tasted even better than I thought it would. When you hear that a vegetable has been added to ice cream, it can make you pretty weary- so I have to say I was absolutely pleasantly surprised. Of course you are all wondering what it tastes like. Well the first flavour that hits you is that of oranges-a delightful citrus that hints at marmalade and is simultaneously fresh. There are subtle notes of beet on the end. I wouldn't go as far to say that you can pick out the flavour distinctly, but there are definitely beetroot qualities, a certain earthiness, a tang. There are no strong flavours, it is a very smooth and harmonious combination, a delicate quality to the ice cream, along with a silky smoothness that lacks in many home made ice creams.


ORANGE AND BEETROOT ICE CREAM  (Adapted from Saveur)

2 cups milk
4 tsp corn flour (or corn starch)
1 1/4 cup thickened or heavy cream
2/3 cup sugar
2 tbsp light corn syrup (or golden syrup)
pinch salt
peel of 1 orange
3 tbsp cream cheese
1/2 cup pureed beetroot (I used beetroot from a 450g can, drained.)

In a small bowl, place 1/4 cup of the milk with the corn flour and set aside In a medium saucepan, place the remaining milk cream, sugar, syrup and salt and whisk to combine.
Bring to the boil over medium-high heat. Add the orange peel and cook for 4 minutes Stir the milk-cornflour mixture until combined, and add to the saucepan. Return to the boil and cook, stirring until thick, for about 2 minutes. Remove about 1/4 cup of the hot milk mixture and place in a small bowl with the cream cheese. Combine thoroughly until smooth. Add this to the saucepan. Stir in the pureed beetroot.
Chill the mixture until completely cold. I left mine overnight in the refrigerator. Then strain the mixture to remove the beetroot and orange peel. Follow the manufacturers instructions on your ice cream machine for the final step. When churned, place in the freezer for several hours to freeze before serving.

Makes about 1 litre


Thursday, October 23, 2014

Strawberry and Pear Crumbles

 It was a brown slimy substance defrosting in a ziplock bag on the counter. Brown liquid was accumulating in the bottom. My husband came home and pulled a face of disgust as he gingerly inspected it , and asked me what on earth that ungodly looking goop on the bench was. You know, when you buy too many bananas, and they start going brown on the outside and a little soft under the skin? I peel them and pop them in a ziplock bag in the freezer, ready for banana bread when I have the chance. When I told my husband that I intended to make a cake with this squelchy mess, I think he almost passed out.
He was so disturbed by it that I promised to throw it out. The next time I served banana bread, he had no idea that I used the same method for saving my bananas, and he loved that bread! I secretly chuckle and continue with the practice. What do they say-what you don't know can't kill you? I doubt that saying rings true for many cooking substances, but hey, I've worked in kitchens and seen chefs use the ten second rule and worse multiple times. Shhh...don't tell anyone I told you!
But back to over ripe fruit, it seriously carries an intensified flavour. I'm sure it doesn't apply to all old fruit and there's a fine line between old and OLD. Browning bananas always make the best banana bread, soft tomatoes make the sweetest chutney, you get the picture.
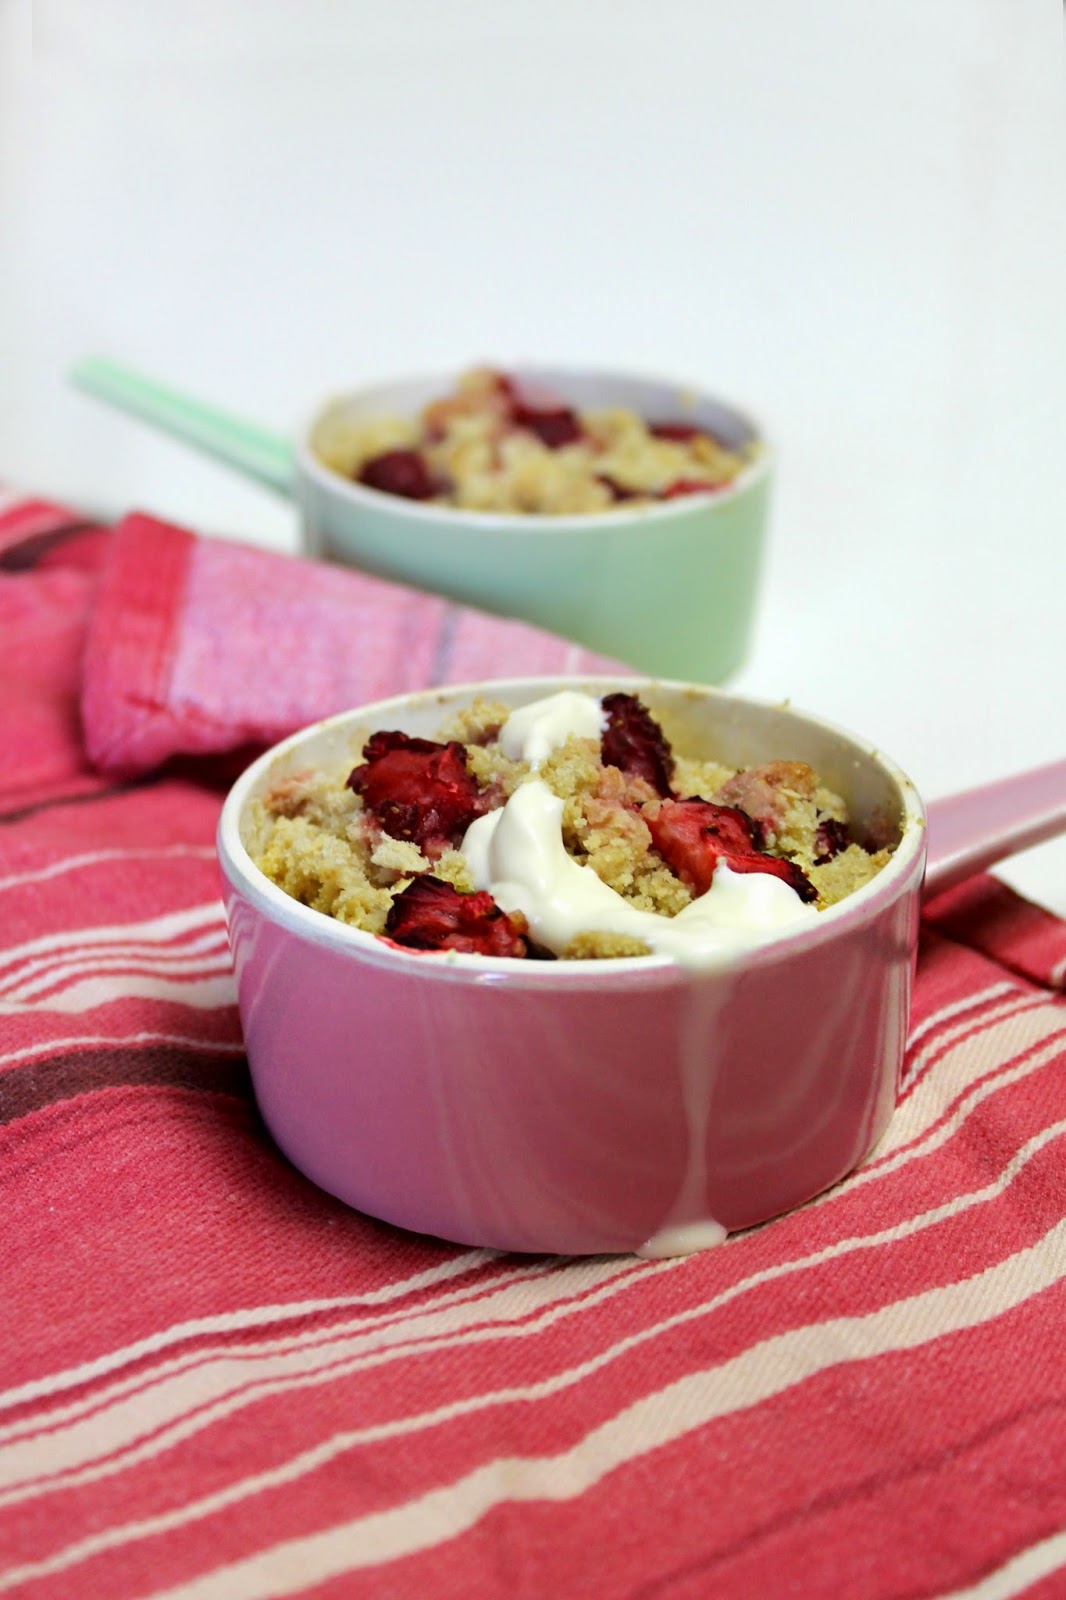
Well, I had a bruised pear and some strawberries that were looking pretty tired. I decided to slice them up and pop them into an apple crumble style dessert, without the apple. Also, being a sucker for vintage kitchen wares, I couldn't resist the opportunity to get out those pastel ramekins!
This is a really easy, go to recipe for a quick, delicious and nutritious dessert. It took as little as five minutes to assemble.
I was so surprised by how these two fruits came together in perfect harmony, topped with a delightful oat laden buttery crumble on the top with a dollop of cream. The juices of the strawberries had coloured the pear a soft pink, and it was a very pretty and scrumptious end to a meal.


STRAWBERRY AND PEAR CRUMBLES (A Lick the Spoon original)

1 large pear
1/2 cup strawberries
1 tbsp butter, melted
3 tbsp. plain flour
1 tbsp brown sugar
1 tbsp rolled oats
Cream to serve (optional)

Preheat the oven at 180C.
Peel, core and slice the pear. Slice the strawberries. Layer these two cut fruits between two oven proof ramekins. In a small bowl, pour the melted butter. Add the flour, brown sugar and oats. Combine until a crumbly dough forms. Sprinkle this mixture over the tops of the fruit in the ramekins. Cook for 15 minutes. Cool for a few minutes before serving with cream or ice cream if desired.

Serves 2


Friday, August 15, 2014

Cowch Dessert Bar Review

There's a new kid on the block. A kid that tickles my fancy.
Actually it's a dessert bar. You can see why I've fallen in love with it, because it hits my sweet tooth, and sweets are basically my niche when it comes to baking. Ooh la la!
Cowch has risen to one of my favourite spots in Brisbane city.
The front invitingly opens onto the street, and cushioned milk crates and small comfortable tables spill out onto the path. Glancing inside, you see a cocktail bar tucked over on the left, and a large open fire set in a circular stone pit close by to keep you toasty while you browse the extensive cocktail list. To the far right, across tables and couches, is a large glass cabinet of delightful desserts, a window of pastel ice creams suspended midair, and quirky decor. The ceiling is dotted with cow udder light fittings and glowing glass milk bottles. My eye is drawn to the back wall behind the counter, which shimmers mermaid-style in a silvery pink scaled tile. (What I would do to have that look in my bathroom!)
We are seen to immediately, and have a short wait before being seated, in which time we scoot over to the bar and order from the dessert inspired, cream laden cocktail menu.
I saw why the people piled inside, it was the perfect place to head after dinner or a show for a drink and to finish off with a decadent dessert. My friends and I loved everything about this place.
To top off the night, we even spotted and had a brief chat to the lead dancer (Romeo) from the Romeo and Juliet Ballet sitting on the table next to us. Night made!


 Drawn in off the street by the amazing, glowing dessert cabinet...


 The decor roughly revolves around cows and cream...loving it! There's a large table in the centre of the room for larger groups of people.


A window of at least 15 different ice creams and gelato that is readily available to taste test.  My pick was peanut butter ice cream. To die for!


 Some of the exquisite cocktails you can expect to be served at Cowch.


Birthday girl and her strawberry mocktail.Yum! The bar staff were happy to create cocktails by request, and also made my sister in law a cookies and cream cocktail.


 Those cocktails went down smoothly! Oh and here's the proof of my size, for those who have recently enquired (yes people ask this!) I am not huge from eating all my bloggy stuff! Yet.)


 You can order desserts from the menu or front window at this counter, and go across to the ice cream display to choose your flavour for the side (yes, taste testing available!) Pretty sure this fella is Cowch's owner, he looked as if he ruled the roost and was very accommodating. Staff were friendly, helpful and efficient and happy to pack up a box for take away-with ice cream for the husbands!


I can never, never go past a good looking Bacci Torte. And that is peanut butter ice cream on the side!

Thursday, June 12, 2014

Chocolate Mint Ganache Tart

There's an insane quantity of chocolate right here. When hubby went to pick up the three blocks of Lindt Excellence Mint, and two Cadbury Dream whites, the check-out-chick must have thought he was out on a weekend binge-or his wife was having an emotional breakdown of catastrophic proportions. Despite being made with five blocks of chocolate, I made two tarts with this quantity, and both measured about 15cm in radius. So that's one giant 30cm tart coming right up! (or a thicker 28cm or 25cm tart, whatever you have on hand in this size range would be fine. I highly recommend using a springform tin if you have one) It will feed an army, and it will be gone before you can look twice at it.

Ever had the pleasure of sinking into one of those delightful Choc mint slice biscuits? They're moreish. And this is just like a giant choc mint slice biscuit, but made by Lindt. And laced with creme de menthe to take it up a notch. 

There is no substitute for good quality chocolate, and I recommend only using the very best for this tart. It will be well worth the money. Also, don't go out and spend up on a bottle of creme de menthe, unless you have it handy already in your liquor cabinet. A little peppermint or mint essence/flavouring will be a budget friendly alternative, and a lot of the mint flavour comes from the top layer of ganache any way. So go lightly on the essence if you use it-the subtle flavours in this made it a heavenly experience for the taste buds.
When you let that splade glide down through the layers, you'll pass through a thick, dark minty lindt layer of fudgy, smooth chocolate ganache, through to a pale green filling made with white chocolate and creme de menthe- finishing off with a thin crust of chocolate shortcrust pastry.


 CHOCOLATE MINT GANACHE TART (Adapted from Australian Good Taste - January 2012 , Page 84)

Pastry: 

1 2/3 cups plain flour 
125g butter, chilled and diced
1/3 cup icing sugar
2 tbsp dark cocoa powder 
1 egg yolk
1 1/2- 2 tbsp cold water (I used a little more, to get a smooth texture)

White Chocolate Ganache:

150ml (2/3 cup) heavy or thickened cream
300g white chocolate, roughly chopped (I used about 1 1/2 blocks of Cadbury Dream Chocolate)
2 tbsp creme de menthe liqueur (or about 1/2 tsp mint or peppermint essence/extract)

Dark Chocolate Ganache:

250ml (1 cup) heavy or thickened cream
3x 100g Lindt Excellence Mint Intense Dark Chocolate blocks


Grease your  spring form round tin (I used 2 15cm tins to make this recipe. To make one tart, use a tin any where around 25cm) To make the pastry, process the flour, butter, icing sugar and cocoa powder until the mixture resembles fine breadcrumbs (feel free to use your hands!) Add the egg yolk and enough chilled water so that the mixture starts to form  a soft dough. Kneed until smooth, then form into a disc shape and wrap in plastic wrap. Rest the dough in the refrigerator for 10 minutes to firm up. 
Remove from refrigerator and place between two sheets of baking paper. Roll to fit into your desired tin, ensuring the pastry comes up the sides of your tin. Trim any excess. Place in the refrigerator for a further 20 minutes.
Preheat the oven to 180C.
Place the tin on a baking sheet and blind bake for 10 minutes. (this is done by placing pastry weights in the tin, or placing a piece of baking paper inside the tin with rice on top of the paper to weigh it down)
Remove the weights. Bake for a further 10 minutes. If any cracks appear, smooth them over with a little egg white. Set aside in the tin to cool.
To make the white chocolate ganache, place the cream in a small saucepan and bring to the boil. As soon as it begins to boil, remove from heat and add the white chocolate. Stir until the chocolate melts and mixes in well with the cream. Add the creme de menthe and incorporate.
Pour this over the cooked pastry and chill for 1 hour to set.
To make the dark chocolate ganache, place the cream in a small saucepan and bring to the boil. As soon as it starts to boil, remove from heat and stir in the Lindt chocolate until melted and well combined. Pour over the set white chocolate ganache and smooth. Chill for three hours before serving.

Notes: Run a knife under boiling water before cutting for a smooth cut. This tart freezes well, so it's great to make ahead! Once the tart is set, wrap in plastic wrap, ensuring the wrap is close against the ganache. Then wrap again, or place in an airtight container and freeze. Thaw by placing on bench top or in refrigerator for several hours.


How to blind bake without pastry weights:


Monday, June 2, 2014

Choc Mint Vacherin

The french have it sorted. Fine dining with simplicity-good, uncomplicated flavours, impressive without pretense. So it was at Boucher in Graceville where I celebrated my birthday on Sunday with some beloveds, after tucking away succulent rib eye beef with chive and sour cream roasted potatoes, roasted beetroot, picked onions, a salad of lightly dressed rocket and a side of bread, butter and the airiest, lightest, Yorkshire puddings you've ever passed between your lips. The dessert was incredible, and I only managed to fit it in due to having one of those dessert stomachs many women in particular find they have after a large dinner (presumably a separate organ from the stomach we all carry around our middle region.) It consisted of a lofty, rectangular slice of sponge cake, thinly layered with dark chocolate ganache and was accompanied by orange and a most exquisite ice cream flavoured with fennel seeds. It was heaven on a plate, and so gorgeously presented.
Going to Boucher reminded me of all the hot spots in Queensland we're yet to hit, and when my husband found this list of 50 meals you should have eaten if you live in Brisbane, I knew we had to make this a more frequent expedition.  It can rack up a bit of a bill though if you're out fine dining every weekend though so we keep an eye out for great food coupon deals where you can get the gourmet experiences for less. That always makes the experience more enjoyable. Fine dining for less. Bring it on.
But if you're stuck at home as I am this weekend, and you can't make it out to any nice restaurants, you might like to try making this Mint Vacherin at home for dessert. It's a show stopper and makes you look like a pro in front of your friends, but it's simple and elegant and easy (it's french, once again!)
So what's it like to sink your teeth into it? There are three layers of chocolate speckled meringue, wedged with a filling of whipped, mint infused cream and the richness of dark chocolate, topped with mint leaves and lashings of more of that dark chocolatey goodness and cream.
Irrésistible!


CHOC MINT VACHERIN (adapted from Today's Nest)

Meringue:

3 egg whites
3/4 cup caster sugar (or superfine sugar)
1 tsp corn flour (or corn starch)
45g dark chocolate, finely grated

Filling:

140g dark chocolate
1 1/2 cups thickened cream (or heavy cream)
1 tbsp. mint leaves, finely chopped
2 tbsp caster sugar (or superfine sugar)

Garnish:

Extra chocolate to grate or drizzle
fresh mint leaves to decorate

Preheat the oven to 135C.
Take a pencil and one sheet of baking paper and place draw out three identical rectangles approximately 4 inches wide by 10 inches long. Place this paper into the baking sheet. Set aside.
To make the meringue, beat the egg whites in a clean dry bowl. When you have achieved soft peaks, gradually add 1/2 a cup of the sugar. Whip into stiff, glossy peaks. Fold in the remaining sugar, the corn flour and the grated chocolate shavings until only just incorporated. (Over folding will deflate your egg whites.)
Fill a piping bag fitted with a 1/2 inch round tipped nozzle. Pipe horizontal lines of the mixture across each drawn rectangle on the baking tray, making sure that each line of meringue mixture touches the next slightly. (This ensures the meringue rectangle is one solid piece once cooked.) Bake for 45 minutes, then rotate the tray. Continue to bake for a further 45 minutes.
Turn the oven off and leave the meringue to cool in the oven.
When cooled, remove the tray and gently take the three rectangles off the baking sheet. You may need an egg flip to assist you.
To make the filling, carefully melt the chocolate in a heat proof bowl in the microwave, stopping at 20 second intervals to stir until smooth. While the chocolate is still warm, spread it on to two of the meringue rectangles. Set aside.
With a mortar and pestle, muddle the mint with the sugar. Add this to the cream in a medium sized bowl, and whip into soft peaks.
Place one of the chocolate covered meringues onto your serving dish. Pipe one third of the cream over the chocolate. Add the other chocolate coated meringue on top of this cream, and repeat with another third of the cream. Top this with the final layer of meringue, and pipe the remaining cream down the centre. Decorate with the extra chocolate and remaining mint leaves.

NOTES: heat a very sharp knife under hot water before cutting, using a sawing motion. This helps to cut through the hardened chocolate layers without breaking and ruining the look of the delicate dessert.


Monday, May 12, 2014

Triple Layer Lemon, Strawberry and White Chocolate Cheesecake

As I was down on my hands and knees scraping squished sultanas from the floor boards, my mind drifted to other pleasant things, after the thought that I should never have introduced my 9 month old to that detestable fruit. My mind took me to that tub of Philadelphia cream cheese chocolate frosting that I had purchased to top cupcakes (I promise!) and I found myself making a bee line for the cutlery draw for a tea spoon.
Honestly, that little tub of heaven never even made it close to a cupcake. Unless that cupcake was already in my stomach.
So with that delicious chocolatey goodness in my mind, I was pretty stoked when Philadelphia released a new flavoured cream cheese block in Strawberry flavour as well as lemon. I instantly knew I had to test these babies out in my kitchen. I borrowed from my favourite triple layered chocolate no bake cheesecake recipe and got to work-not using dark, milk and white chocolate as in this recipe, but just white as a base.

There was a heavenly layer of white chocolate paired with the original cream cheese, one of white chocolate and strawberry, and one of white chocolate and lemon-encrusted with a buttery, crumbly biscuit base that extended up the sides. This was topped with an ornate white chocolate crown and chocolate dipped, crumbed strawberries piled high in the centre.


Once it was set I removed a piece for testing purposes. The layering was so pretty, and the scent of strawberry and lemon arose from that cutting. It was at that moment that I was sure that Philadelphia had done it again, inspired by the divine. So if you're wondering how to use Philadelphia's Lemon or Strawberry cream cheese blocks, look no further. Here's a recipe to tickle your fancy!


TRIPLE LAYER LEMON, STRAWBERRY AND WHITE CHOCOLATE CHEESECAKE

 350g plain sweet biscuits (I used Marie biscuits)
125g butter
1/4 cup boiling water
3 tsp unflavoured gelatine
1x 250g packet original cream cheese, at room temperature
1x 250g packet lemon cream cheese, at room temperature
1x 250g packet strawberry cream cheese, at room temperature
1/2 cup caster sugar, divided into three parts
300ml thickened cream, divided into three parts
600g white cooking chocolate, divided into three parts
250g strawberries, washed and dried
100g extra chocolate to garnish strawberries if desired

Break up 300g of biscuits into a food processor. (Reserve the remaining 50g to garnish the top of the cheesecake at a later point.)
Process the biscuits until they resemble fine crumbs. Melt the butter in a large microwave proof bowl, then add the biscuit crumbs and stir until well combined. Tip the contents of the bowl into a 23cm round springform tin. Using a straight sided glass, press this mixture into the base and up the sides of the tin until even and compact. Place in the refrigerator to harden.
In a small bowl, place the hot water and shower the gelatine evenly over the surface. Stir with a fork until the gelatine has dissolved completely. Set aside.
Melt the 600g of white chocolate gently in the microwave. Remove from heat and set aside.
Place the original cream cheese in a medium bowl. Add one third of the sugar (this is approximately 2 heaped tablespoons of sugar). Beat the cream cheese and sugar together until smooth and well incorporated. Add a third of the cream (100ml) and beat until smooth. Add a third of the gelatine mixture and stir until well combined. Add a third of the melted chocolate (200g) and stir until well combined.
Pour this mixture into the base, cover and freezer to set.
Meanwhile, repeat this process with the strawberry cream cheese for the next layer. Remove the cheesecake from freezer and add this strawberry cream cheese mixture on top of the plain white chocolate layer. Smooth the top and freezer to set.
While these two layers firm, repeat this process with the lemon cream cheese for the final layer.  Remove the pan from the freezer and spread with the final cheesecake layer. Cover in plastic wrap and refrigerate for 3 hours until firm.
To add the garnishes, process the remaining 50g of biscuit in the food processor. Dip the strawberries in extra melted chocolate if desired, dip them in biscuit crumbs and dry. Pile in the centre of the cake.
If you are interested in making the chocolate crown, melt another 100g white chocolate. Blow up a balloon and paint with the white chocolate. Allow to dry, then prick the balloon with a pun close to the mouth to slowly release the air. Voila!


Serves 10-12


Tuesday, November 12, 2013

One Minute Self Saucing Nutella Mug Pudding for One

Movie ticket for one. Table for one. Pudding for one.
Sounds lonely.
I don't like doing those sorts of things on my own. Never really have had to fortunately. But it sounds way too lonely to be any fun.
Until last night.
I did it.
I went solo.
My husband said it was the perfect night for pudding. It was cool--the type of night you just want to roll up in a ball in front of a log fire like a cat and bask in warmth and hibernate there forever.
But what to do when you can't be bothered cooking pudding for an hour because you're way too tired and it feels like a hundred hours past your bed time?
One minute self saucing microwave mug pudding. And even better, it's choccas with Nutella. Can't really go wrong there.
I can tell you I got a little excited seeing the pudding magically rising before my eyes in the coffee mug and it made its way slowly around the microwave carousel. Nothing really beats chocolate self saucing pudding made in the oven, but this came pretty close, and considering it took so little time, it turned out to be a winner. It's a self saucing pudding, and the sauce sits awaiting at the bottom of the mug, making it fudgy the further you dig the spoon down. Ooh laa la! So good with ice cream...and perfect consolation food for those damn heartbreaks and breakups most people suffer at least once in their lives. Forget eating out of a tub of ice cream. Get to it! It will only take two minutes of your time to put together, and another in the waiting for it to cook, and voila! Better than tall, dark and handsome? Yes...it's rich too.
This decadent recipe makes one generous serve in a large mug (my mug wasn't on the large side, hence the explosion)...so if you're in a wonderfully happy loving relationship, grab two spoons and share it with your significant other. You could even add walnuts to this recipe for something really special--and I also like to add a dollop of cream for nice contrast. Dessert tonight--sorted! In less than 5 minutes from beginning to end.


ONE MINUTE SELF SAUCING NUTELLA MUG PUDDING FOR ONE (from Live Love Pasta)

1 egg
4 tbsp self raising flour
4 tbsp sugar
3 tbsp unsweetened cocoa powder
3 tbsp nutella
3 tbsp milk
3 tbsp oil

Place all the ingredients in a large mug. Thoroughly whisk with a fork until well incorporated and the egg is well broken down. Place in the microwave and cook on high, for approximately 1-1.5 minutes. Cooking time will vary due to the differences in strength from microwave to microwave. Serve with cream or ice cream if desired.